Table of Contents
Introduction
In this article we will discuss in detail, iDoc functionality, it’s uses, it configuration in SAP, iDoc customizing etc. Some of the key topics covered will be :
- Configure inbound iDoc in SAP
- Apply derivations to inbound iDocs
- Understand content of inbound iDocs
- Create extended iDocs in SAP
- Error handling of iDocs in SAP
- Create custom iDocs in SAP
Need for iDoc
iDoc is used by companies running on SAP ERP to exchange data with other companies who could be their vendors, customers, banks, Non SAP application processing company data and than feeding it into it’s SAP ERP.
What is an iDoc
IDoc is an SAP object ( A type of file format) that carries data of a business transaction from one system to another in the form of electronic message. IDoc is an acronym for Intermediate Document. The purpose of an IDoc is to transfer data or information from SAP to other systems, which could be SAP or Non SAP and vice versa.
iDoc is transferred from SAP to another SAP system using SAP’s ALE technology.

Outbound iDoc
An outbound iDoc is triggered in SAP. From SAP it goes to middleware which could be EDI system or Muelsoft or any other middleware system. In case the receiving system is a non SAP system Middleware transform the iDoc into an XML / flat file and feeds it into the receiving system.
In case the other system is SAP iDoc is sent to othe system through transactional RFC connection between the two SAP systems. We will discuss all these is details along with their set in SAP later in this article. E.g of outbound iDoc could be sent customer master data from SAP to other applications, Vendor master data, Material master data etc
Inbound iDoc
This iDoc is generated outside of receiving SAP system. Middleware system like EDI / Mulesoft receive the inbound data which could be in the flat file, xml format. This is than transformed into iDoc format by the middleware system. This iDoc is than sent to receiving SAP system. SAP system process the iDoc and post documents in SAP

Configuring inbound iDoc in SAP
SAP has different iDoc types for different purposes. Here we will configure Customer master outbound iDoc type. Below are some of the iDoc types:
| iDoc Purpose | iDoc Type | Message Type |
| Post Vendor Invoice | ACC_INVOICE_RECEIPT03 | ACC_INVOICE_RECEIPT |
| Post Customer Invoice | ACC_BILLING02 | ACC_BILLING |
| Acknowledgement iDoc |
Can refer to SAP Note #210137 for more details on above iDocs
Below steps are involved in setting up outbound iDoc in SAP
- Create Logical System
- Create RFC Destination
- Allocate Logical System to Client
- Maintain Ports
Above steps are common for both inbound and outbound iDocs. These have been covered in detail in earlier article :
Create Partner Profile
- Create Partner Profile
Transaction code : WE20
This has to be configured separately for different iDoc types. Here we will set it up for inbound iDoc type ACC_INVOICE_RECEIPT03 (Post Vendor Invoice)
Select folder LS (Logical System) – Now click the create button
In the Partner Number field enter the receiving system created earlier
In the inbound Parameters click the plus sign
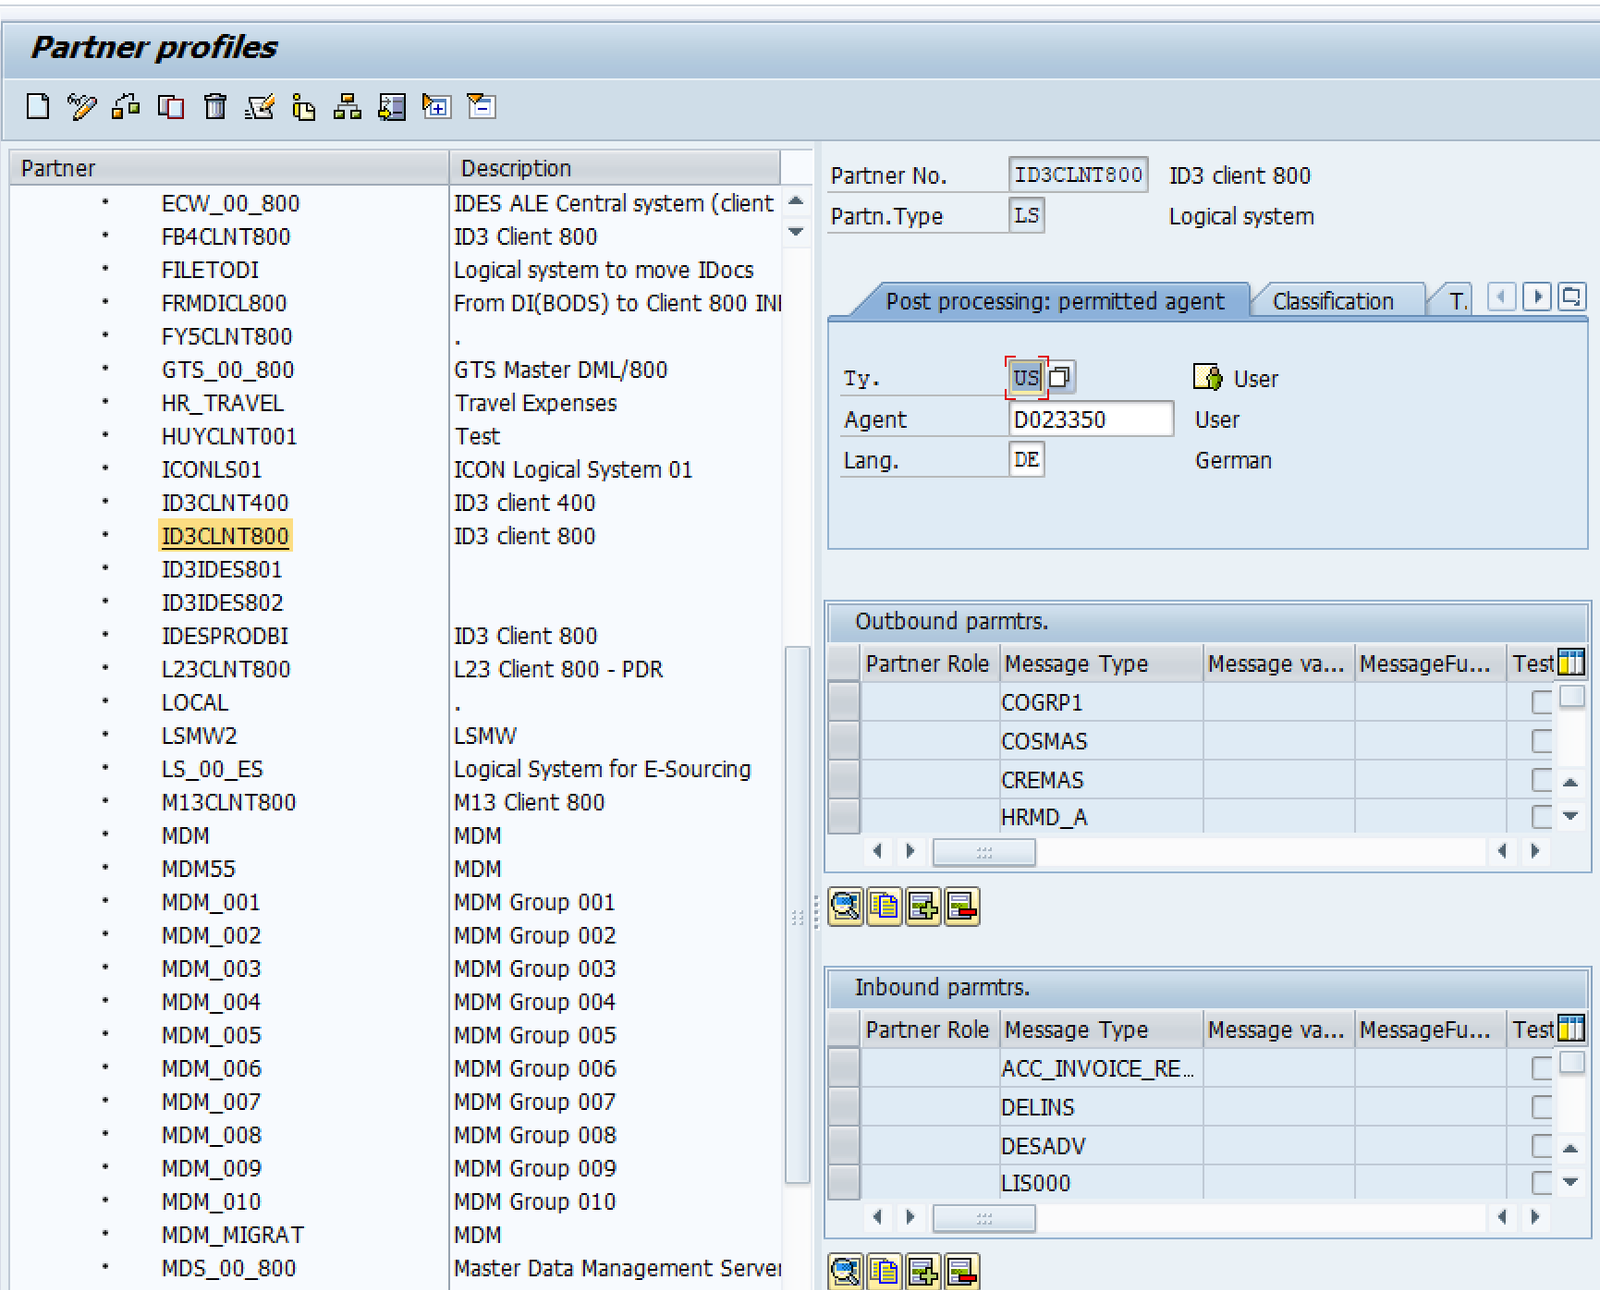
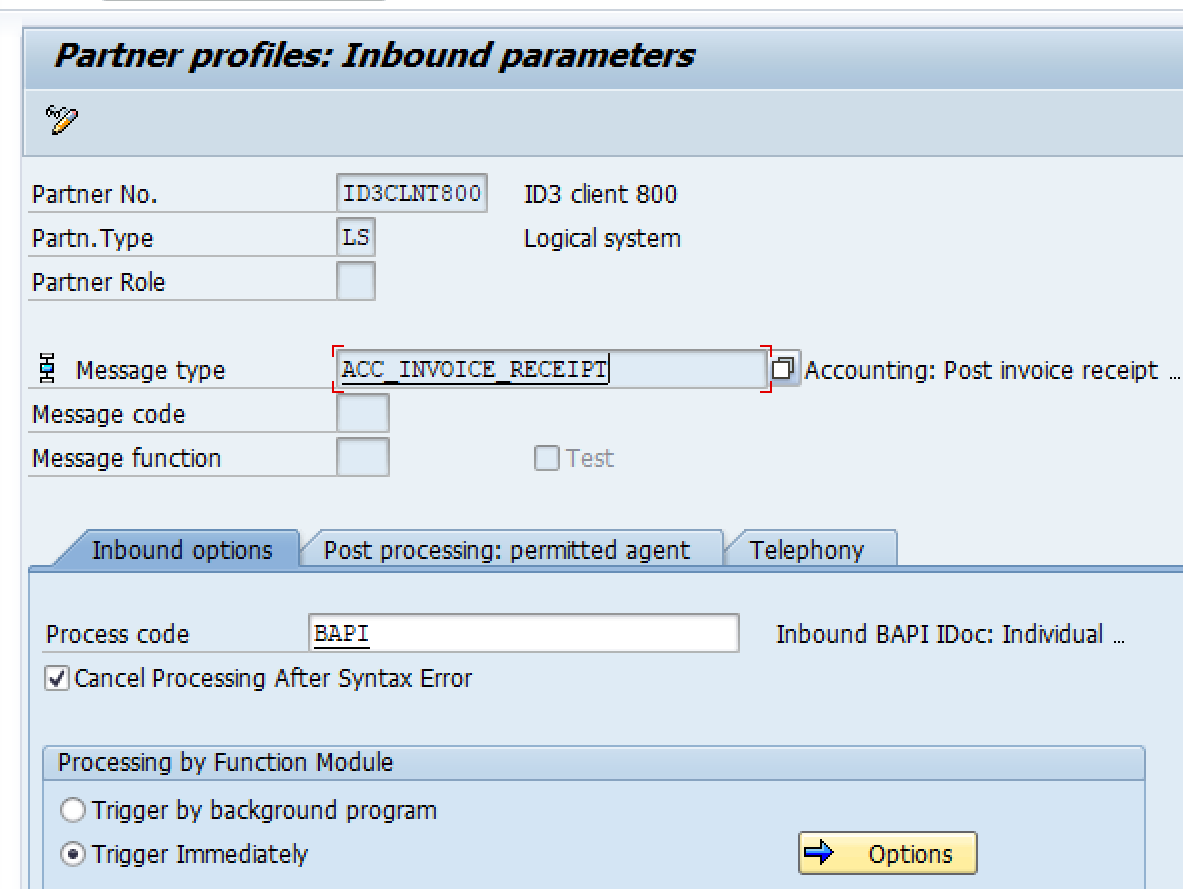
In the next screen enter iDoc message type ACC_INVOICE_RECEIPT and other details as shown below
Test Inbound iDoc
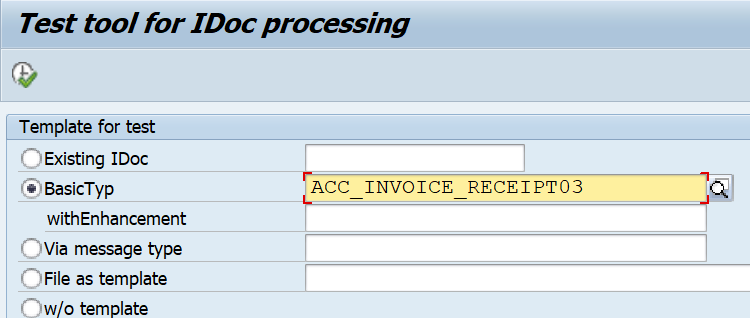
We can use transaction code WE19 to test iDocs. Enter the details as shown below:
Transaction code : WE19
Used for testing iDoc
Enter the iDoc type or message type as shown below:
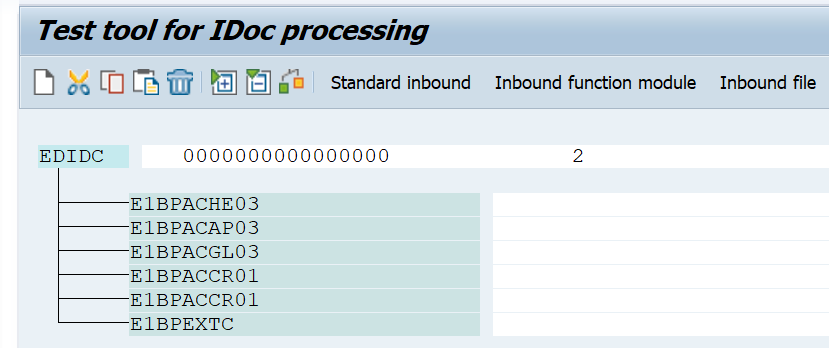
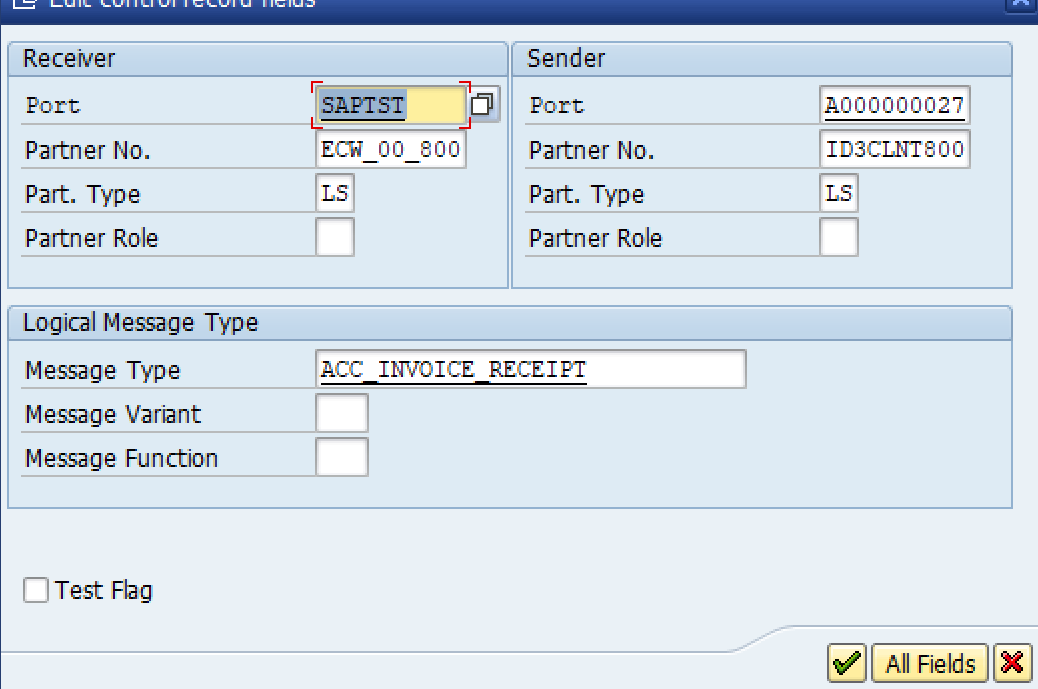
Now double click on segment EDIDC and enter sender and receiver data

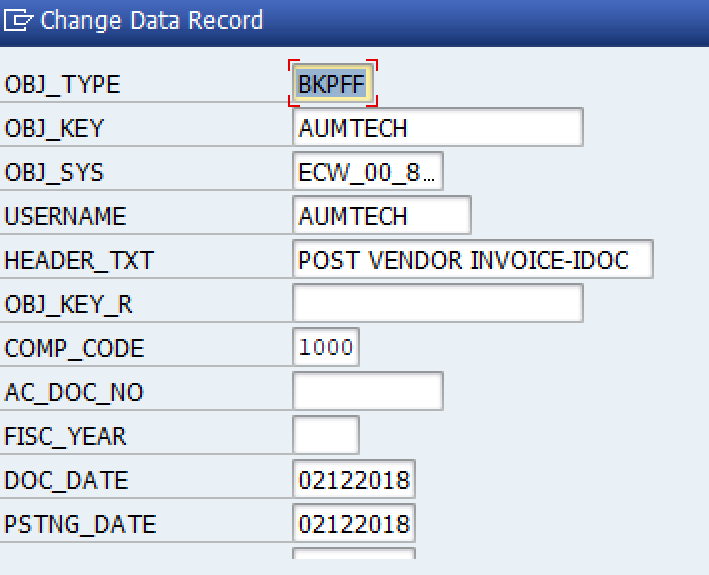
Enter data in Vendor Invoice header record segment #E1BPACHE03

Enter data in Vendor Invoice Vendor Line item record segment #E1BPACAP03

Ensure it is 10 digit. Add preceding zeroes
Enter data in Vendor Invoice GL Line item record segment # E1BPACGL03

Enter amount for vendor line item, segment # E1BPACCR01
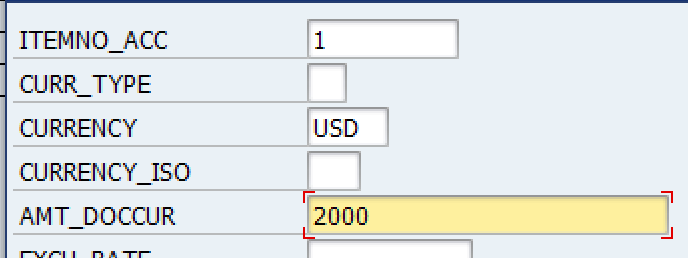
Enter amount for GL line item, segment # E1BPACCR01
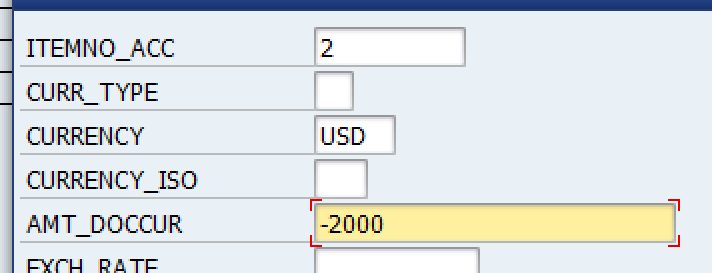
Ensure credit entry has negative (-) sign

Verify the Inbound Vendor invoice posted through iDoc in WE02
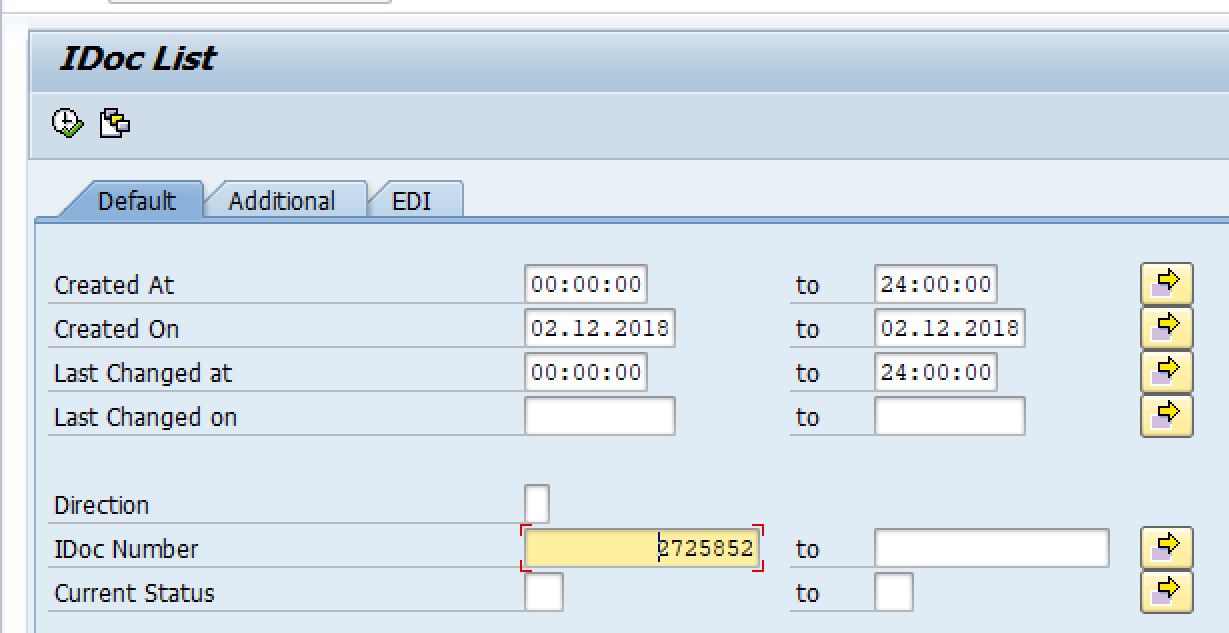
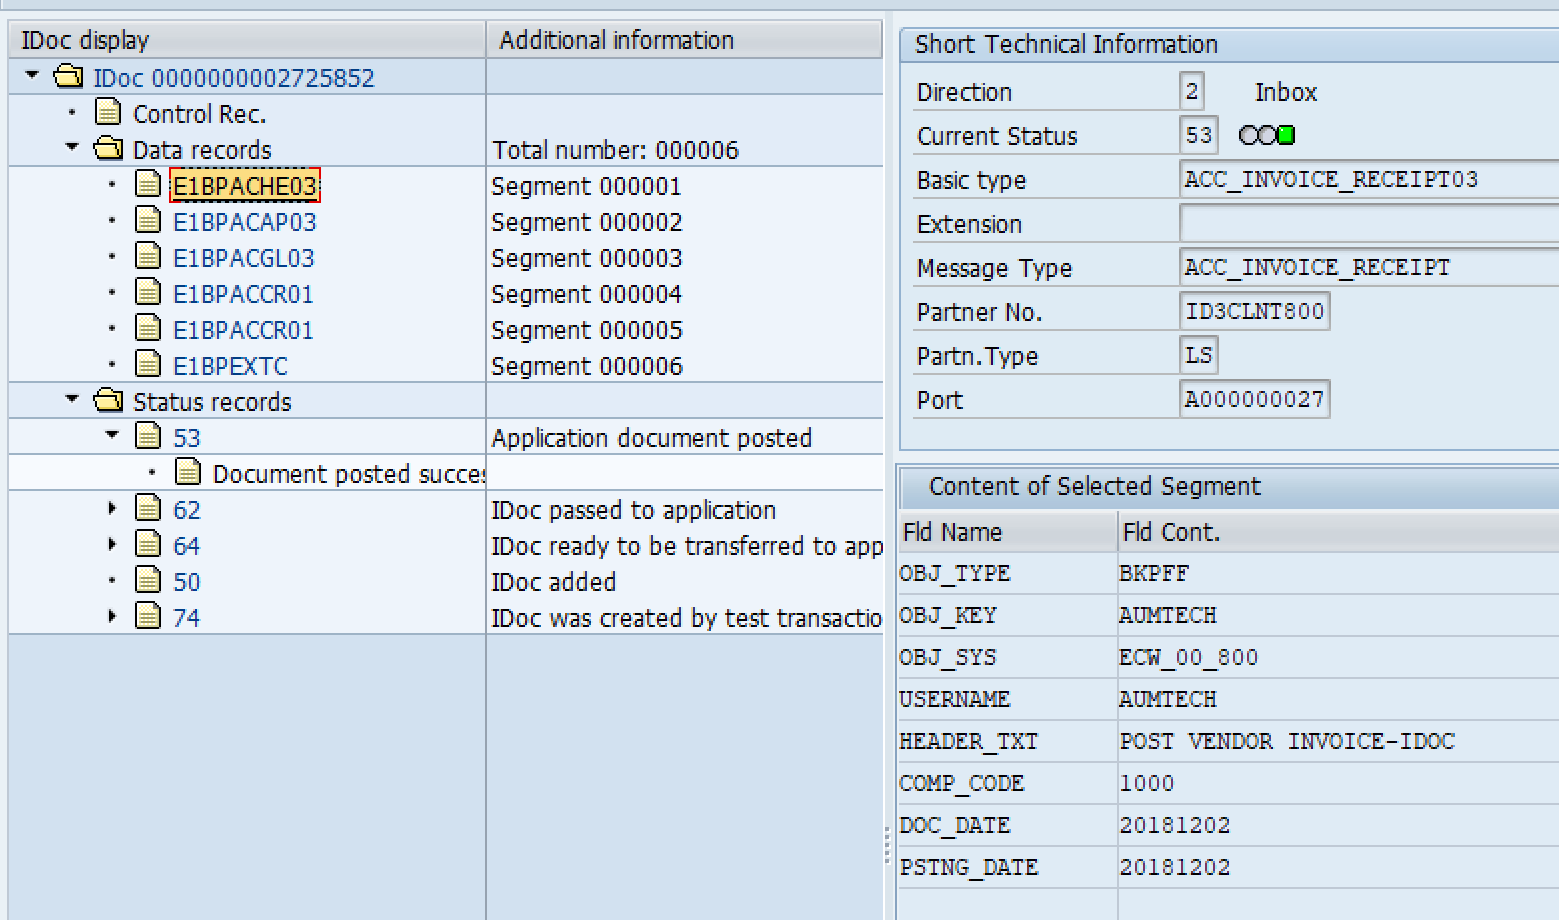

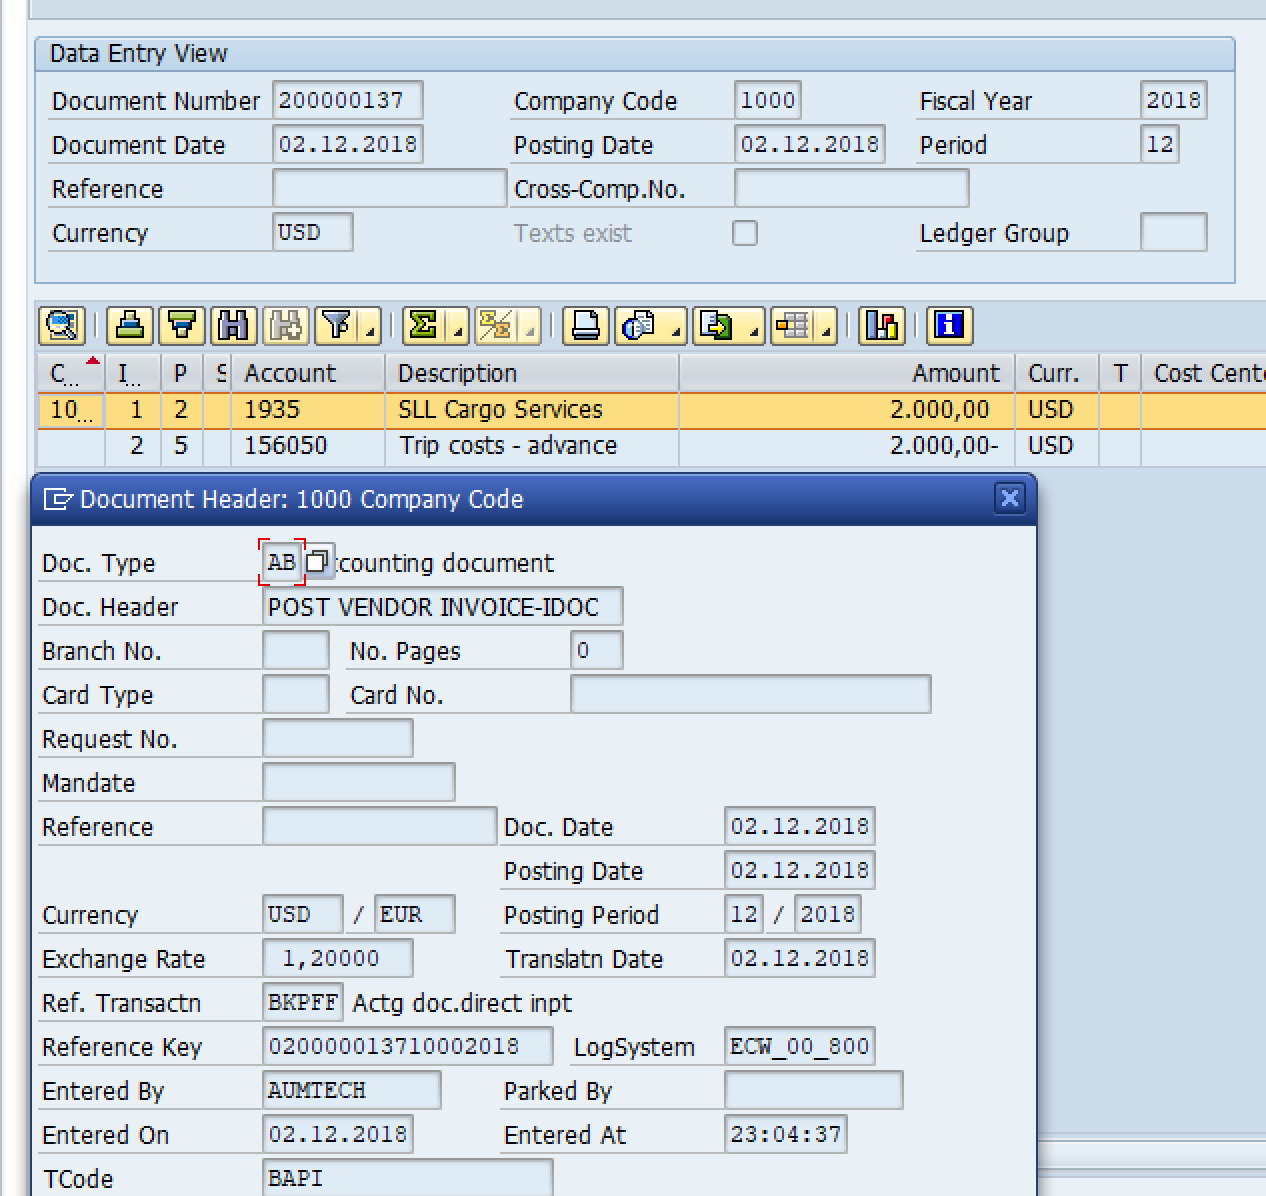
Similarly we will configure Inbound iDoc to post Customer Invoice and acknowledgement iDoc
| iDoc Purpose | iDoc Type | Message Type |
| Post Vendor Invoice | ACC_INVOICE_RECEIPT03 | ACC_INVOICE_RECEIPT |
| Post Customer Invoice | ACC_BILLING02 | ACC_BILLING |
| Acknowledgement iDoc | ALEAUD01 | ALEAUD |
Create Partner Profile for Inbound Customer Invoice
Transaction code : WE20
This has to be configured separately for different iDoc types. Here we will set it up for inbound iDoc type ACC_BILLING02 (Post Customer Invoice)
Select folder LS (Logical System) – Now click the create button
In the Partner Number field enter the receiving system created earlier
In the inbound Parameters click the plus sign and enter the below details:
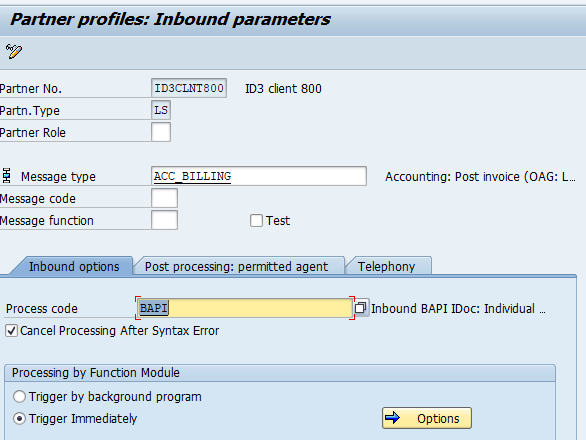
Test Inbound iDoc
We can use transaction code WE19 to test iDocs. Enter the details as shown below:
Transaction code : WE19
Used for testing iDoc
Enter the iDoc type or message type as shown below:

Now double click on segment EDIDC and enter sender and receiver data
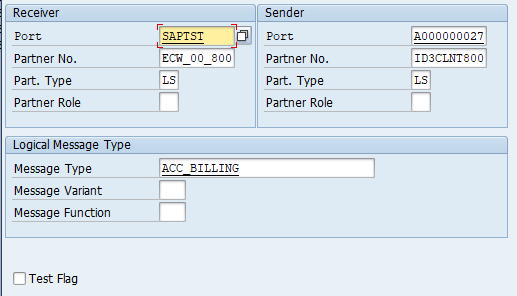

Enter data in Customer Invoice header record segment #E1BPACHE03
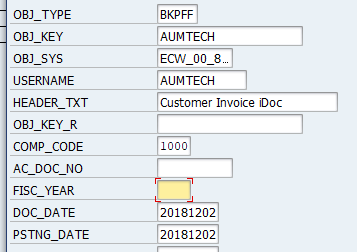
Enter data in Customer Invoice Line item record segment #E1BPACAR01
Ensure it is 10 digit. Add preceding zeroes

Enter data in Customer Invoice GL Line item record segment # E1BPACGL01
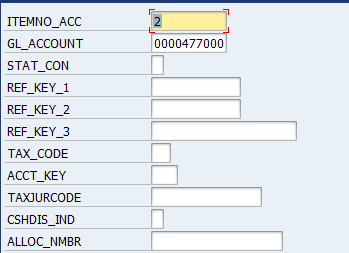

Enter amount for customer line item, segment # E1BPACCR01
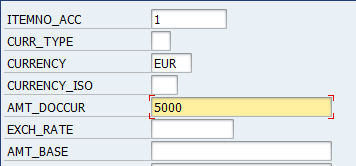
Enter amount for GL line item, segment # E1BPACCR01
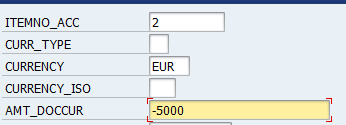
Ensure credit entry has negative (-) sign
Segment # E1BPEXTC. This segment is used for enhancement to iDoc. Enter any value in this segment for any enhancement done for this iDoc to work

Verify the Inbound Customer invoice posted through iDoc in WE02
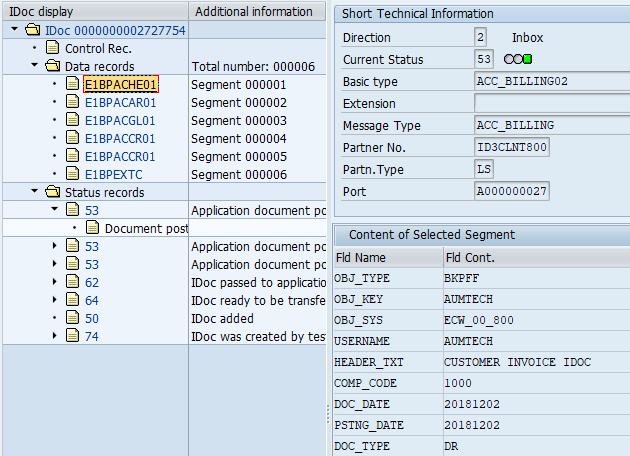

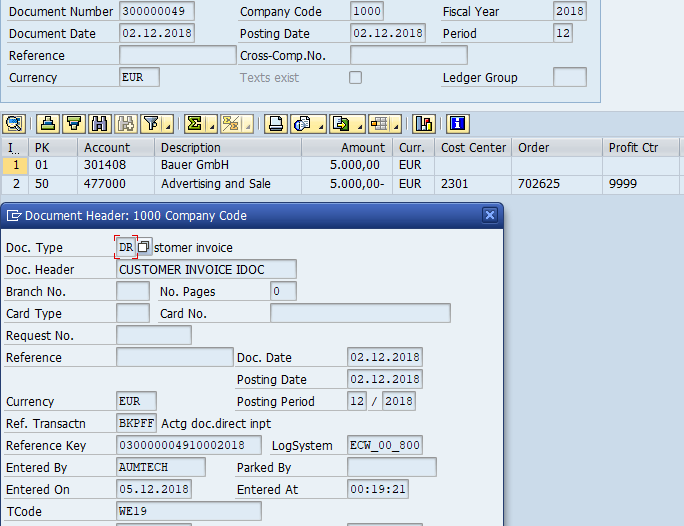
Audit Confirmation iDoc
Now we will set up iDoc which will send audit confirmation to the sending system. This is an outbound iDoc. It send details of incoming iDoc, their status (success, failure), FI document posted to the sending system
| iDoc Purpose | iDoc Type | Message Type | Direction |
| Customer Master | DEBMAS06 | DEBMAS | Outbound |
| Vendor Master | CREMAS06 | CREMAS | Outbound |
| Post Vendor Invoice | ACC_INVOICE_RECEIPT03 | ACC_INVOICE_RECEIPT | Inbound |
| Post Customer Invoice | ACC_BILLING02 | ACC_BILLING | Inbound |
| Audit confirmation iDoc | ALEAUD01 | ALEAUD | Inbound |
Create Partner profile for Audit Confirmation iDoc
Transaction code : WE20
This has to be configured separately for different iDoc types. Here we will set it up for outbound iDoc type ALEAUD01 (Audit Confirmation)
Select folder LS (Logical System) – Now click the create button. In the Partner Number field enter the receiving system created earlier. In the inbound Parameters click the plus sign and enter the below details:
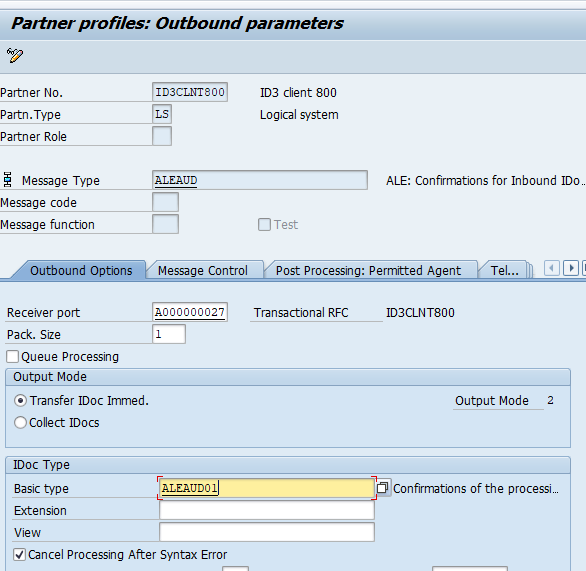
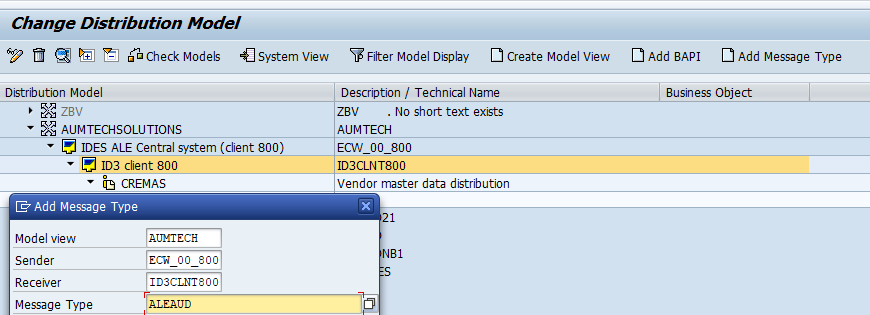
As this is an outbound iDoc, add the iDoc to the distribution model in transaction#BD64
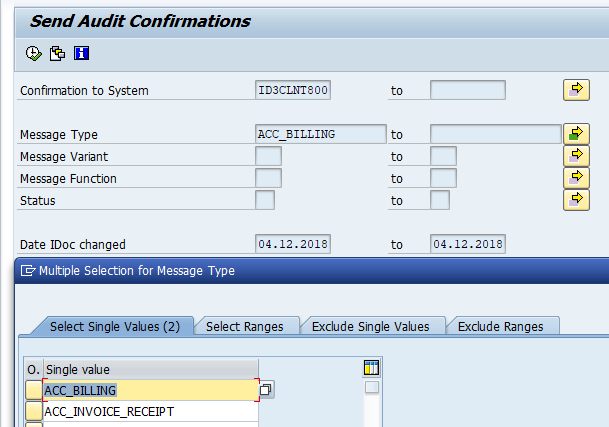
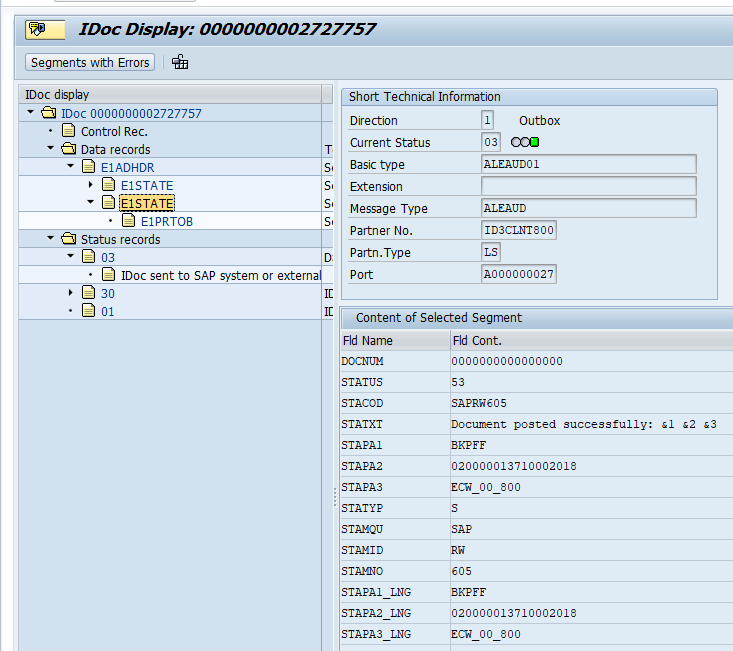
Use transaction#BDM8 (Program#RBDSTATE) to run audit confirmation report. This will send details of iDoc received to the confirmation system selected
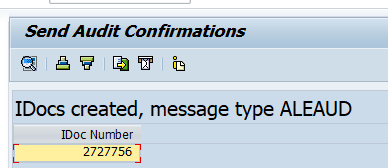
Edit / Display Audit Confirmation iDoc#2727756 : WE02
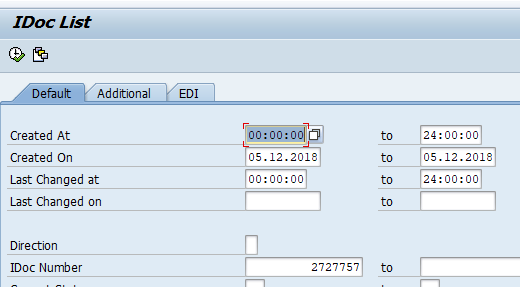
We may have situation where Customer / Vendor invoice posted earlier through iDoc needs to be reversed. This can be done through transaction FB08 (individual) or F.80 (Mass reversal). However reversal can also be done using iDoc. iDoc type used for customer invoice reversal is ACC_BILLING_REVERSE01. iDoc type used for vendor Invoice reversal is ACC_INVOICE_REVERSE01. These can be configured and used in SAP as shown below:
| iDoc Purpose | iDoc Type | Message Type | Direction |
| Customer Master | DEBMAS06 | DEBMAS | Outbound |
| Vendor Master | CREMAS06 | CREMAS | Outbound |
| Post Vendor Invoice | ACC_INVOICE_RECEIPT03 | ACC_INVOICE_RECEIPT | Inbound |
| Post Customer Invoice | ACC_BILLING02 | ACC_BILLING | Inbound |
| Audit confirmation iDoc | ALEAUD01 | ALEAUD | Inbound |
In the next article we will look at creating custom iDoc. This could be required if we have to send data from custom tables (Z-tables) in SAP iDoc-3
Pingback: Course Material - AIERP1