SAP ERP

SAP Validations

Table of Contents Validation in Accounting document Validations are custom rules to check that FI data entered is correct Validations are defined at company code level Validations can be set at Document header level, Line item level and whole document level. Only one validation per company code can be defined at a call up point. […]

SAP Validations Read More »

SAP iDoc Part-3

Table of Contents Introduction iDoc is used by companies running on SAP ERP to exchange data with other companies who could be their vendors, customers, banks, Non SAP application processing company data and than feeding it into it’s SAP ERP. An iDoc is a contained which stires information. It is made up of segments. Each

SAP iDoc Part-3 Read More »

SAP iDoc Part-2

Table of Contents Introduction In this article we will discuss in detail, iDoc functionality, it’s uses, it configuration in SAP, iDoc customizing etc. Some of the key topics covered will be : Configure inbound iDoc in SAP Apply derivations to inbound iDocs Understand content of inbound iDocs Create extended iDocs in SAP Error handling of

SAP iDoc Part-2 Read More »

Machine Learning use in SAP

Table of Contents SAP Cash Application using Machine Learning Machine learning helps finance and risk teams increase automation and handle exceptions, streamlining business processes and reducing manual errors. As opposed to rules configured in tables — which are often never revisited, even when the business environment changes — machine learning means just that: the system

Machine Learning use in SAP Read More »

SAP iDoc-1

Table of Contents Introduction In this tutorial we will discuss in detail, iDoc functionality, it’s uses, it configuration in SAP, iDoc customizing etc. Some of the key topics covered will be : Configure outbound iDoc in SAP Apply filters to outbound iDoc Understand contents of outbound iDoc in SAP Configure inbound iDoc in SAP Apply

SAP iDoc-1 Read More »

SAP Treasury Payment Program

Uses of the Treasury Payment Program

People familiar with SAP applications are often familiar with the Accounts Payable (AP) payment program, but not everyone is familiar with the Treasury payment program, although there are features of the Treasury payment program that most companies could use to improve their processes in an SAP system. The Treasury payment program offers a very controlled, best practice process for treasury departments to follow.

Whereas the AP payment program pays AP and accounts receivable (AR) invoices, the Treasury payment program pays payment requests. Payment requests are open items made to the Payment Request Clearing Account, which is a suspense account configured to track Treasury payments. The same Payment Request Clearing Account number should be used across all company codes.

An obvious advantage of using the Treasury payment program is that the accounting entries for Treasury payments are made by the SAP system before the payment is executed at the bank, which is a more controlled and compliance-friendly process. Another advantage is the straight-through processing of the payment, meaning the payment details, such as the routing number and account number, are entered just once and flow through the SAP system before being sent to the banks. A third advantage is to have the system enforce strict controls around Treasury payments.

There are seven types of payments that could be run through the Treasury payment program (F111). They are:

Bank-to-bank transfers
Free form payments
Business partner repetitive code payments
Trade-related payments
In-house cash (IHC) payments
Loans Management (FS CML) payments
Payments to customers and vendors

(Note: When you are making payments to customers and vendors using the Treasury payment program, the customer and vendor bank details are used, but the open invoice is not cleared.)

The IHC payments, payments to customers and vendors using the Treasury payment program, and Loans Management modules are not as frequently used as the other types of payments listed above.

(Note: The functionality described in this article is included in SAP ERP Central Component [SAP ECC], although licensing may be required to use the SAP Treasury and Risk Management module. SAP’s Transaction Manager module tracks Treasury trades through their full life cycle: from trade entry to payments to month-end processing to maturity of the trades. All accounting entries related to the trades are triggered by the trades and are posted directly to the SAP General Ledger. The article also mentions aspects of the SAP Bank Communication Management module, which may also require additional licensing.)

Creating Payment Requests
Repetitive Payments

Repetitive payments are bank-to-bank transfers or payments to a business partner that take place regularly using the same set of payment instructions. There are two types of repetitive payments in the SAP system: bank-to-bank transfers and business partner repetitives. The SAP system uses repetitive codes to process repetitive payments. A repetitive code in the SAP system is a 20-character key that designates a set of payment standing instructions that do not and cannot be changed ad hoc. This includes the sender bank, sender account, recipient bank, recipient account, payment method, and currency. The only details that can be changed when the payment is made are the payment amount, value date, and reference text. There are multiple advantages gained by using repetitive codes in the SAP system. Some of the advantages include increased security, faster entry, and risk mitigation against user error.

Bank-to-Bank Transfers

The most common type of repetitive payment is the bank-to-bank transfer. Bank-to-bank transfers are used to make repetitive payments from one house bank account to another. Both accounts must be defined in the SAP system as house bank accounts. Keep in mind that when the two accounts are in different company codes, this type of repetitive payment creates an intercompany posting document (the payment posting posts to the intercompany due to /due from accounts) posting. (Bank-to-bank transfers can be done between any two accounts as long as the FI configuration has enabled cross-company code postings between the two entities.)

Business Partner Repetitive

Business partner repetitive are repetitive payments made from a house bank account to a business partner bank account.

Before you can execute a bank-to-bank repetitive code or business partner payment, you need to create a repetitive code template. The repetitive code template defines details of the payment that will be executed. The two aspects of the payment that are not included in the repetitive code template are the amount and the value date.

Both bank-to-bank repetitive code and business partner repetitive code templates are created using the Edit Repetitive Codes program (transaction code OT81). After you execute transaction code OT81 or follow menu path Accounting > Financial Accounting > Banks > Master Data > Repetitive codes > Repetitive Codes, the Edit Repetitive Codes screen appears (Figure 1). To create the repetitive code template, enter a value for the sending company code in the Paying CoCd (paying company code) field and enter the name of the house bank in the House bank field.

Figure 1

Create a repetitive code template

Click the create icon

 to create a repetitive code template.

The system then displays the pop-up screen shown in Figure 2. To create a business partner repetitive template, select the Central Business Partner radio button. To create a bank-to-bank repetitive code template select the Bank radio button.

Figure 2

Select the type of repetitive code template

For this example, select the Bank radio button and then click the enter icon

. This action displays the screen in Figure 3.

Figure 3

Define a bank-to-bank repetitive code template

In the Repetitive Code field at the top of the screen, enter a name (up to 20 characters) for the repetitive code template. In the Processing Bank Data section, enter details for the house bank account from which the funds will be sent when the repetitive code payment is executed. In the Target Bank section, enter details for the house bank account to which the funds will be sent. In the Bank chain ID field, you can specify an intermediary bank. Enter the payment method and currency of the payment. In the Reference text: field, enter the reference information that should be sent along with the payment. This text typically describes the payment. The Individual pmnt (individual payment) indicator should be selected if you do not want the payment to net with any other payment when you run the Treasury payment program. By selecting the Individual pmnt indicator, the payment is sent as an individual payment.

(Note: When the Treasury payment program is run, it nets payments that have the same value date, source house bank account, target house bank account, payment method, and currency, and that do not have the Individual pmnt indicator set.)]

After you enter the details for the bank-to-bank repetitive code template, click the save icon

. This action displays a pop-up screen similar to the one in Figure 4. Click the enter icon.

Figure 4

Save the bank-to-bank repetitive code template

At this point, you have defined the repetitive code template, but you cannot use it yet. Before you can use it to execute a payment, you must release it. To release the repetitive code template, open the Edit Repetitive Codes screen (see the instructions before Figure 1), select the tab to the left of the repetitive code as shown in Figure 5, and click the release icon

 .

Figure 5

Release the repetitive code template

This action displays the pop-up screen shown in Figure 6. Click the enter icon and then click the save icon (Figure 5) to save the release.

Figure 6

Save the release

The Release Status for the repetitive code template now is green, indicating it is available to be used to execute a payment (Figure 7).

Figure 7

Released bank-to-bank repetitive code template

To execute a bank-to-bank repetitive code payment, go to the Fast Entry with Repetitive Codes (Bank-to-Bank Transfer) program (transaction code FRFT_B), follow menu path Accounting > Financial Accounting > Banks > Outgoings > Payments with Repetitive Code > Carry Forward Bank Accounts, and press Enter. (There are no required fields when running this program.) This action displays the screen in Figure 8.

Figure 8

Execute a bank-to-bank payment

Enter the amount of the payment in the field under the Amount paid column. The reference text defaults from the repetitive code definition, but can be changed here. Click the Create Payment Request button to create the payment request. A message showing the payment request number is displayed in the next screen (Figure 9).

Figure 9

Payment request generated

At this point, the payment request is unreleased. If you run the Treasury payment program at this point, the system would not pay the payment request created above because the payment request has not been released. To release the payment request, you need to select the payment request in the lower window then click the Release button at the bottom of the screen, as shown in Figure 10.

Figure 10

Release the payment request

After you click the Release button, the system displays a message similar to the one in Figure 11. Click the enter icon to display the screen shown in Figure 12. At this point, the Treasury payment program can be run.

Figure 11

Payment request has been released.

At this point, the payment request’s status is released, as shown in Figure 12.

Figure 12

Payment request Release Status is updated

(Note: The steps for executing a business partner repetitive code template are the same as when executing a bank-to-bank repetitive payment except that the Fast Entry with Repetitive Codes (Treasury Partner) program (transaction code FRFT_TR) is used. Transaction code FRFT_TR can be found by following SAP menu path Accounting > Financial Accounting > Banks > Outgoings > Payments with Repetitive Code > Payments to Business Partners.)

Free Form Payments

Before moving on to the steps to execute the Treasury payment program, I first describe the steps to execute a free form payment.

A treasury department needs to be able to make urgent payments on an as-needed basis. The SAP system provides this functionality with the free form payments transaction. Treasury staff can make payments from any bank account in any company code configured in the system to any external bank account. These payments, including the bank details, are keyed in manually by a treasury user.

To execute a free form payment, run the Online Payment program found under Accounting > Financial Supply Chain Management > Cash and Liquidity Management > Planning > Generate Payment Request > Using USA Control Program > Online Payment, or execute transaction code RVND. In the initial screen that the system opens, select the Free Form Payment button (not shown). This action displays the screen in Figure 13.

Figure 13

The Free Form Payment screen

Enter the information related to the payment, as shown in Figure 14. In the Payee section, enter the name and bank account information for the beneficiary of the payment. By clicking the address icon

, you can enter an address for the beneficiary (not shown). In the Posting Data section, the debit side of the posting is specified when generating the payment request. In the House Bank section of the Payment Data tab, specify the bank account to be used for payment, and in the Payment Data section, specify the amount and currency of the payment, the payment method, and the value date. In the Reference text: field, enter the reason for payment. This text is sent to the bank along with the payment. When you have entered all your data, click the Payments button. This action displays the screen in Figure 15.

Figure 14

Enter details in the Free Form Payment screen

Figure 15 shows the payment request number created and the FI document number created. Click the enter icon (not shown).

Figure 15

Free form payment request created

Before a free form payment can be paid, a user with the authorization to release free form payments must release it. Approving the free form payment at this point is critical because the bank account details have been entered manually into the SAP system. To release the free form payment, execute transaction code F8REL. (This transaction code is not in the SAP menu.) This action opens the screen in Figure 16.

Figure 16

Release free form payments

Enter the known fields and click the execute icon

. This action displays a pop-up screen with a message (Figure 17).

(Note: With dual control, the user who initiated the payment is not able to release his or her own free form payment.)

SAP Treasury Payment Program Read More »

SAP Treasury Trainning

Money Market

Money market transactions are used for short and medium term Investments and for borrowing of funds. Key money market instruments are as listed below:

  • Fixed Term Deposit
  • Commercial papers
  • Deposit at Notice
  • Interest rate Instruments

Fixed term Deposits: A Fixed term deposit is an investment that includes the deposit of money into an account at a financial institution. Term deposit investments usually carry short-term maturities ranging from one month to a few years. Investors can withdraw funds only at the end of term

Commercial Papers: A Commercial paper is an unsecured, short-term debt instrument issued by a companies for the financing of accounts payable and inventories and meet short-term liabilities. Commercial paper is usually issued at a discount from face value and reflects prevailing market interest rates

Deposits at Notice: These investments are similar to fixed term deposit. However, money can be withdrawn only after advance notice period has expired. For e.g. If you have a 50-day notice deposit account, you ca withdraw money only after 50 day withdrawal notice period has expired

Interest rate Instruments: An interest-rate instrument is a derivative where the underlying asset is the right to pay or receive a notional amount of money at a given interest rate. Its value increase / decrease based on movement of the interest rate

We will understand Money Market configuration and business process by configuring a new Fixed Term deposit and Interest Rate instruments. Test various associated business Process. Later we will also configure Intercompany loans in Money Market Instruments

Configure Treasury in SAP

Activate Treasury Functions in SAP

Path: SPRO- Activate business functions – Continue – Enterprise Business functions -Activate below functions

  • FIN_TRM_LR_FI_AN
  • FIN_TRM_LR_FI_AN2

Fixed term Deposits

Define Product Type Path

Explanation

Product types help to differentiate between different Money Market financial instruments. In Money Market area, the following product categories are available in standard SAP

  • 510 Fixed-term deposits
  • 520 Deposits at notice
  • 530 Commercial Paper
  • 540 Cash flow transaction
  • 550 Interest rate instrument

We will create new product Type as below

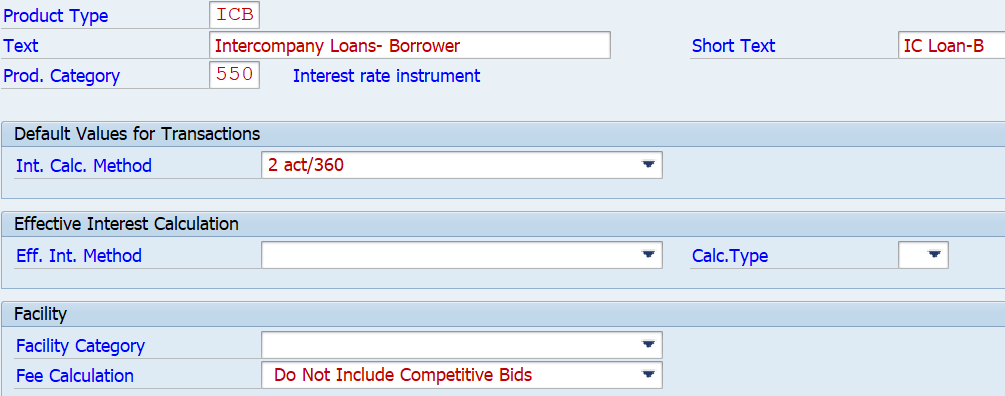
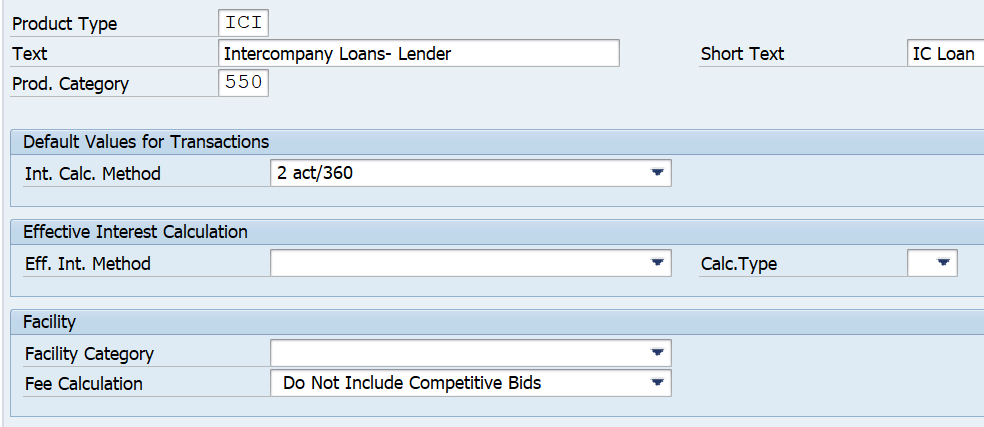
  • ICI – Intercompany Loan by the Lending Company
  • ICB – Intercompany loan by the Borrowing Company

Path: FSCM- TRM – TM – MM – TM – Product Type – Define Product Type

Intercompany Loans- Lender

Intercompany Loans- Borrower

In Calc. Method: This drives day count for interest calculation.

Define Number Ranges

Path: FSCM – TRM – TM – MM – TM – Transaction Type – Define Number Ranges

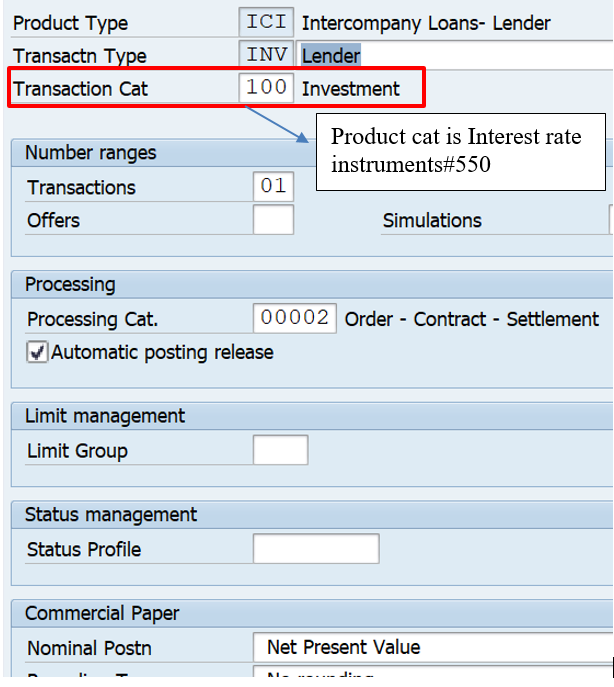
Define Transaction Types

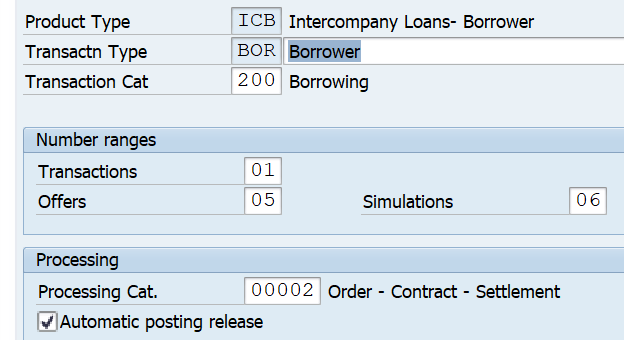
Explanation: Transaction Type is assigned to a Product Type. Transaction Type define the direction of the Trade. For Lending Company Transaction type will be INV (Investment) for Borrowing Company Transaction type will be BOR (Borrowing)
Path: FSCM – TRM – TM – MM – TM – Transaction Type- Define Transaction Type

Transaction Type for borrowing side as below:

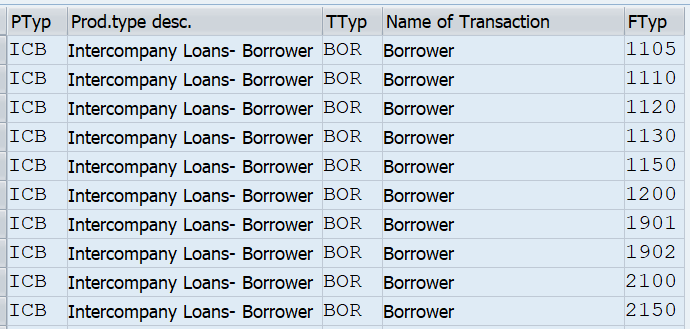
Define Flow Types

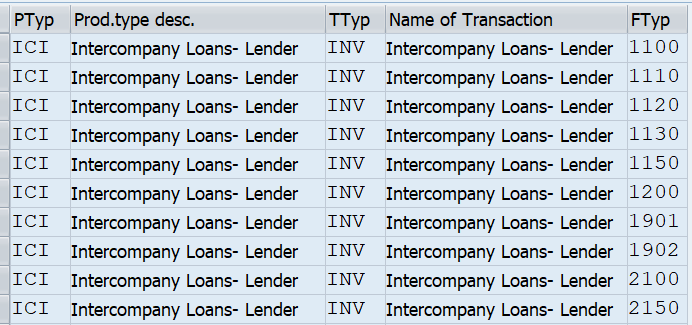
Path: FSCM – TRM – TM – MM – TM – Flow Types- Define Flow Types

Explanation

Flow types represent different types of flows related to interest rate instruments. We will copy from SAP standard Flow types as below to create New Flow Types

We will use the SAP standard flow types as given below:

s.no.Flow TypeDescription
1105Borrowing / Increase
1110Principal Decrease
1120Final repayment LT
1130Installment repayment LT
1150Interest capitalization
1200Nominal interest LT
1901Charges
1902Facility Admin Fee
2100Interest accrual
2150Interest accrual: Reset
1100Principal Increase
N200With Holding tax

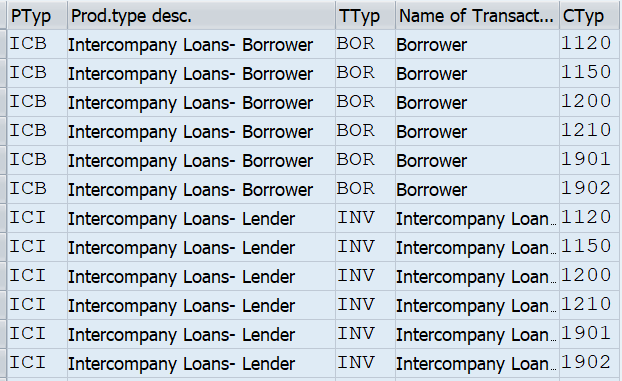
Assign Flow Types to Transaction Types

Path: FSCM – TRM – TM – MM – TM – Flow Types- Assign Flow Types to Transaction Types

Define Update Type and Assign Usage

Two steps performed in this step

  • Define Update Type
  • Assign usage to update type

Path: SPRO- FSCM – TRM – TM – MM – TM – Update Types – Define Update Types

SAP standard update types have been used as listed below:

Update TypeDescription
MM1105+Borrowing / Increase
MM1100-Investment / Increase
MM1120 +Investment / Final Repayment
MM1120 -Borrowing / Final Repayment
MM1130 +Investment / Instalment Repayment
MM1130 -Borrowing / Instalment Repayment
MM1150 +Borrowing / Interest Capitalization
MM1150 -Investment / Interest Capitalization
MM1200+Investment / Nominal Interest
MM1200-Borrowing / Nominal Interest
MM1901 +/-Charges
MM1902 +/-Commission
MMN200-Withholding Tax 1
MMN200+Withholding Tax
AD1000Accrual Revenue
AD1001Accrual Revenue- Reset
AD1002Accrual Expense
AD1003Accrual Expense Reset

Assign Update Type to Usages

Assign Flow Types to Updates Types

In this step assign direction (Inward / outward flow) to update type

Path: SPRO- FSCM – TRM – TM – MM – TM – Update Types- Assign flow Types to Update Types

Click new entries and enter the below data

Define condition Types

Path: SPRO- FSCM – TRM – TM – MM – TM – Condition Types – Define Condition Types

Functionality: condition Types used for Intercompany loans are Fixed Interest rates, Floating interest rates, Final repayment of principal

We will create new condition types by copying SAP standard condition types as per table below:

SAP STD Cond typeNew Cond TypeCond Type NameGenerated Flow TypeFlow Cat
11201000Final RepaymentPF00
12002000Nominal InterestIN00
12102010Interest Rate Adjustment<BLANK>
1901-Charges190190-Other Flow
1902-Commissions190290-Other Flow

Assign Condition Types to Transaction Types

Path: SPRO- FSCM – TRM – TM – MM – TM – Condition Types- Assign Condition types to Transaction types

In this step, assign the condition types created in last step to Product Type and Transaction Types created in earlier steps

Transaction Manager Configuration

General Transaction manager configuration, which must be done to use Transaction manager. This is not specific to product type

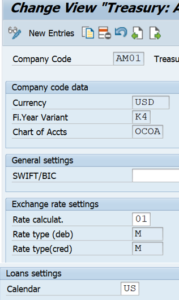
Define Company Code Additional data

Path: SPRO – FSCM – TRM – TM – General Settings – Organization – Define Company Code Additional data

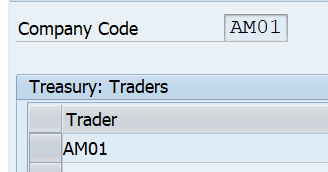
Define Traders

Path: SPRO – FSCM – TRM – TM – General Settings – Organization – Define Traders

Define User Data

Path: SPRO – FSCM – TRM – TM – General Settings – Organization- Define User data

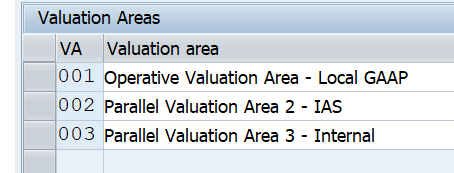
Define Valuation Area

Path: SPRO – FSCM – TRM – TM – General Settings – Accounting – Organization – Define Valuation Area

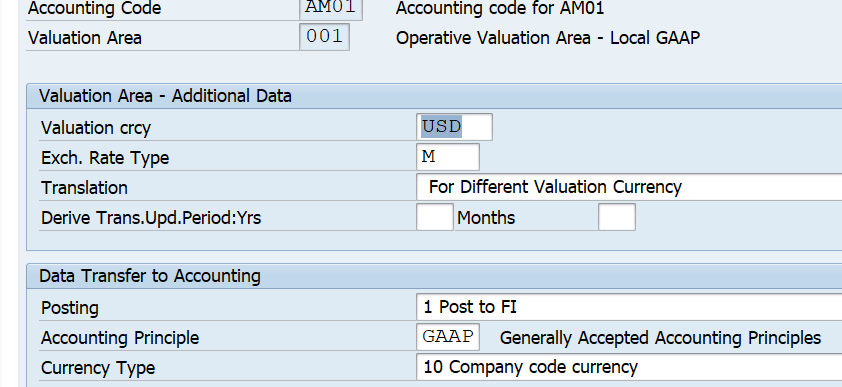
Define Accounting Codes

Path: SPRO – FSCM – TRM – TM – General Settings – Accounting – Organization –Define Accounting Codes

Add the company codes involved in intercompany loans as accounting codes

Assign accounting Codes and Valuation Area

Path: SPRO – FSCM – TRM – TM – General Settings – Accounting – Organization –Assign Accounting codes to valuation Area

Define and Assign Valuation Classes

Functionality:

  • General Valuation class drive the assignment of the position management procedure which is significant to the valuation and accounting of trades
  • For e.g. accounting treatment is different if the Trade is designated as Trading, Available for Sale, Held to Maturity
  • We need to create separate General Valuation class for above Trade categories.
  • General Valuation class is than assigned to Valuation area

Path : SPRO – FSCM – TRM – TM – General Settings – accounting – Settings for Position Management – Define and assign valuation class

Now select the row and make below entries

Select the row and make below entry

Assign General Valuation Class

Path: SPRO- FSCM – TRM – TM – MM – TM – Assign General Valuation Class

Make the below entries

Set the Effects of the Update Types on the Position Components

Functionality: Here you define how the system should handle changes like increase / decrease in principal

Path: FSCM – TRM – TM – general Settings – Accounting –settings for Position Management – Set the Effects of the Update Type on the Position Components

SAP Default

Similarly SAP default for other update types

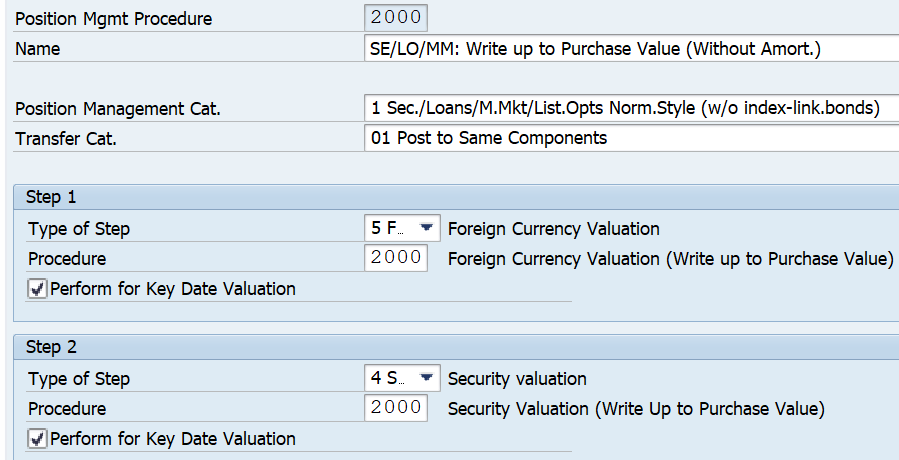
Define a Position management Procedure

This Functionality drives how Trades are values at month end. How derived business transactions such as withholding tax are generated

Path: SPRO – FSCM – TRM – TM – General Settings – Accounting – Settings for Position Management – Define Position management procedure

We will use SAP default for Fixed Term deposits

Assign the Position management Procedure

Path: SPRO – FSCM – TRM – TM – General Settings – Accounting – Settings for Position Management- Assign Position Management Procedure

Assign Update Types for Derived Business Transactions

Example of derived business transactions are: realized gain / loss, partial position sales, security account transfers etc.

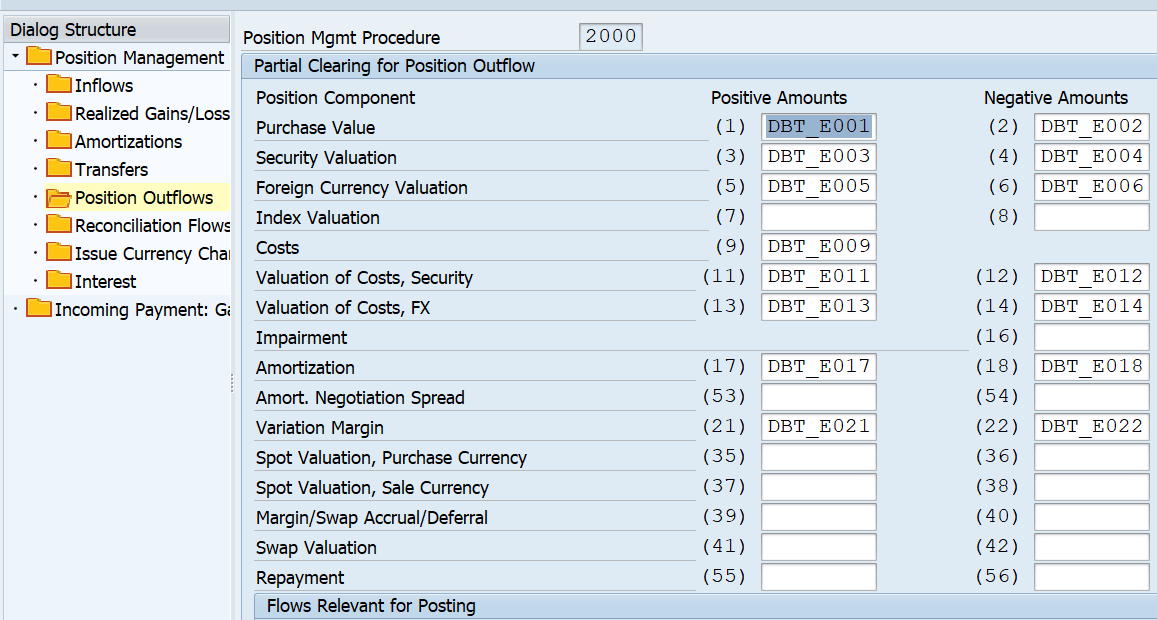
Path: FSCM – TRM – TM – General Settings – Accounting – Derived Business Transactions – Updates Types - Assign Update Types for Derived Business Transactions

New Entries – Enter the position management procedure created in earlier step – Save

Double Click Position outflow folder in the left panel and add SAP defined update types as shown below:

Using SAP Default position Management:2000

Processing of Derived Business Transactions

Path: FSCM – TRM – TM – General Settings – Accounting – Derived Business Transactions – Control of processing of Derived Business Transactions

Enter the below data and save

With Holding Tax Posting and Configuration

Path

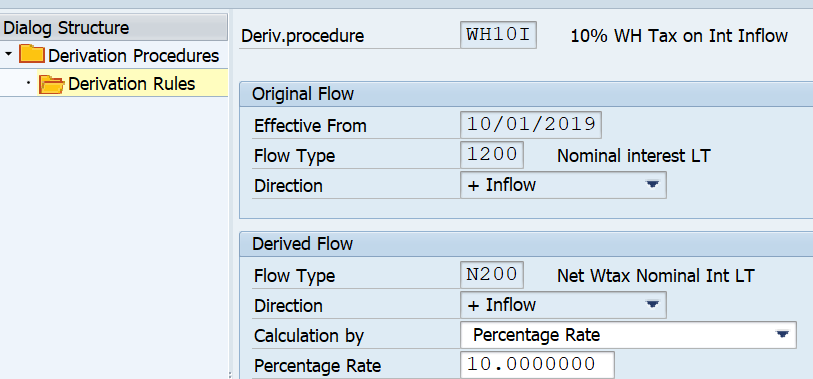
FSCM- TRM – TM - MM – TM – FT – Derived Flows – Define Derivation Procedure and Rules

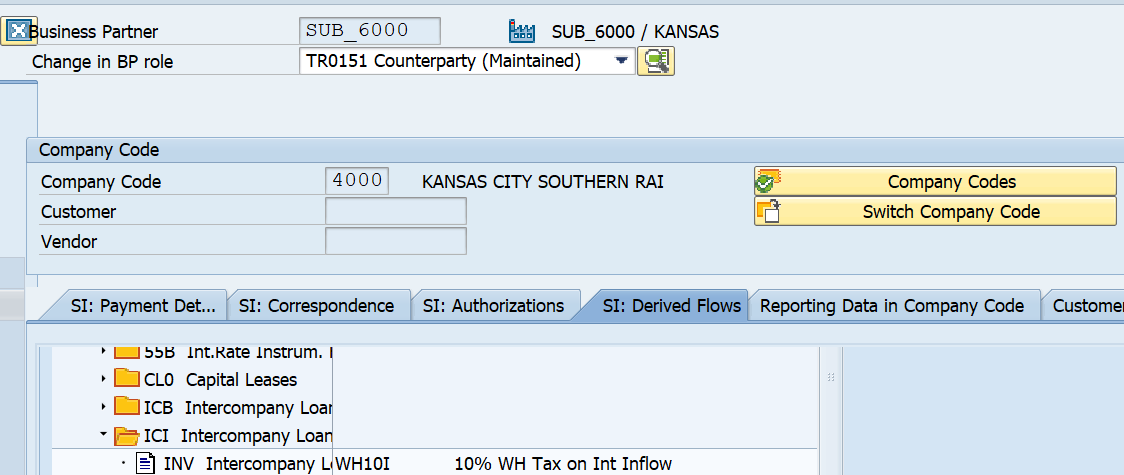
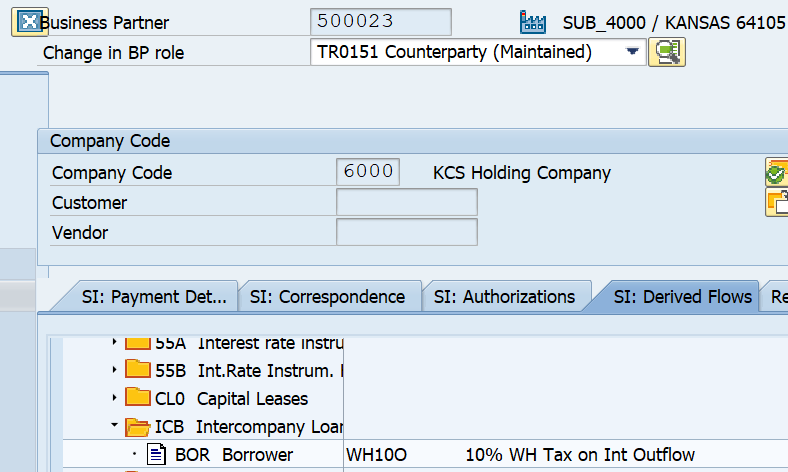
Inflow assigned to Transaction Type INV to Business Partner

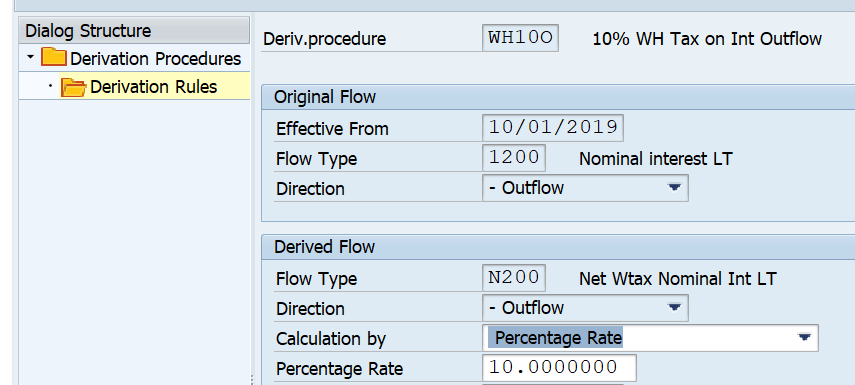
WH Tax on Interest Outflow

Assign to Transaction Type BRO to Business Partner

Can define any number of WH Tax rates here

These have to be assigned to Original flow type 1200 (Nominal Interest) as this flow type is assigned to our product type ICI / ICB

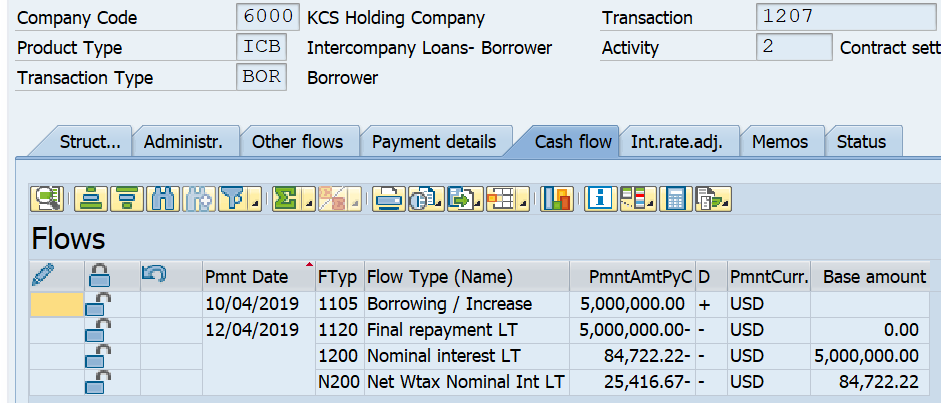
Derived flow type is N200. This is assigned to Update type MMN200+ /-

As in, the above scenario WH Tax is going out, it will be assigned to BP of the borrowing company code. Company code paying the interest

Mirroring Configuration

Functionality: With this configuration, if you enter intercompany loan on investing side, SAP automatically creates opposite intercompany loan on the borrowing side

However all subsequent processing should be done to both the loans

Activate below BADI to implement Mirror Transactions

SE18-BADI# FTR_MIRROR_DEALS

Business Scenario for Intercompany Loans

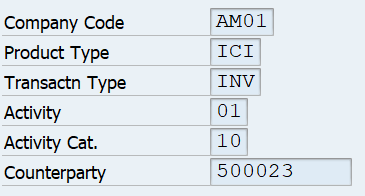
  • Lending Company Code: AM01
  • Business Partner 500021 is created as Business Partner in Company code AM01
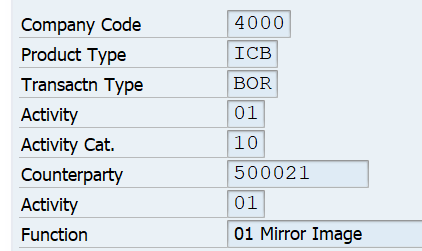
  • Borrowing Company code: 4000
  • Business Partner 500023 is created as Business Partner in company code#4000

Maintain Relevant Product types and Transaction Types

Path: SPRO – FSCM – TRM – TM – General Settings – Transaction Management – Distribution of Mirror transactions - Maintain Relevant Product types and Transaction Types

Mirror transaction is triggered if below combination of Company Code; Product Type and Transaction type is satisfied

Business Partner of Company code 4000

Map Product Types and Transaction Types

Path: SPRO – FSCM – TRM – TM – General Settings – Transaction Management – Distribution of Mirror transactions -

Functionality: Here you map incoming and outgoing intercompany transactions using the META Text (ICIICB)

Process Incoming data

Path: SPRO – FSCM – TRM – TM – General Settings – Transaction Management – Distribution of Mirror transactions -

Enter the below data:

BP of company code AM01

Assign Company Code to partner

Path: SPRO – FSCM – TRM – TM – General Settings – Transaction Management – Distribution of Mirror transactions -

Silver Level Membership Required

You must be a Silver Level member to access this content.

Join Now

Already a member? Log in here

SAP Treasury Trainning Read More »

SAP Product Costing-2

Production Planning Settings

Define PP Order Type

Path: Production- Shop Floor control – master data – Order – define order type

Tcode: OPJH

Select PP01

Copy SAP standard Production order PP01 as 19PO

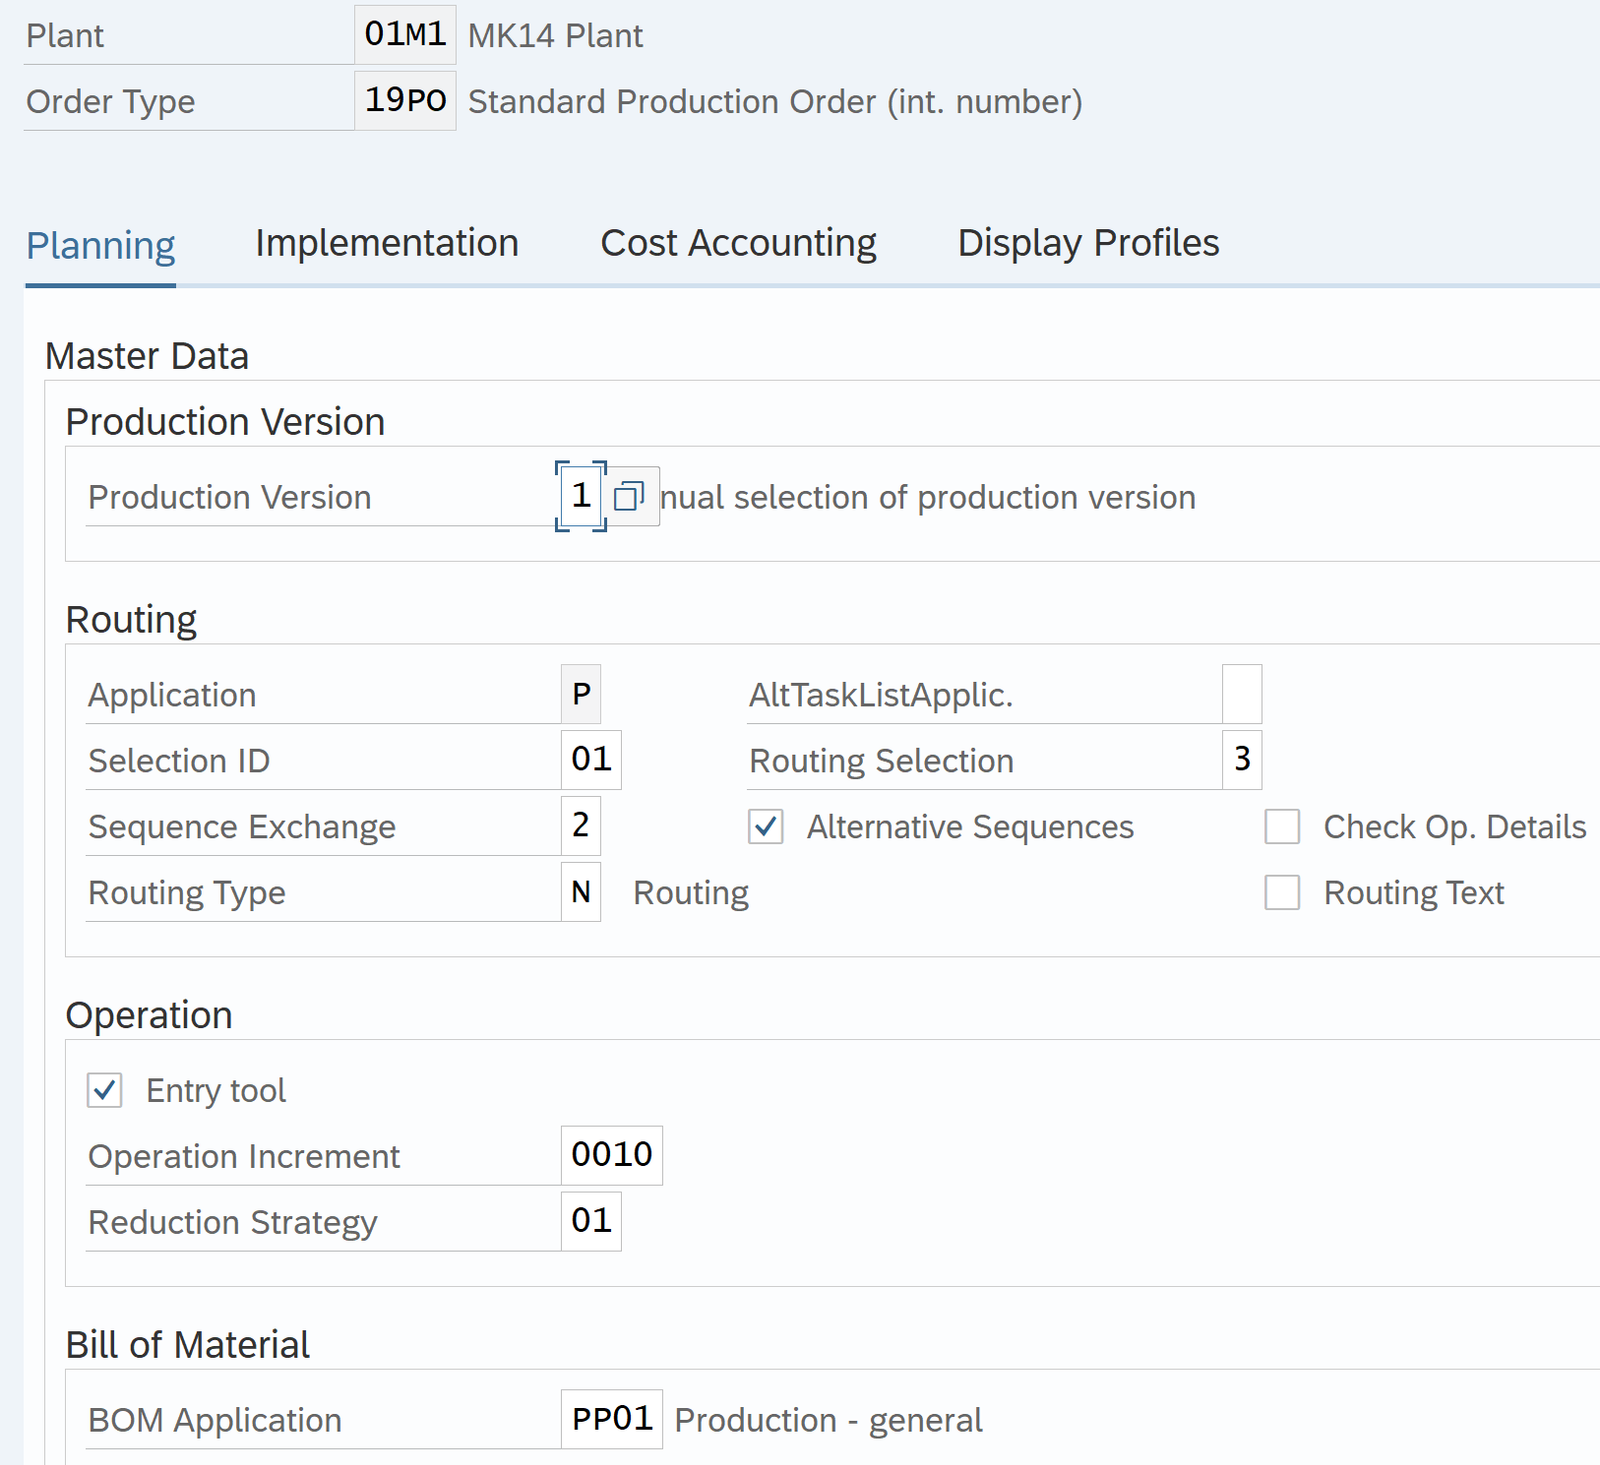
Define Order Type Dependent Parameters

Path: Production- Shop Floor control – master data – Order – define order type dependent parameters

Tcode: OPL8

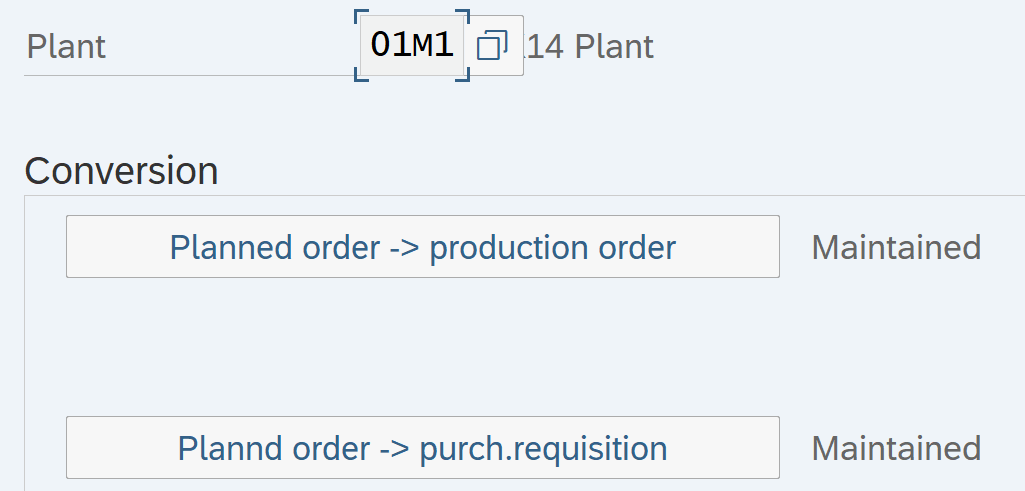
Copy from plant 1000 and Order type PP01. Change Plant to 01M1 and Order type to 19PO

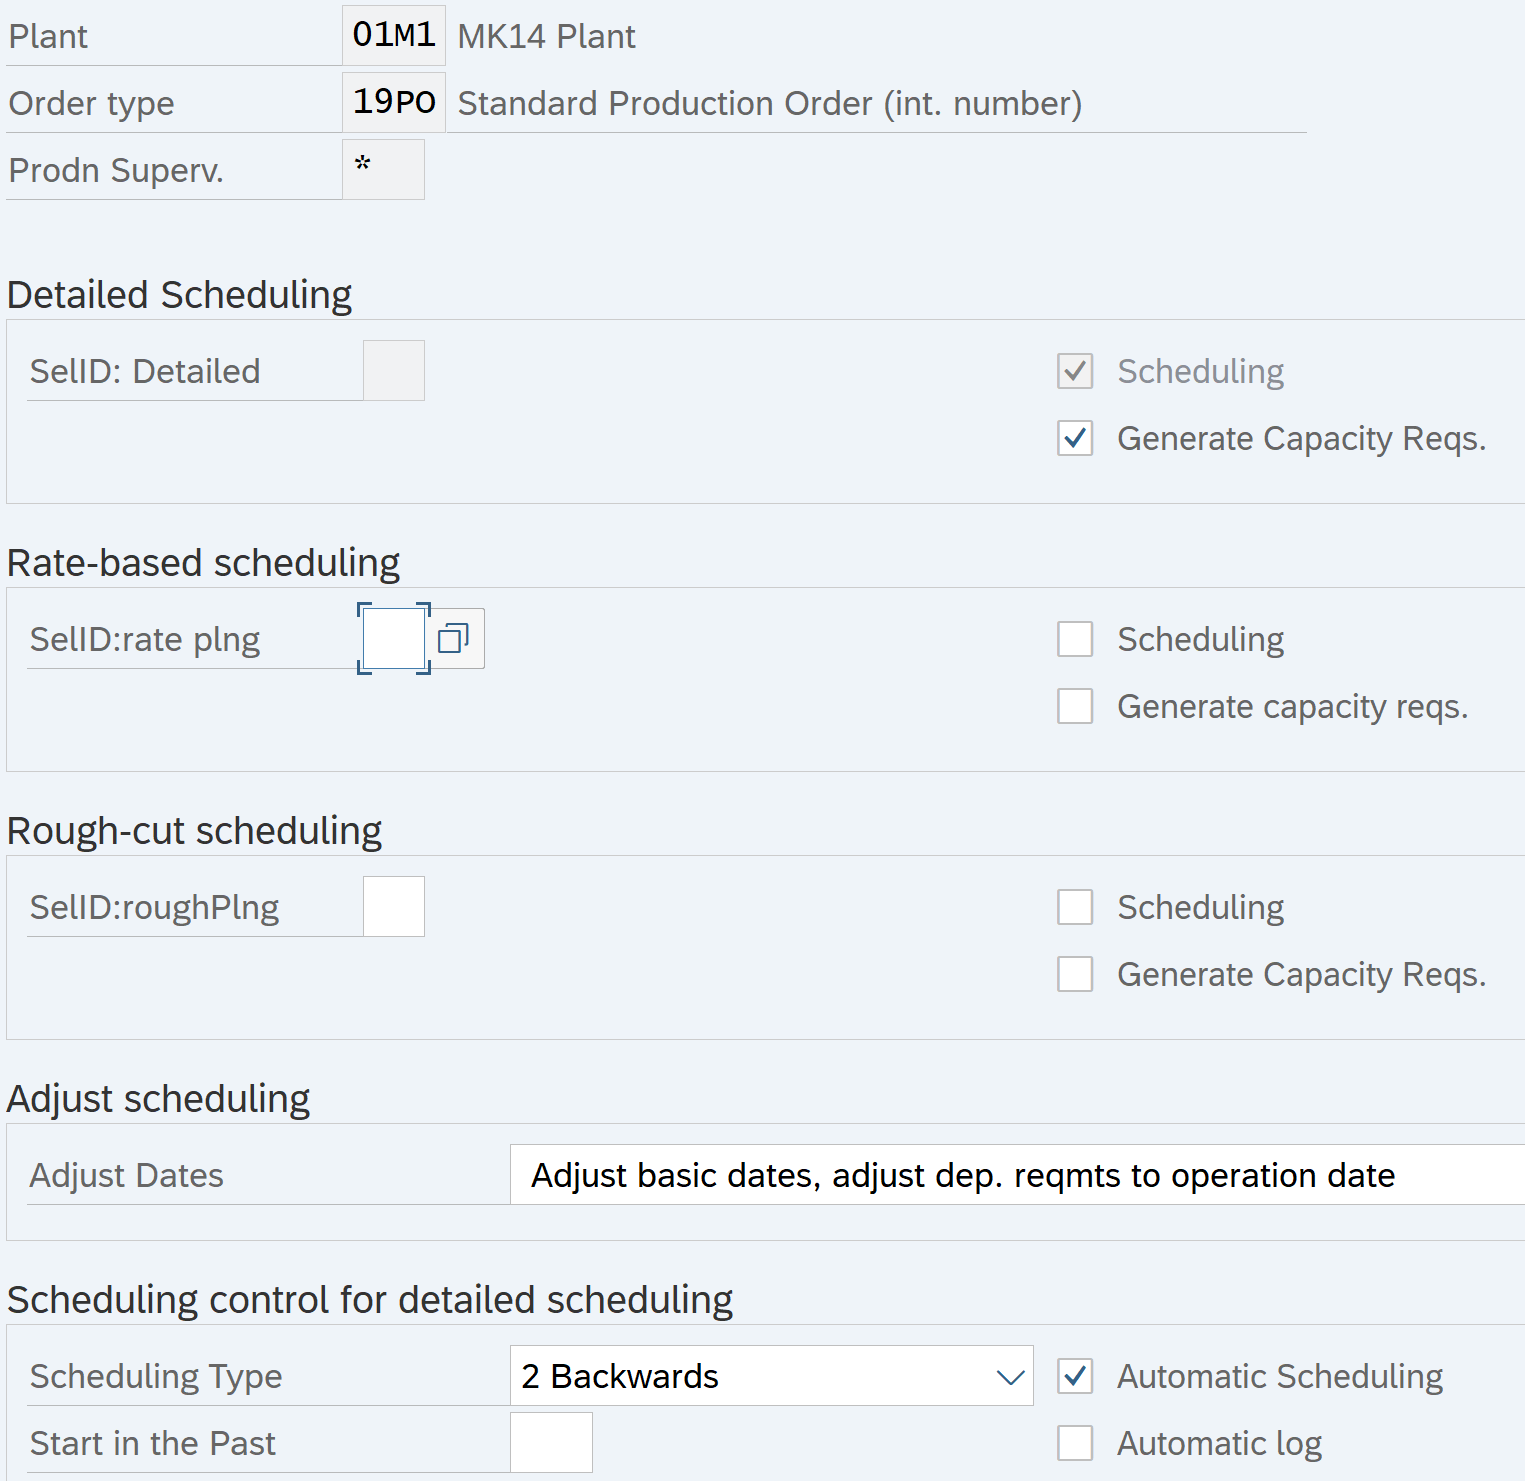
Define Scheduling Parameters for Production Order

Path: Production- Shop Floor control – operations – scheduling -define scheduling parameters for production orders

Tcode: OPU3

Copy Plant 1000 and Order type PP01 as Plant 01M1 and Order type 19PO

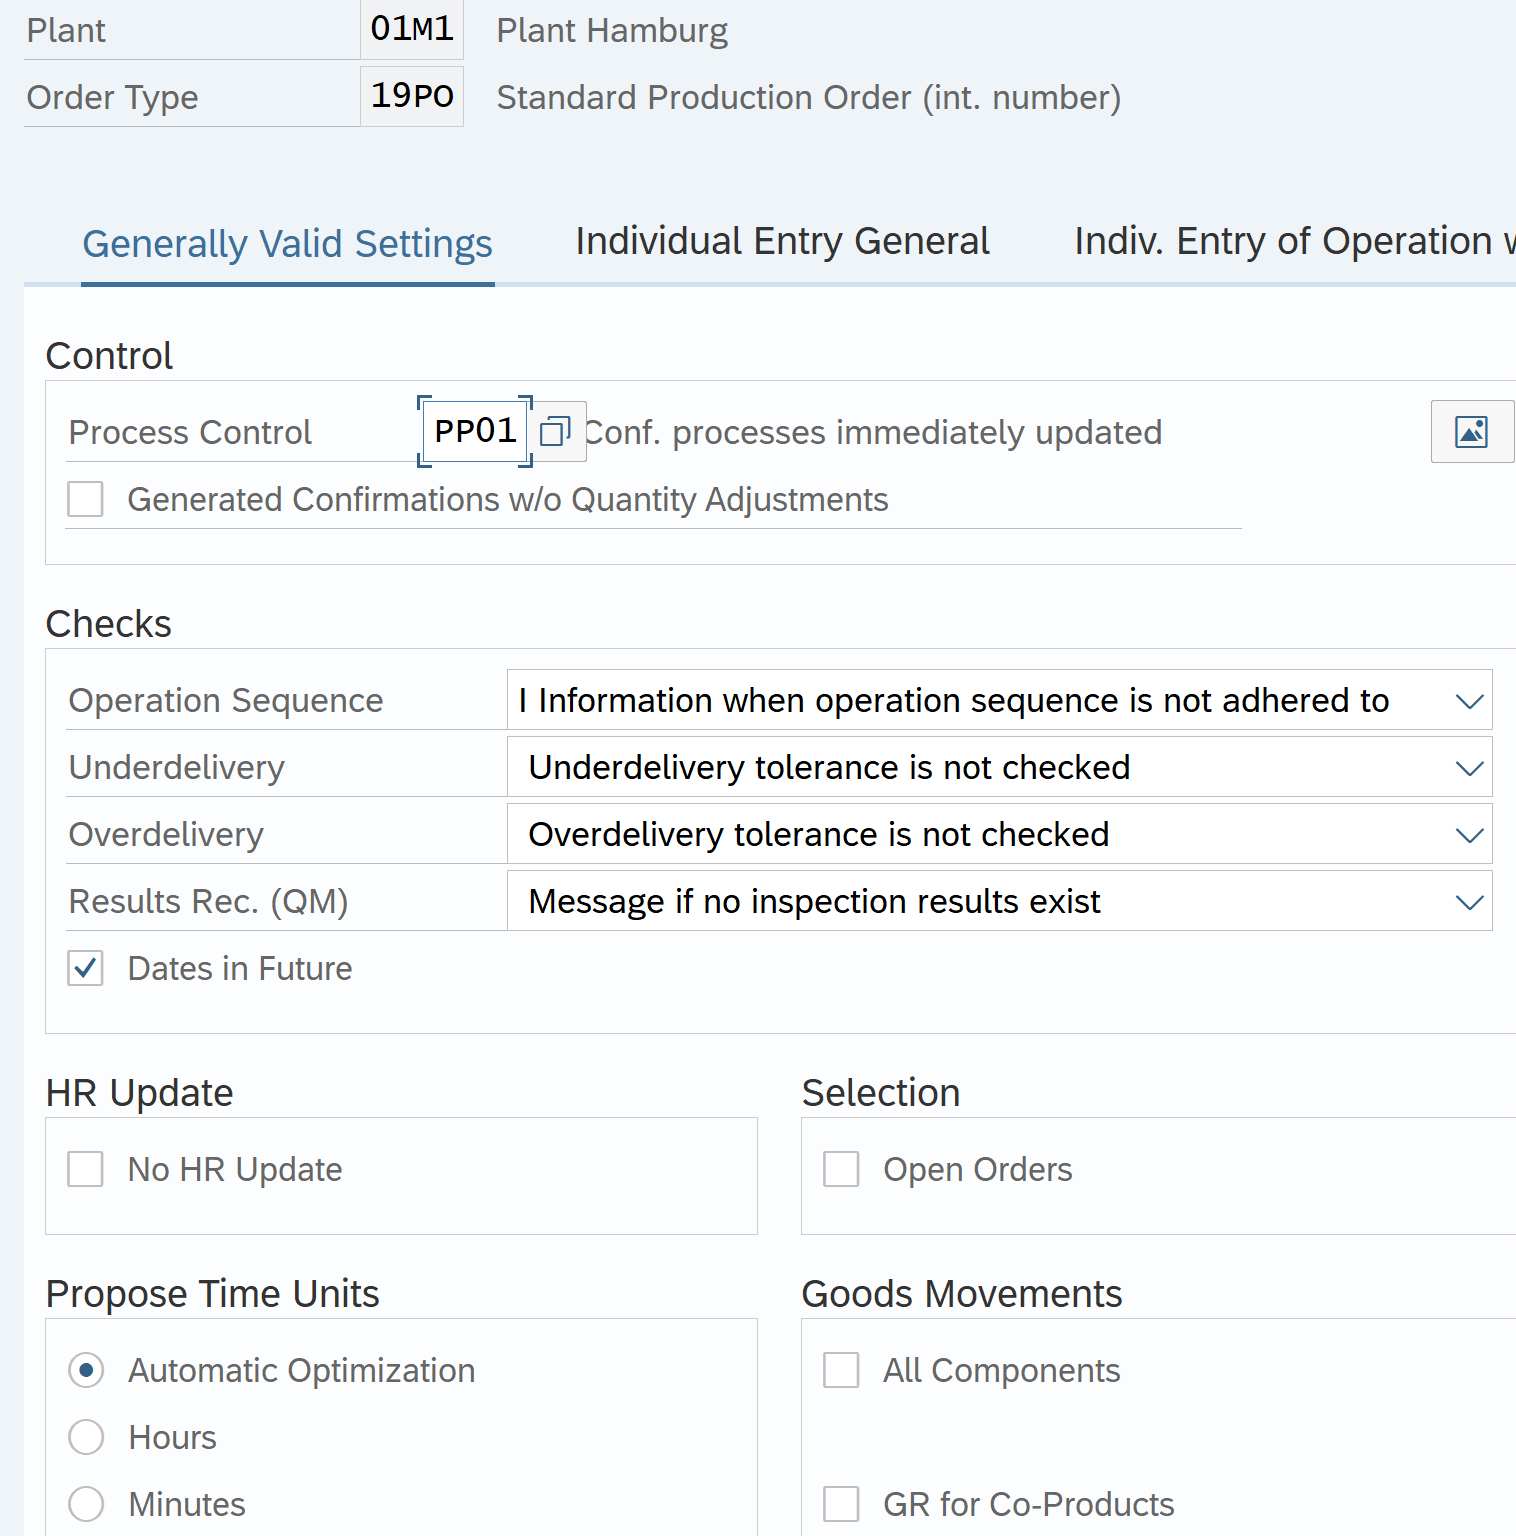
Define Confirmation Parameters

Path: Production- Shop Floor control – operations – confirmation – define confirmation parameters

Tcode: OPK4

Copy Plant 1000 and Order type PP01 as Plant 01M1 and Order type 19PO

Define Checking control

Path: Production- Shop Floor control – operations – availability check – define checking control

Tcode: OPJK

Copy Plant 1000 and Order type PP01 as Plant 01M1 and Order type 19PO for business functions 1 and 2

Define Material Type assignment

Path: Production – Basic Data – Routing – General Data – Define Material Type assignment

Tcode: OP50

Material Type 02FG and 01SF define in FI-MM

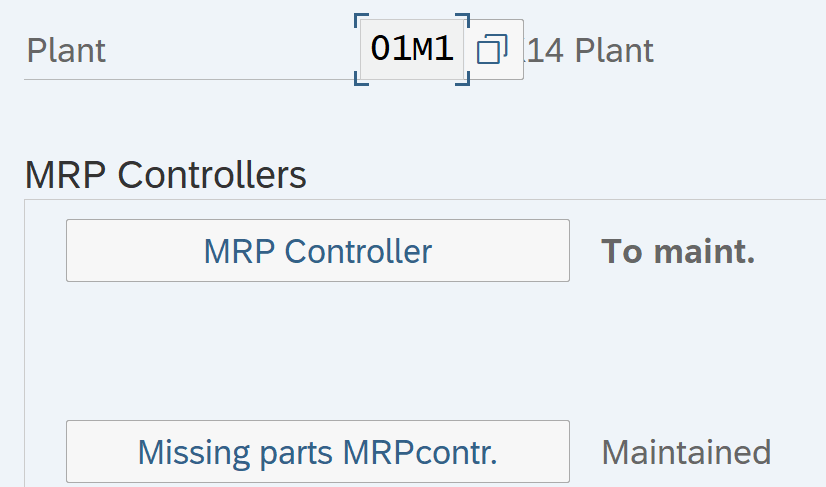
Maintain Overall Plant Parameters

Path: Production – MRP – Plant Parameters – carry out overall maintenance of plant parameters

Tcode: OPPQ

Copy Plant 1000 to Plant 01M1

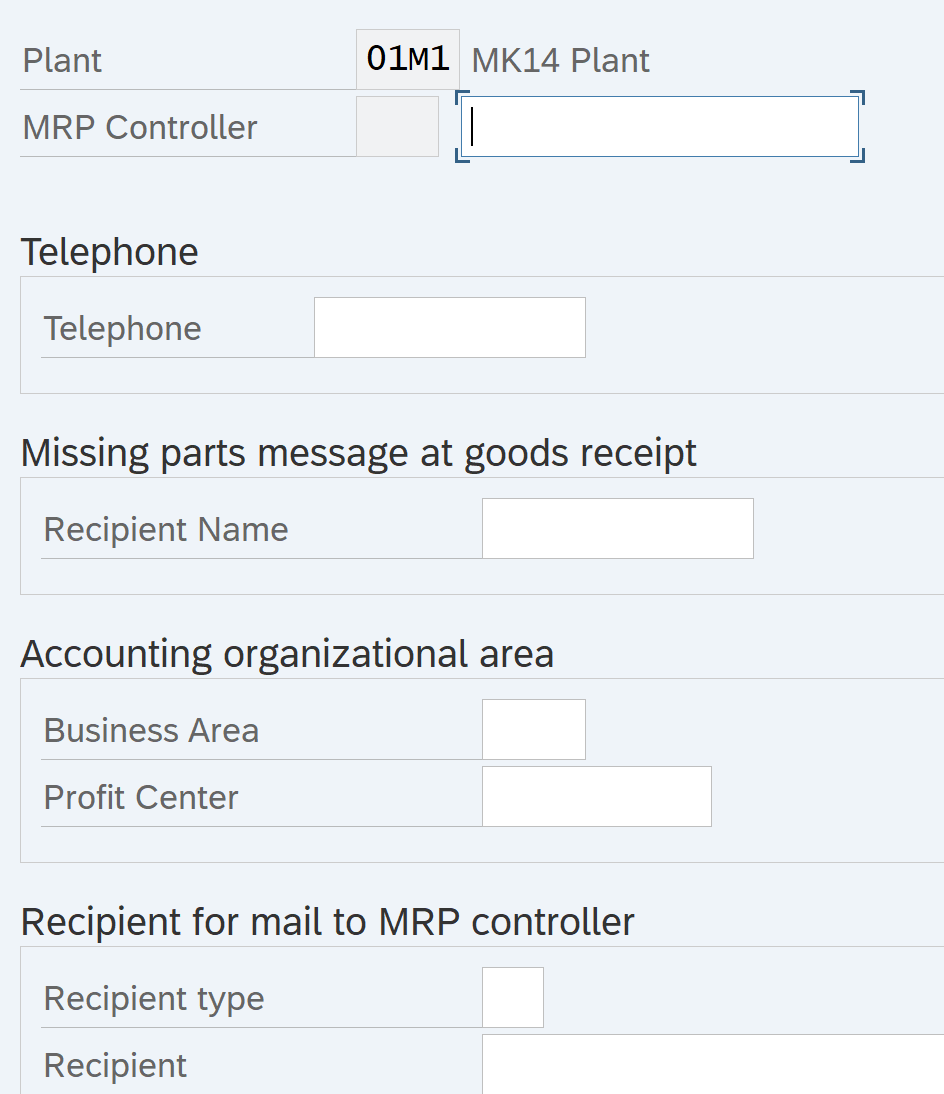
Click on Maintain – Enter plant 01M1 – Click on MRP Controllers

Click on MRP controller – New entries – Enter Plant 01M1 and save

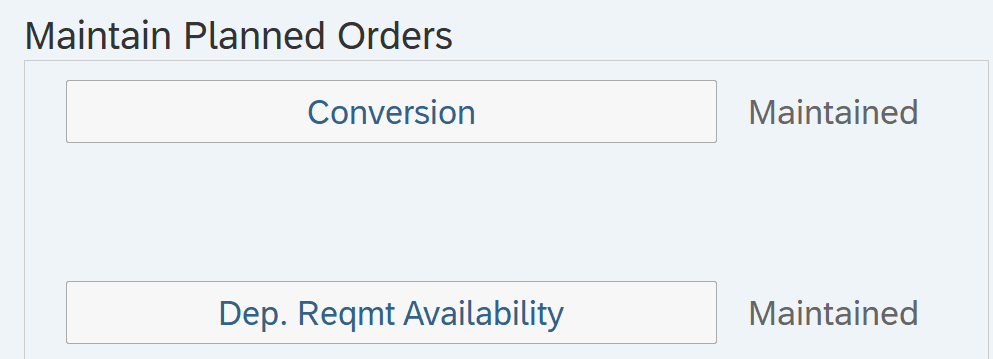
Click on Conversion under maintain planned orders

Click Planned Order and update Production Order to 19PO

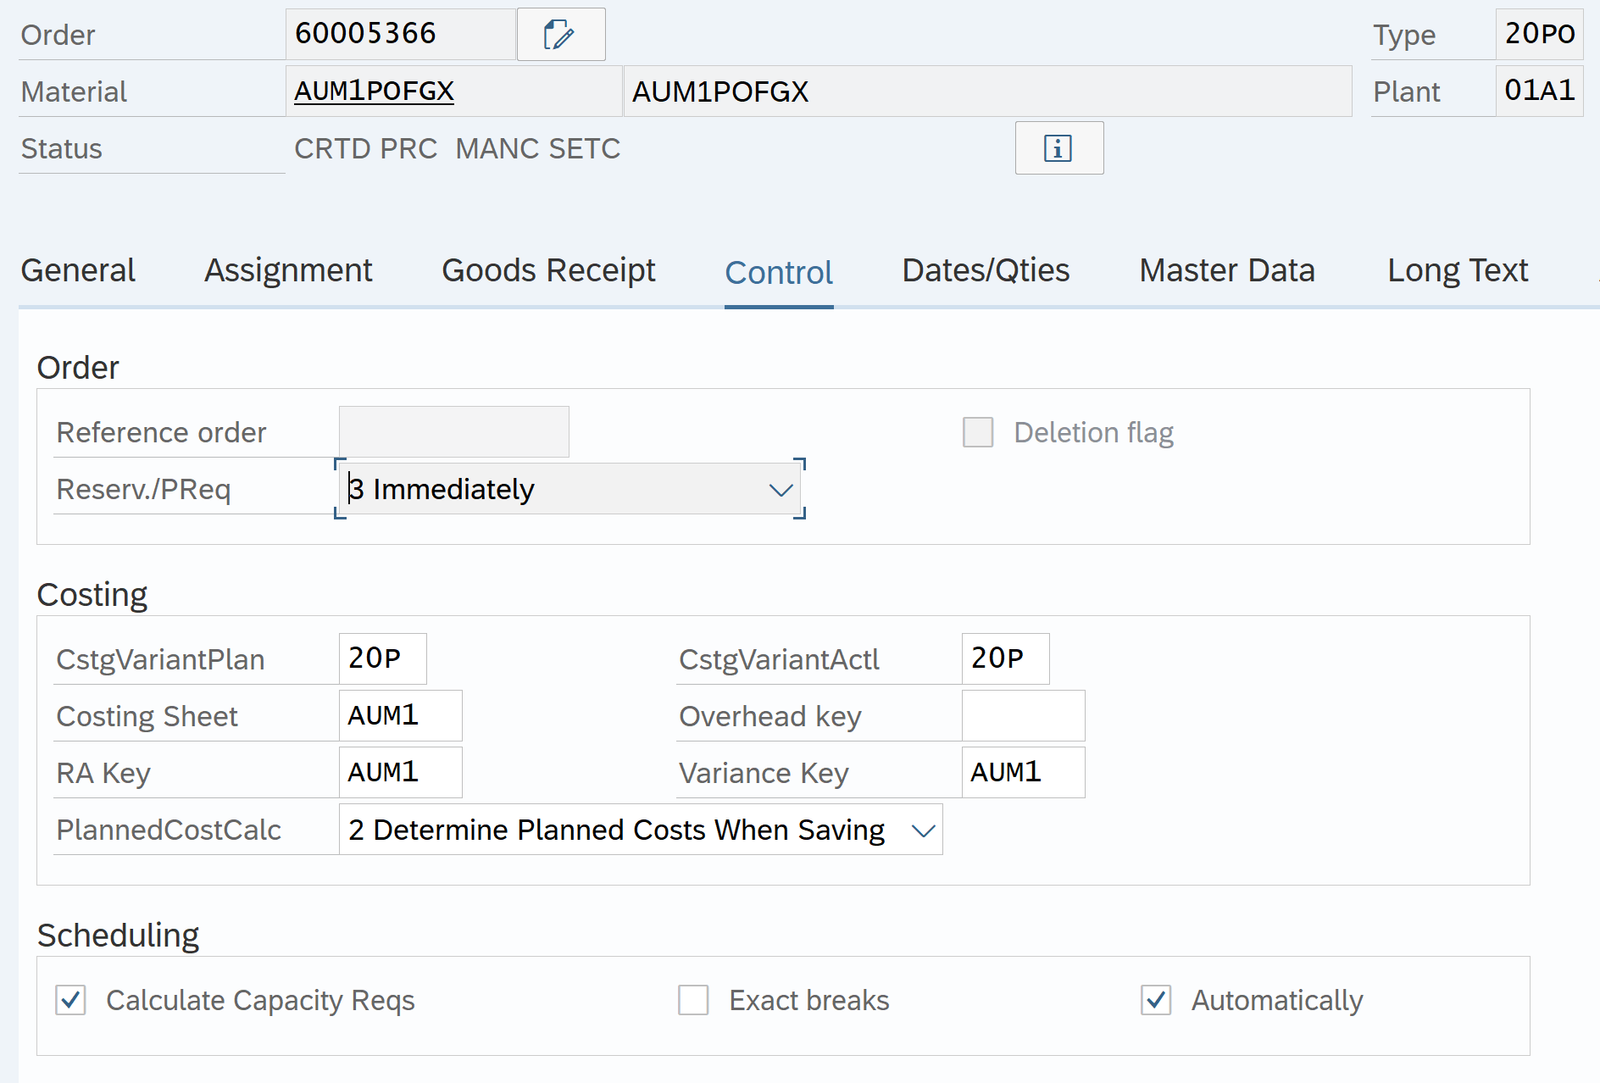
Integration between CO and PP

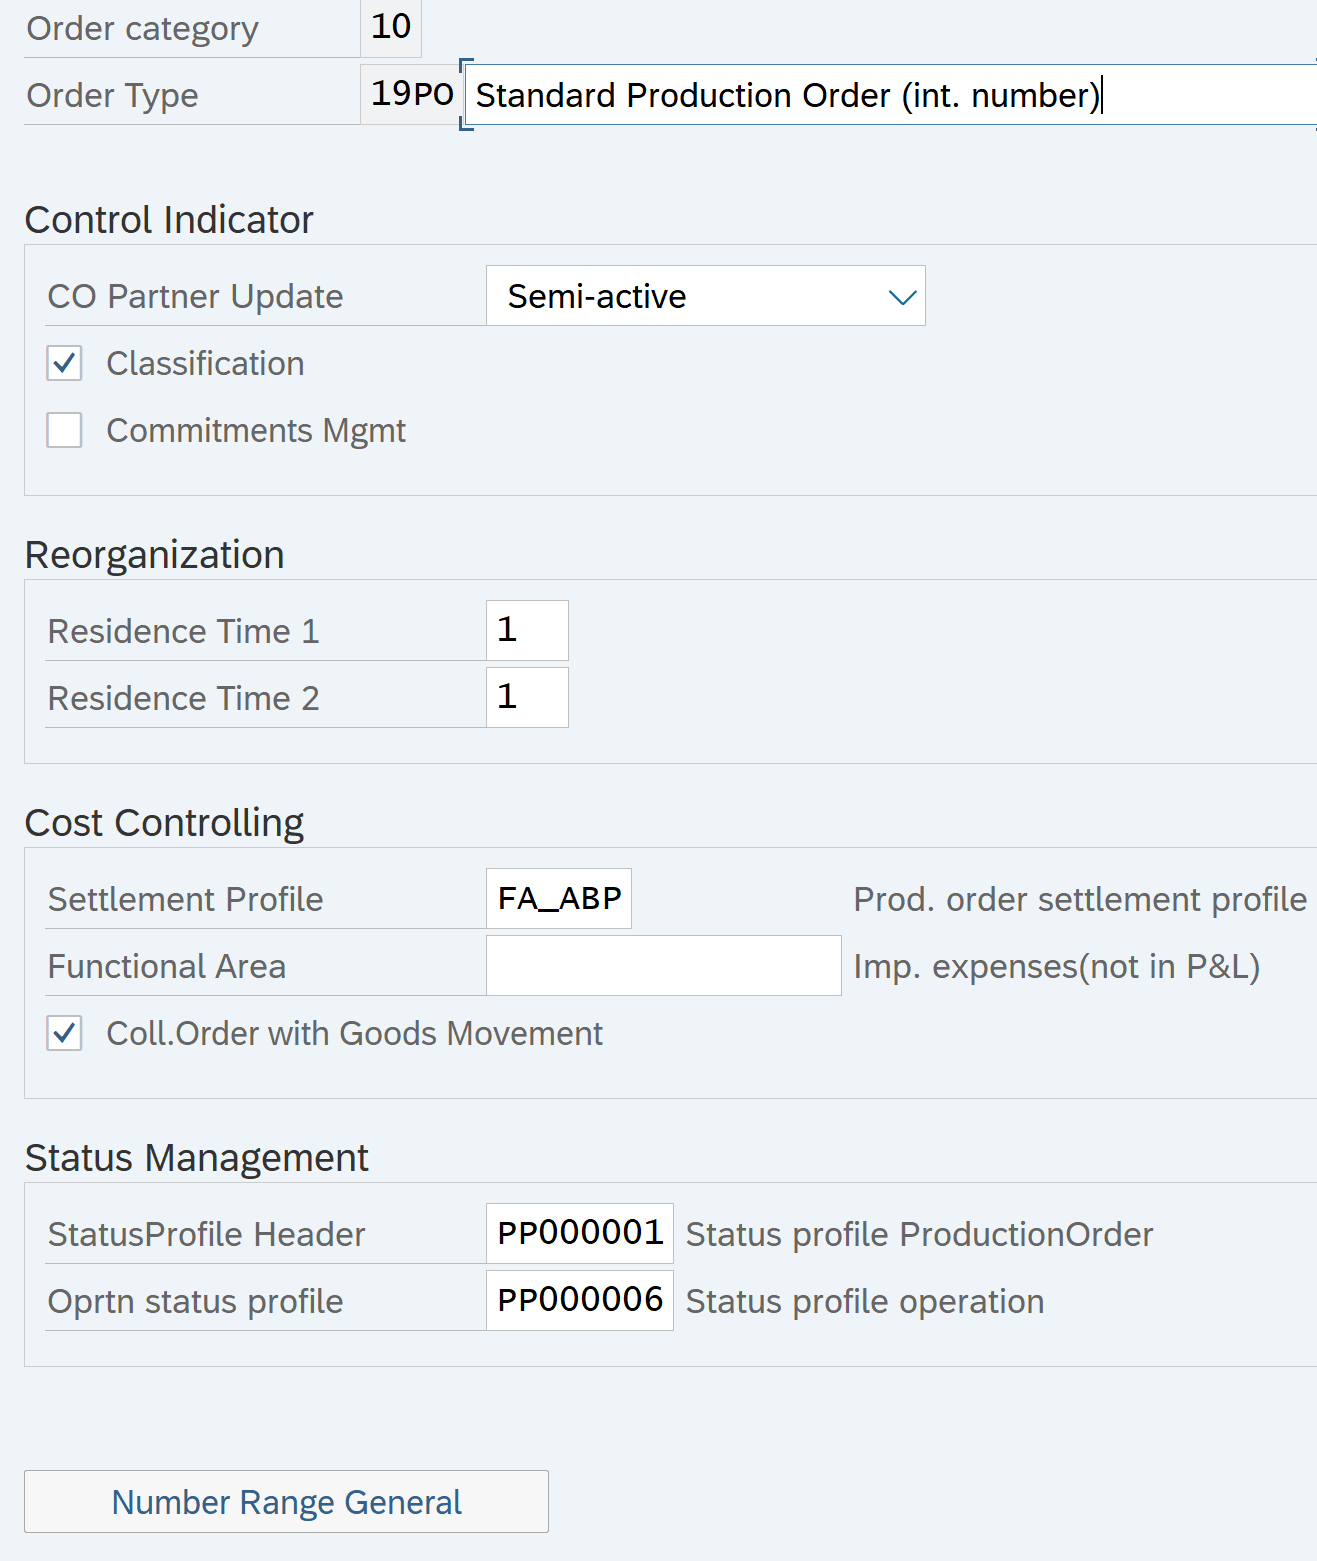
Check Order Type

Path: Controlling – Product Cost Controlling – Cost Object Controlling – Product Cost by Order – Manufacturing Orders – Check Order Types

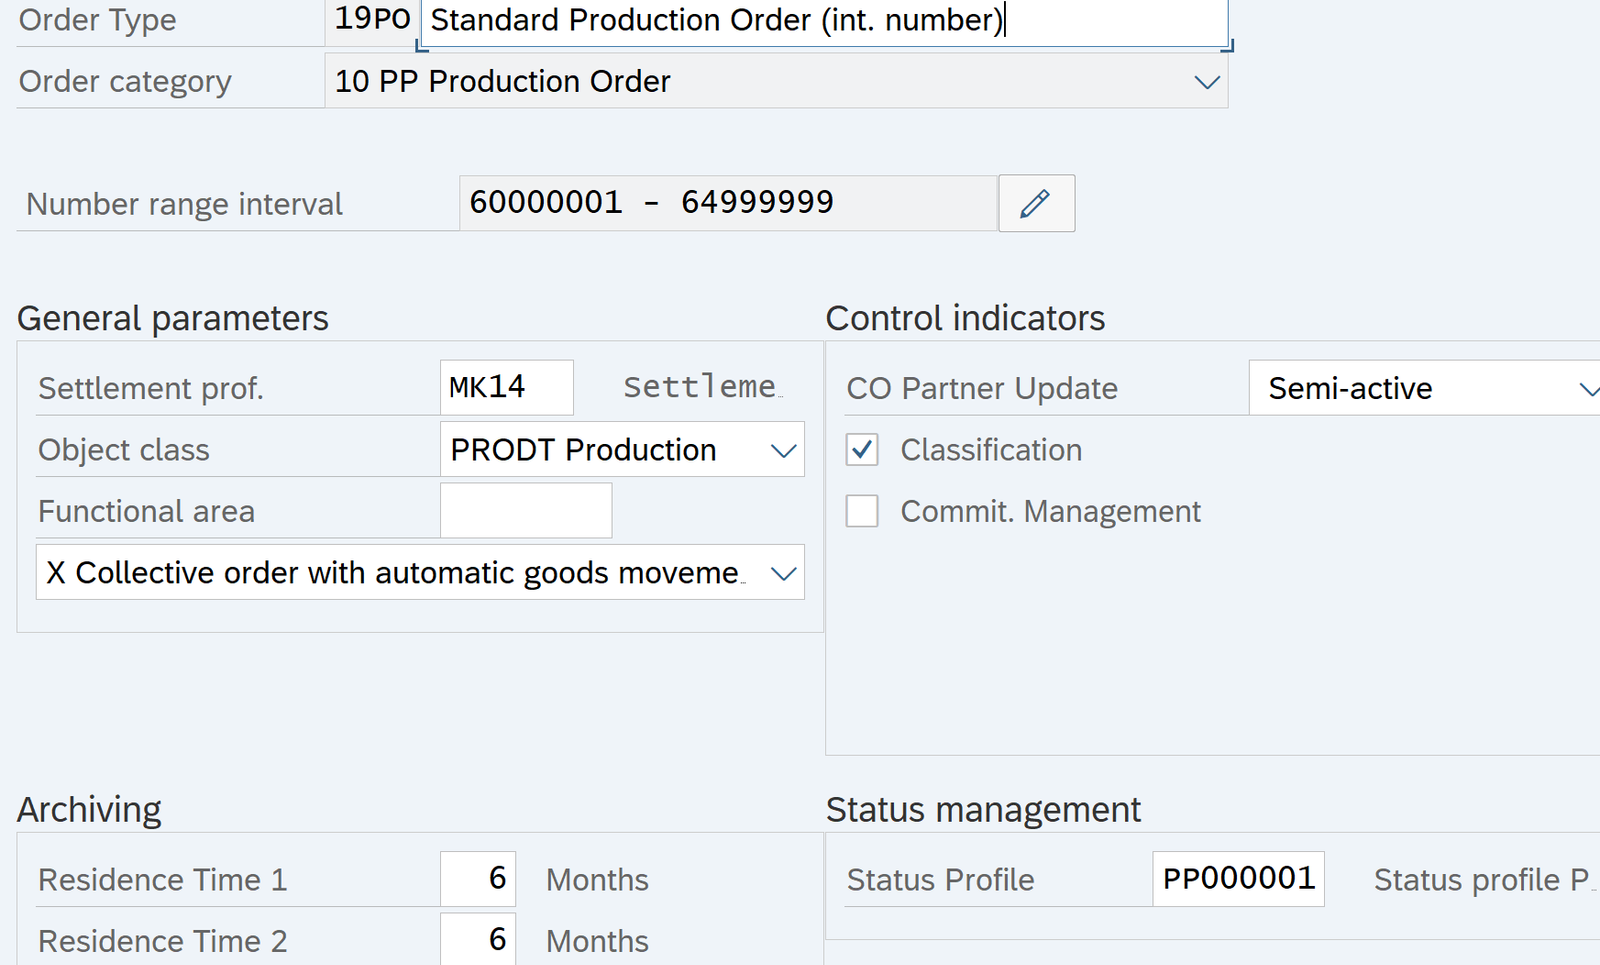
Tcode: KOT2

Update your order type 19PO as below

Update Settlement Profile

Update Object Class: Production

Residence Time: 6

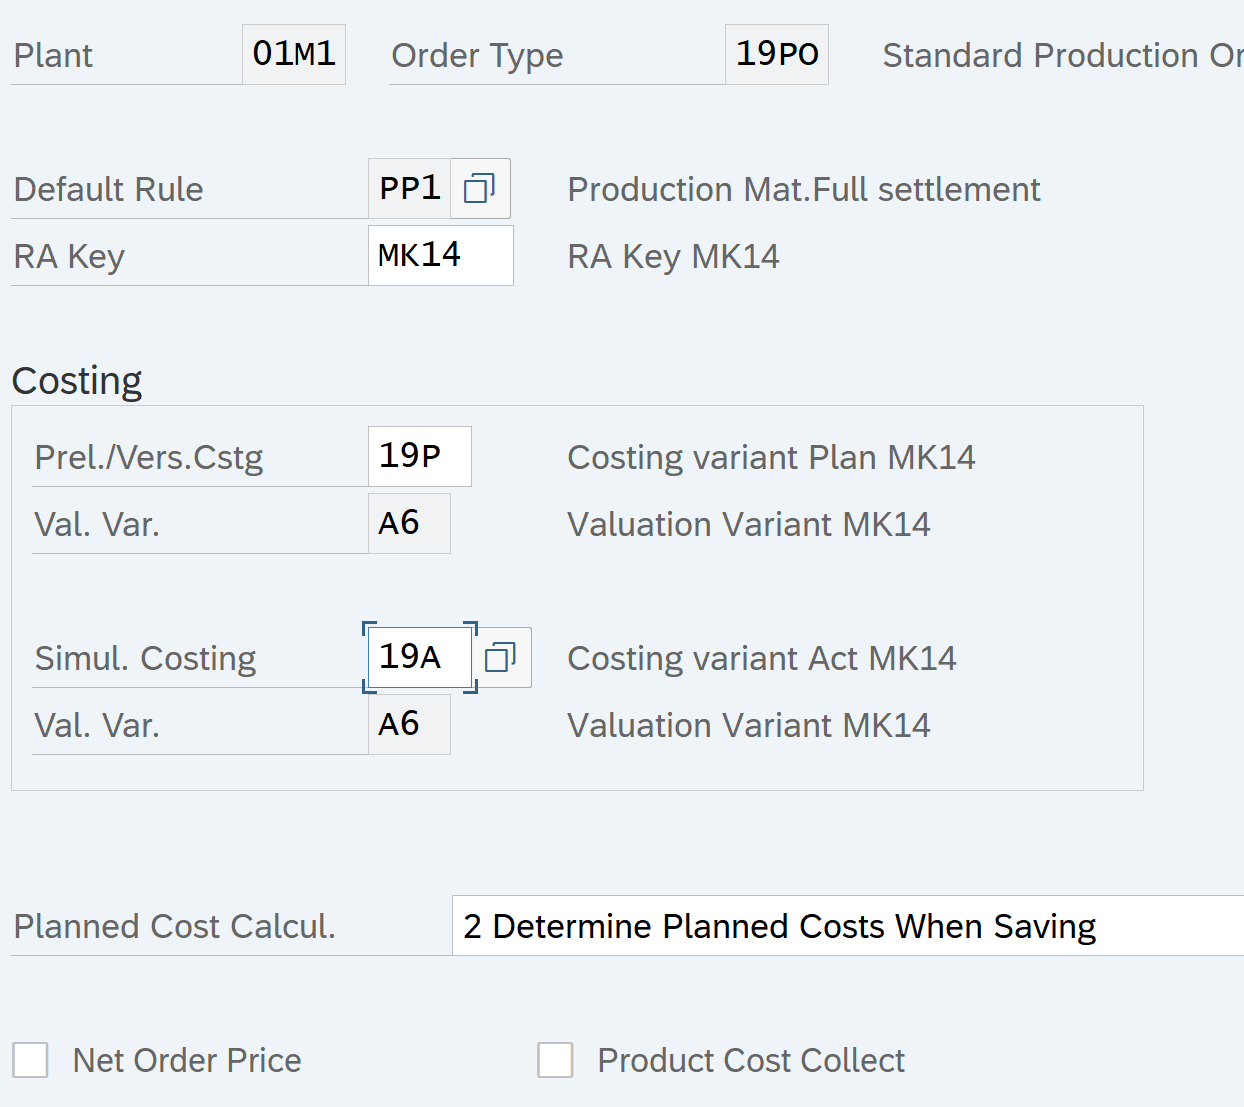
Define Cost Accounting relevant default values for order type

Path: Controlling – Product Cost Controlling – Cost Object Controlling – Product Cost by Order – Manufacturing Orders

Update as below:

RA Key: MK14

Costing Variant Plan: 19P

Costing Variant Actual: 19A

End User Steps

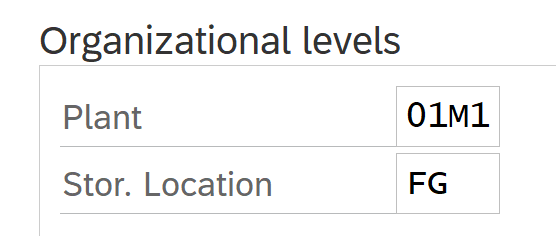
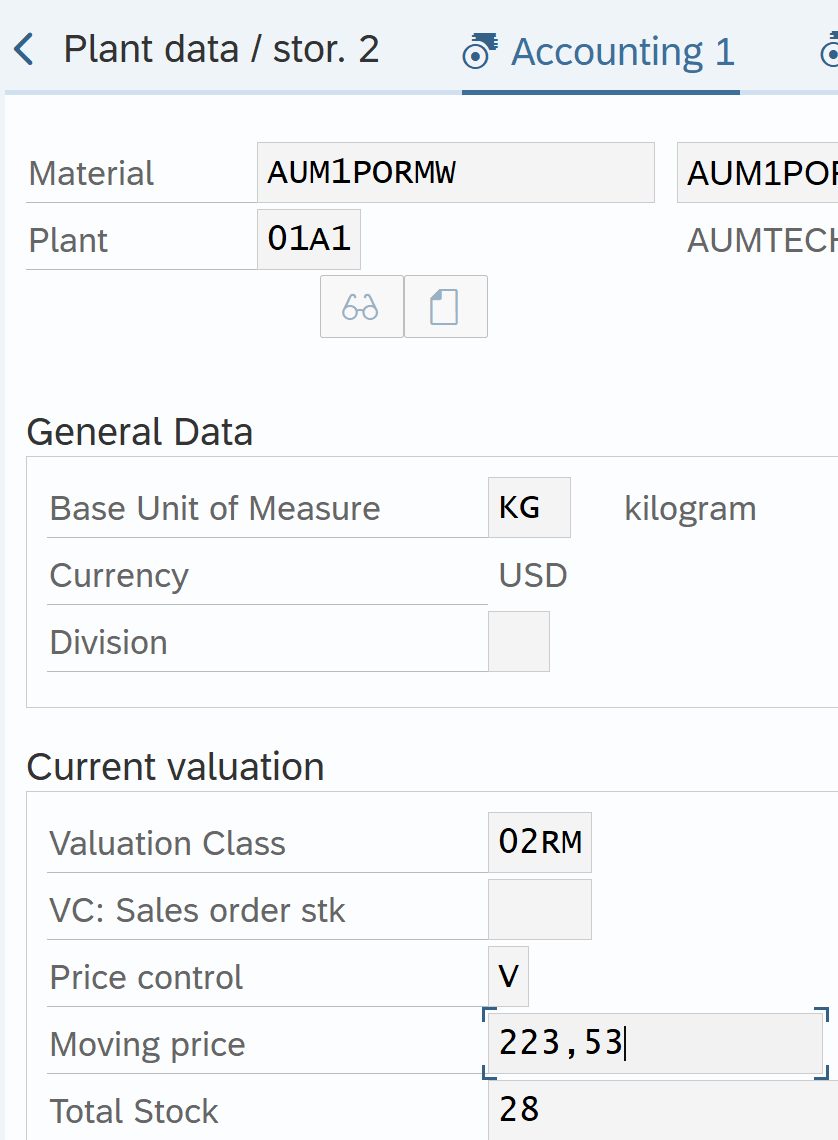
Create Finished Goods Material Master

Tcode: MM01

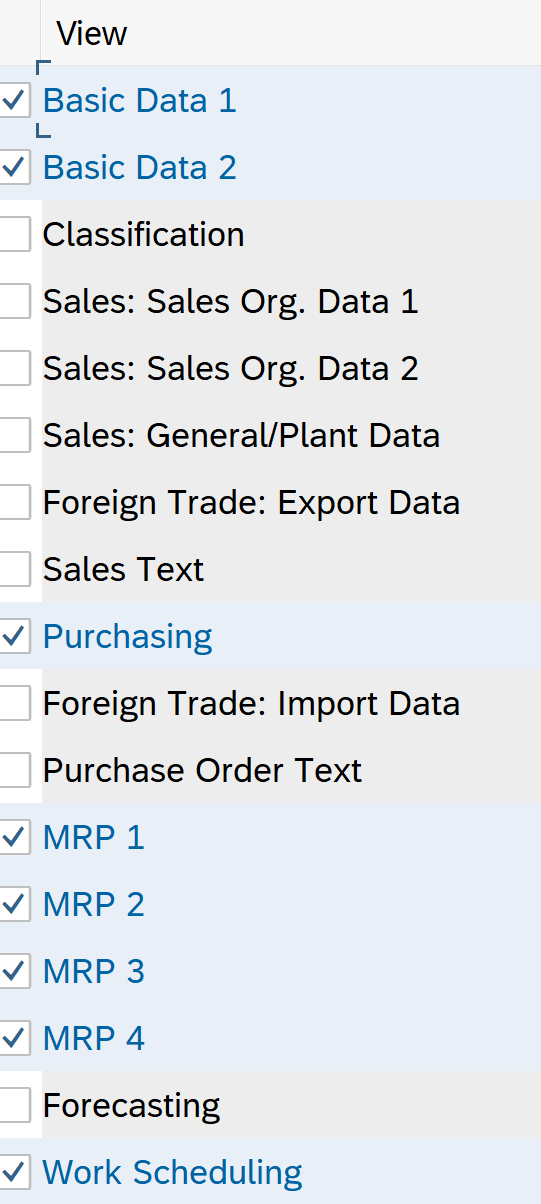
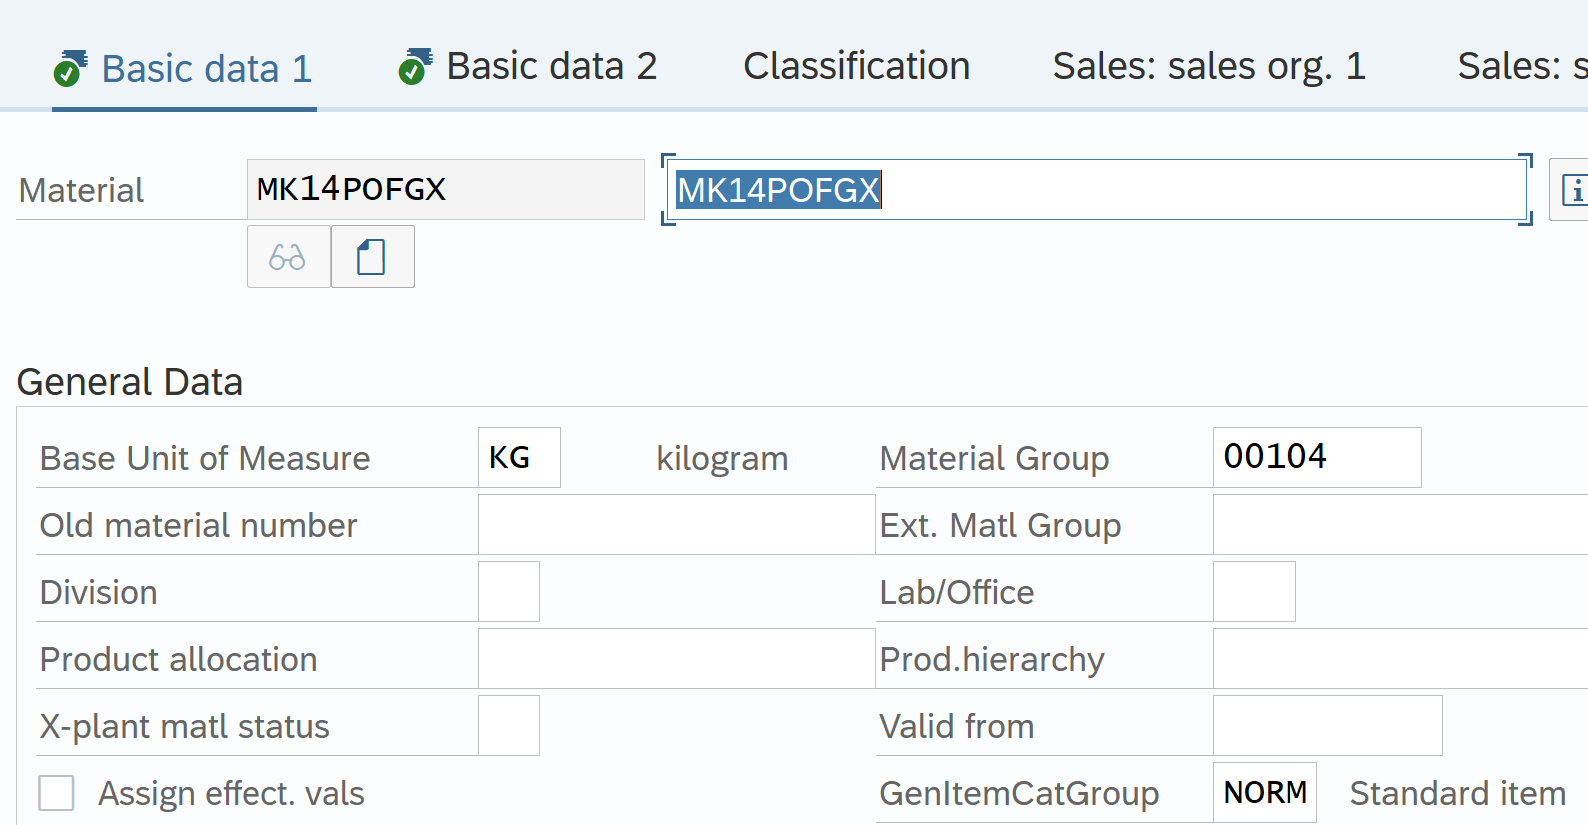
Basic Data 1 and 2 view

  • Required for all material types
  • Fields: Base Unit of Measure, Material Group, X-Plant Status, Prod Hierarchy

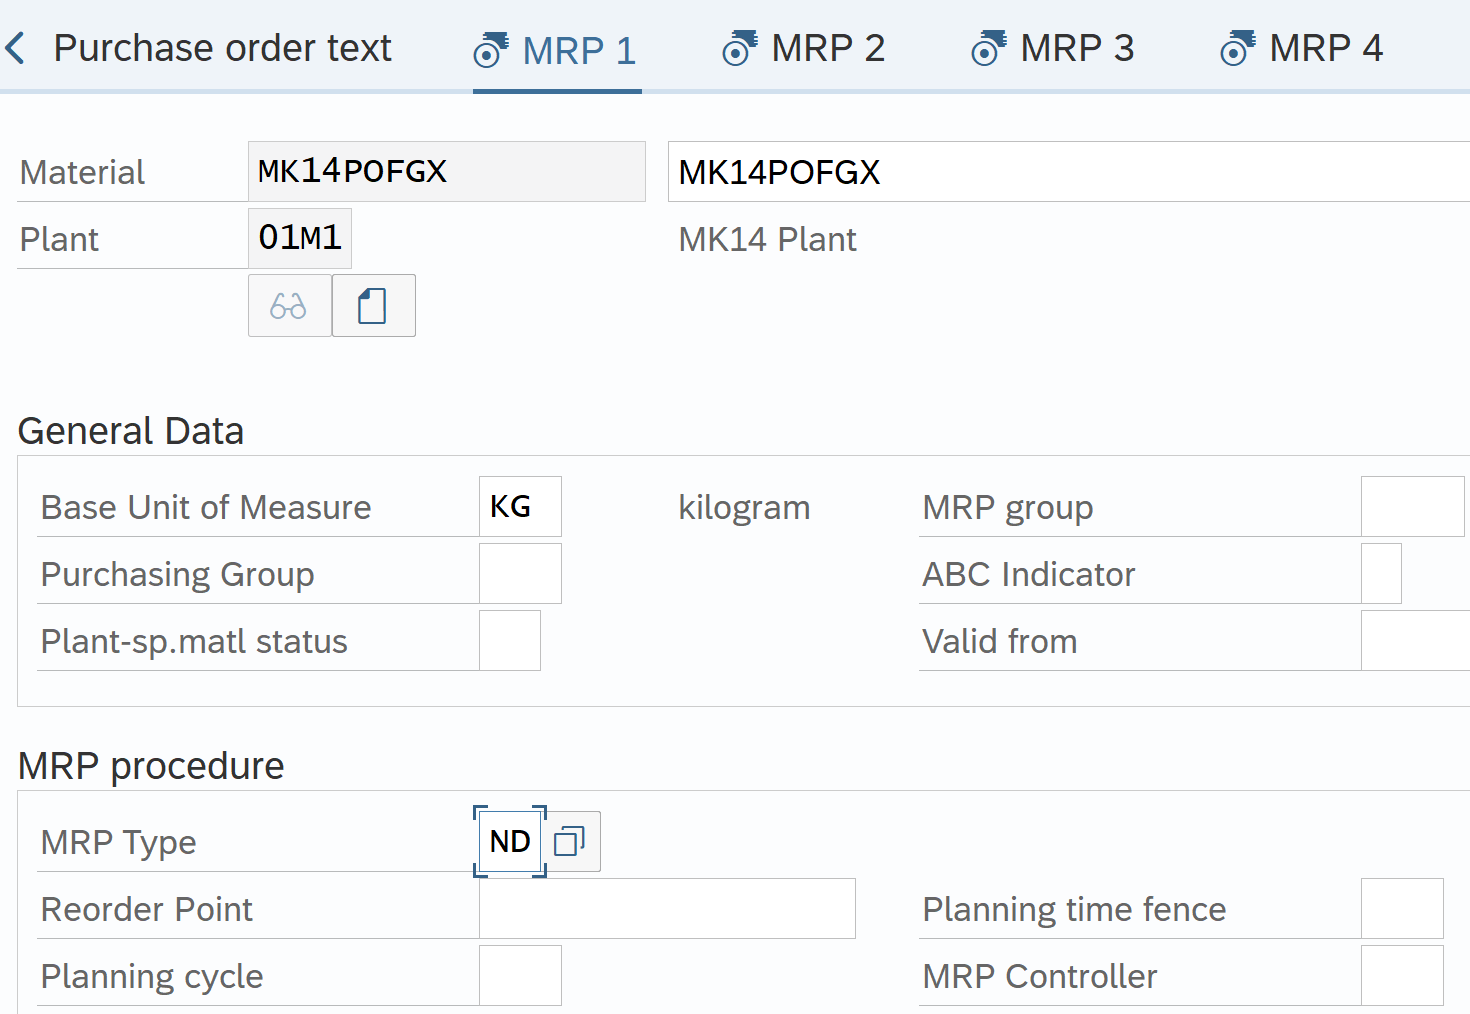
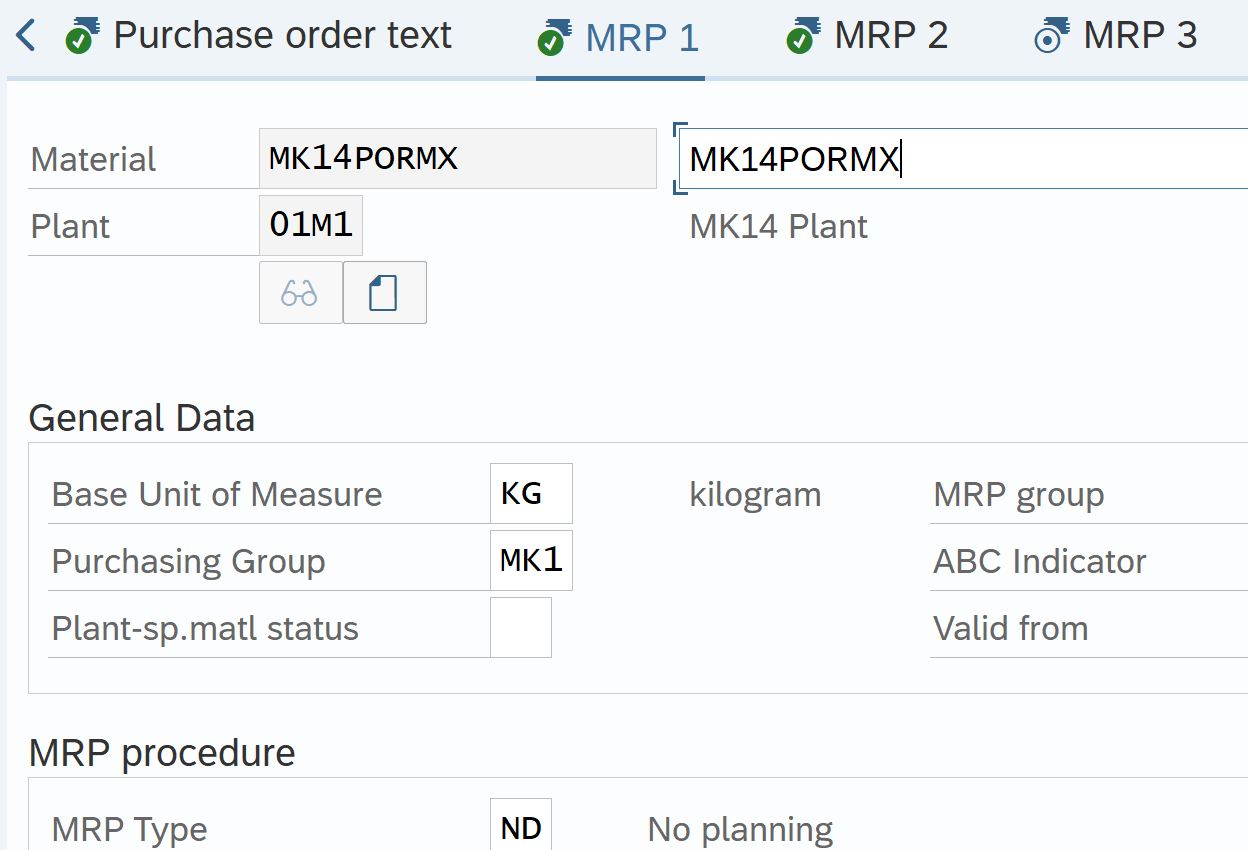
MRP 1 View (Material Requirement Planning)

  • MRP Type: ND (No Planning)
  • Procurement Type: X (Both Internal and External)
  • Storage Location: FG
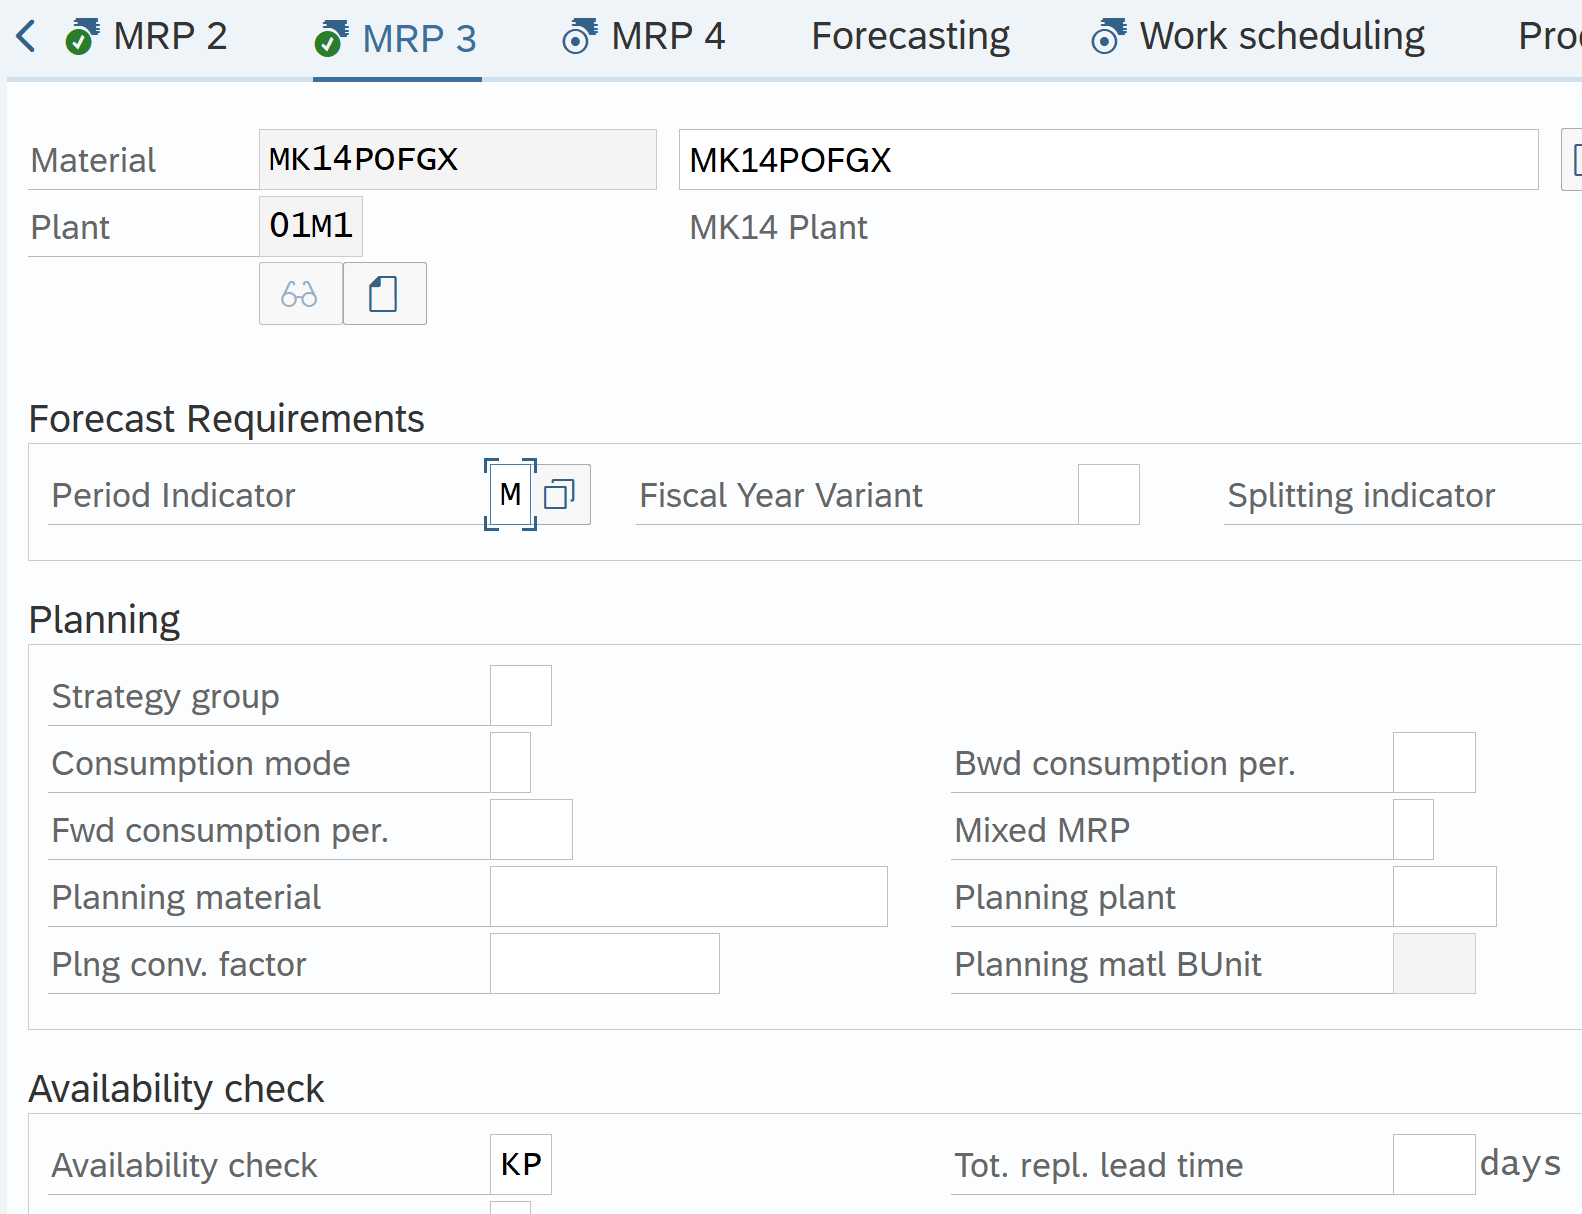
  • Availability Check: KP (No Check)

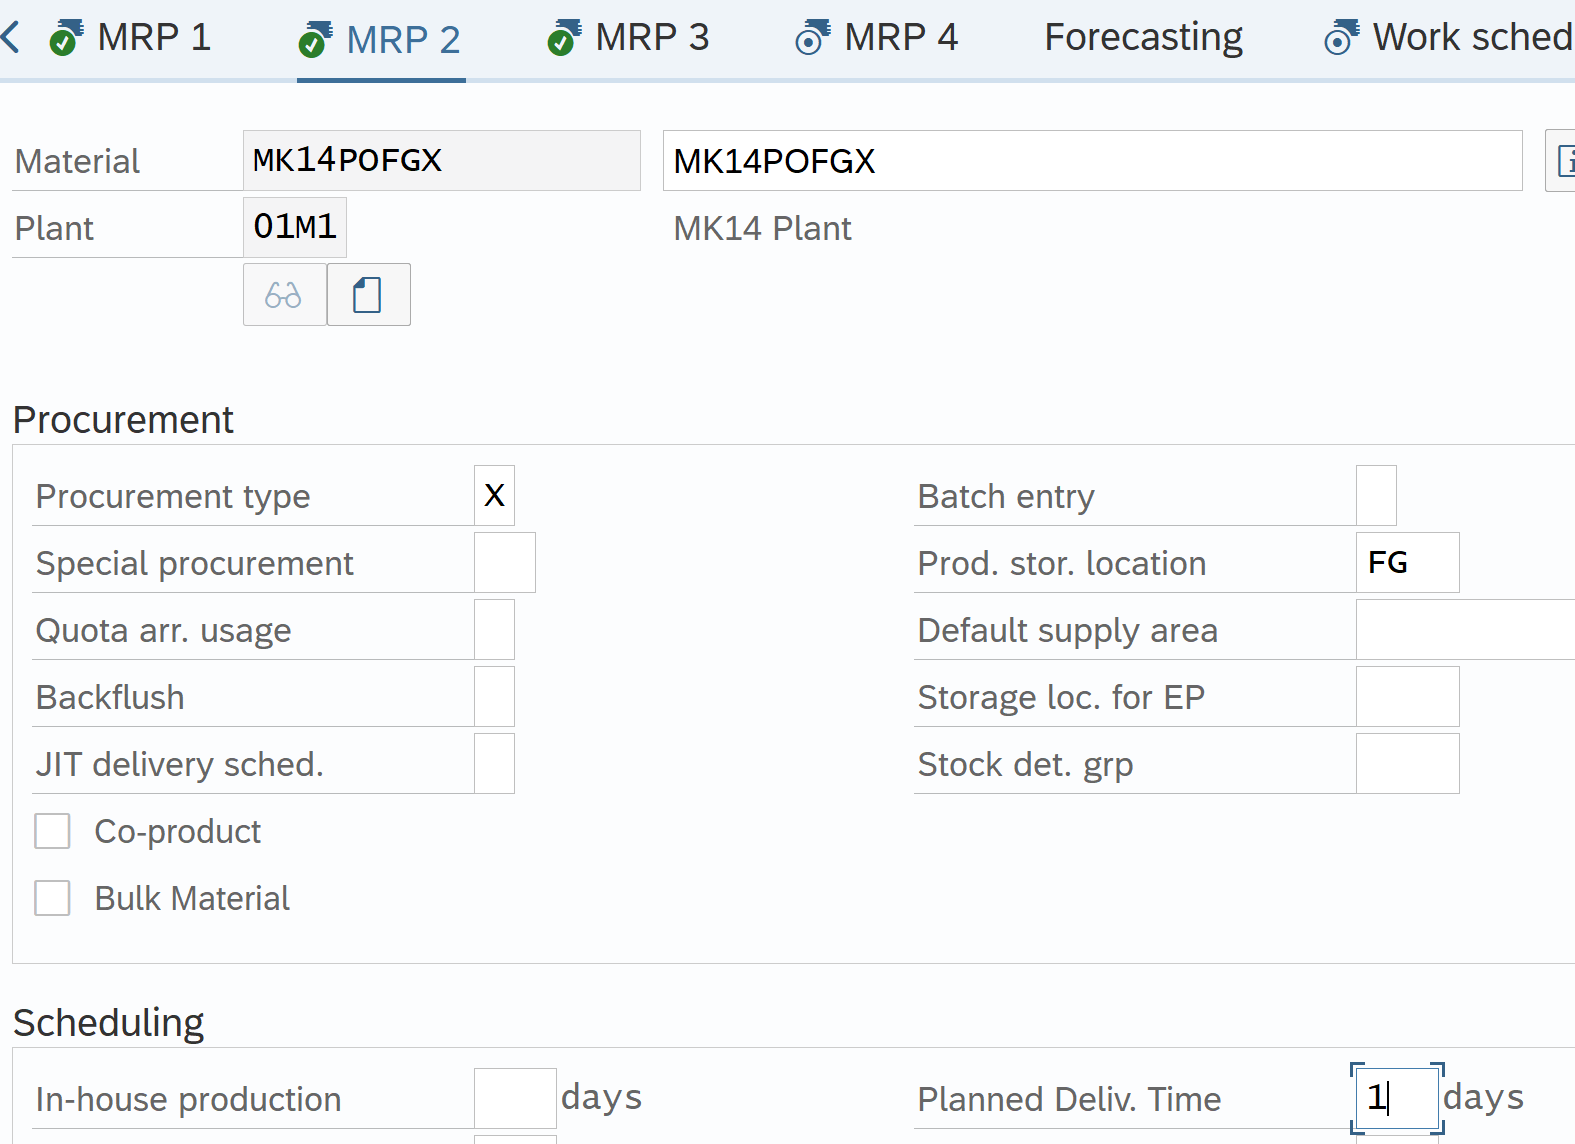
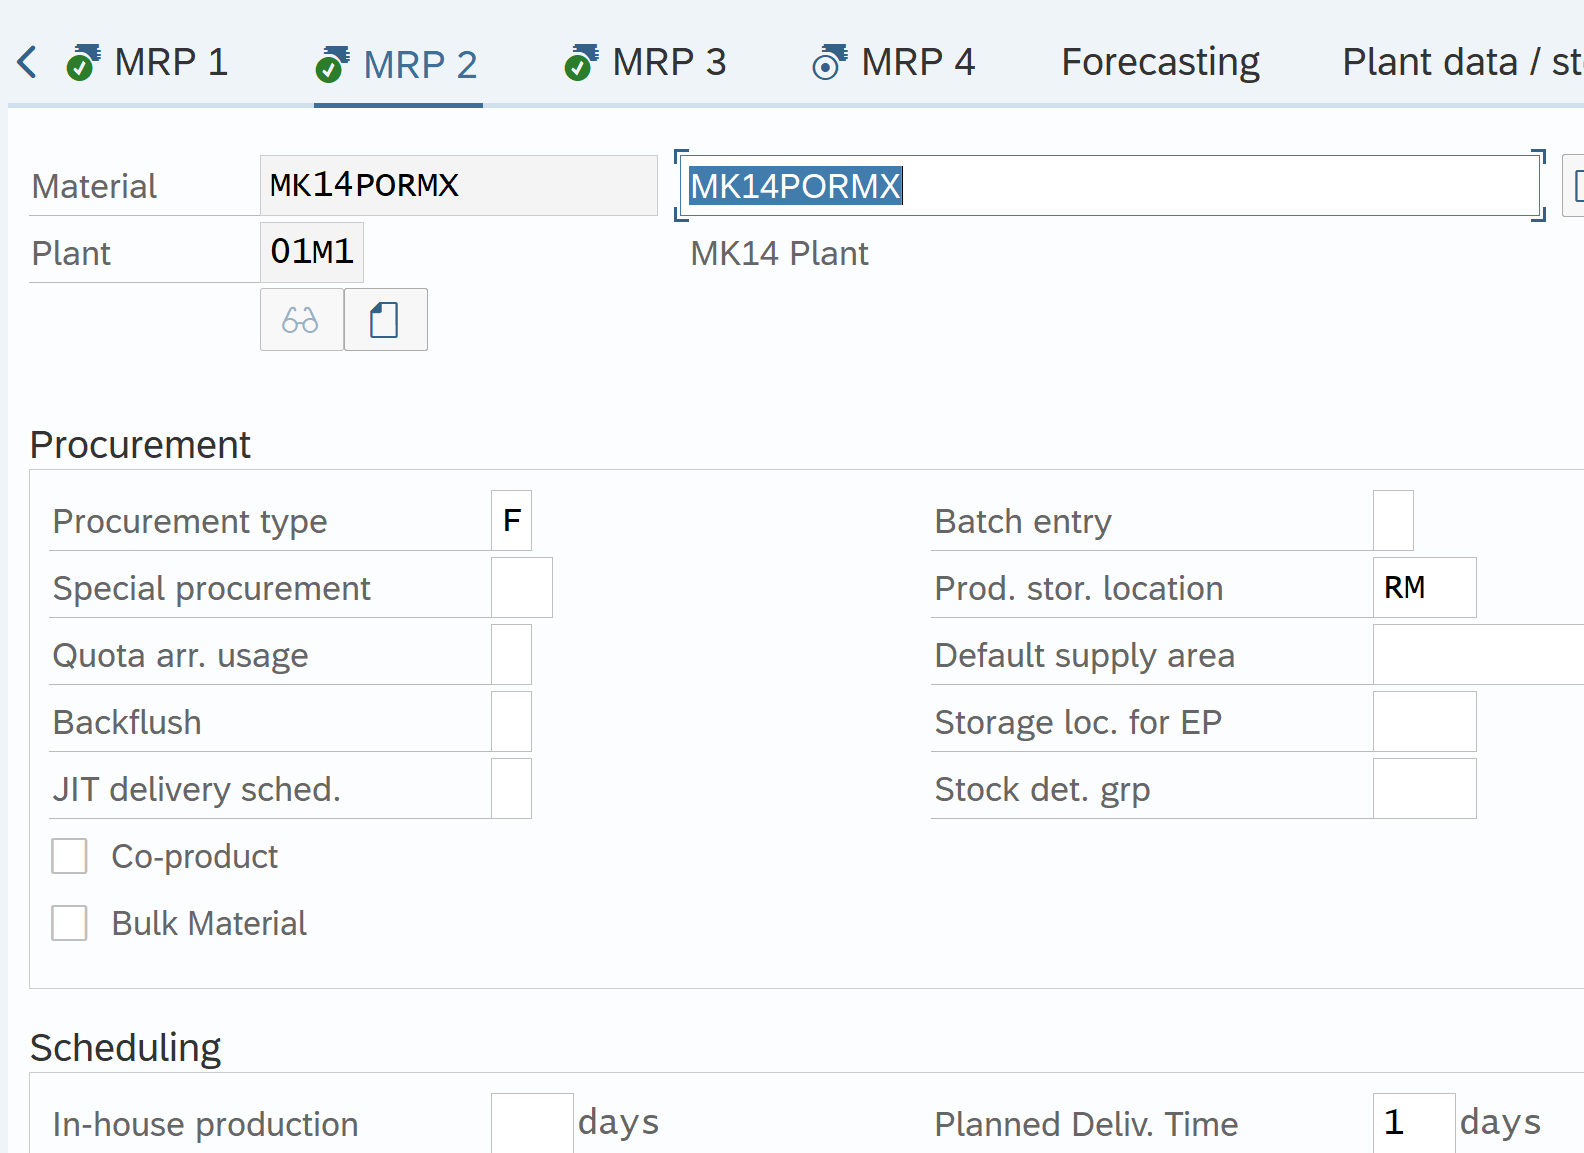
MRP 2 View

Back flush:

  1. Always Back flush
  2. Work Center decides

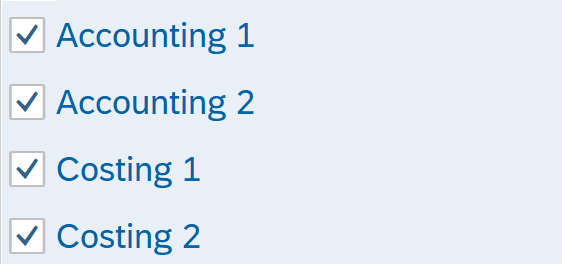
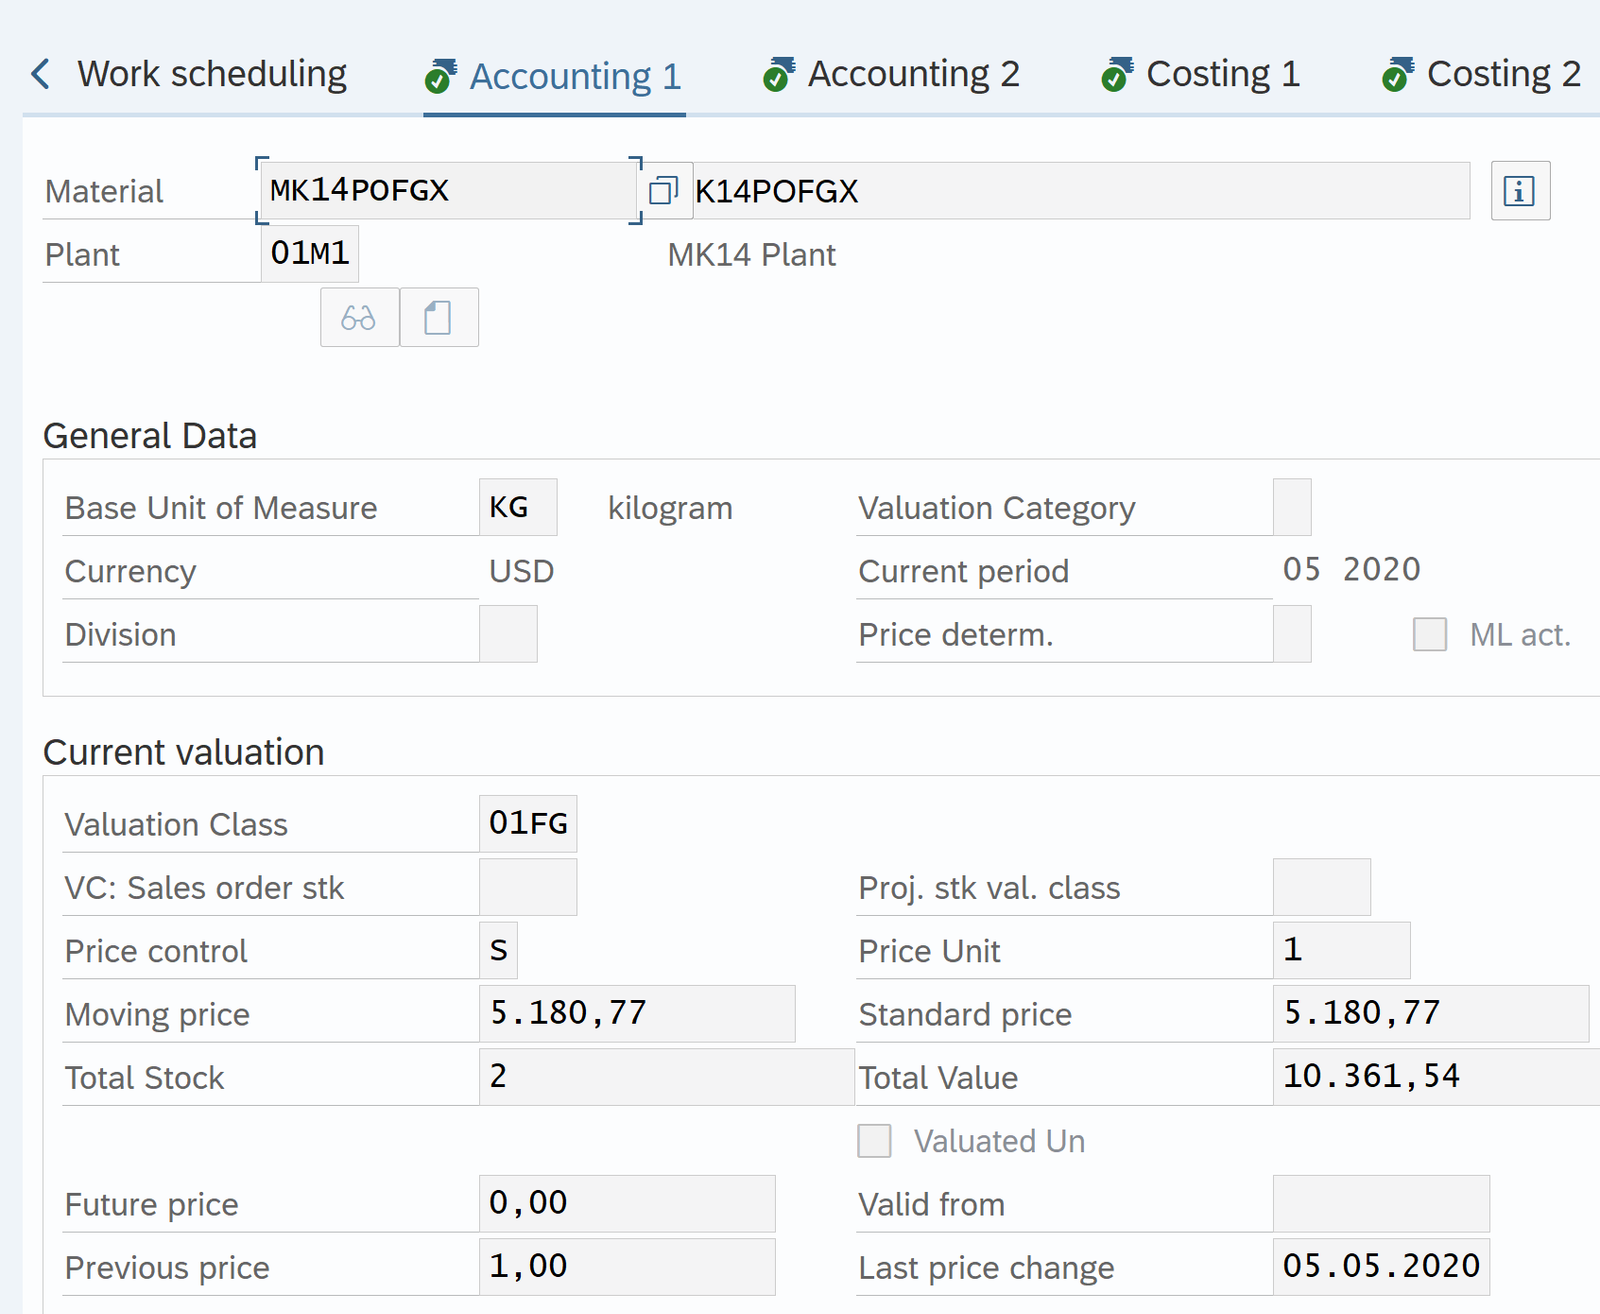
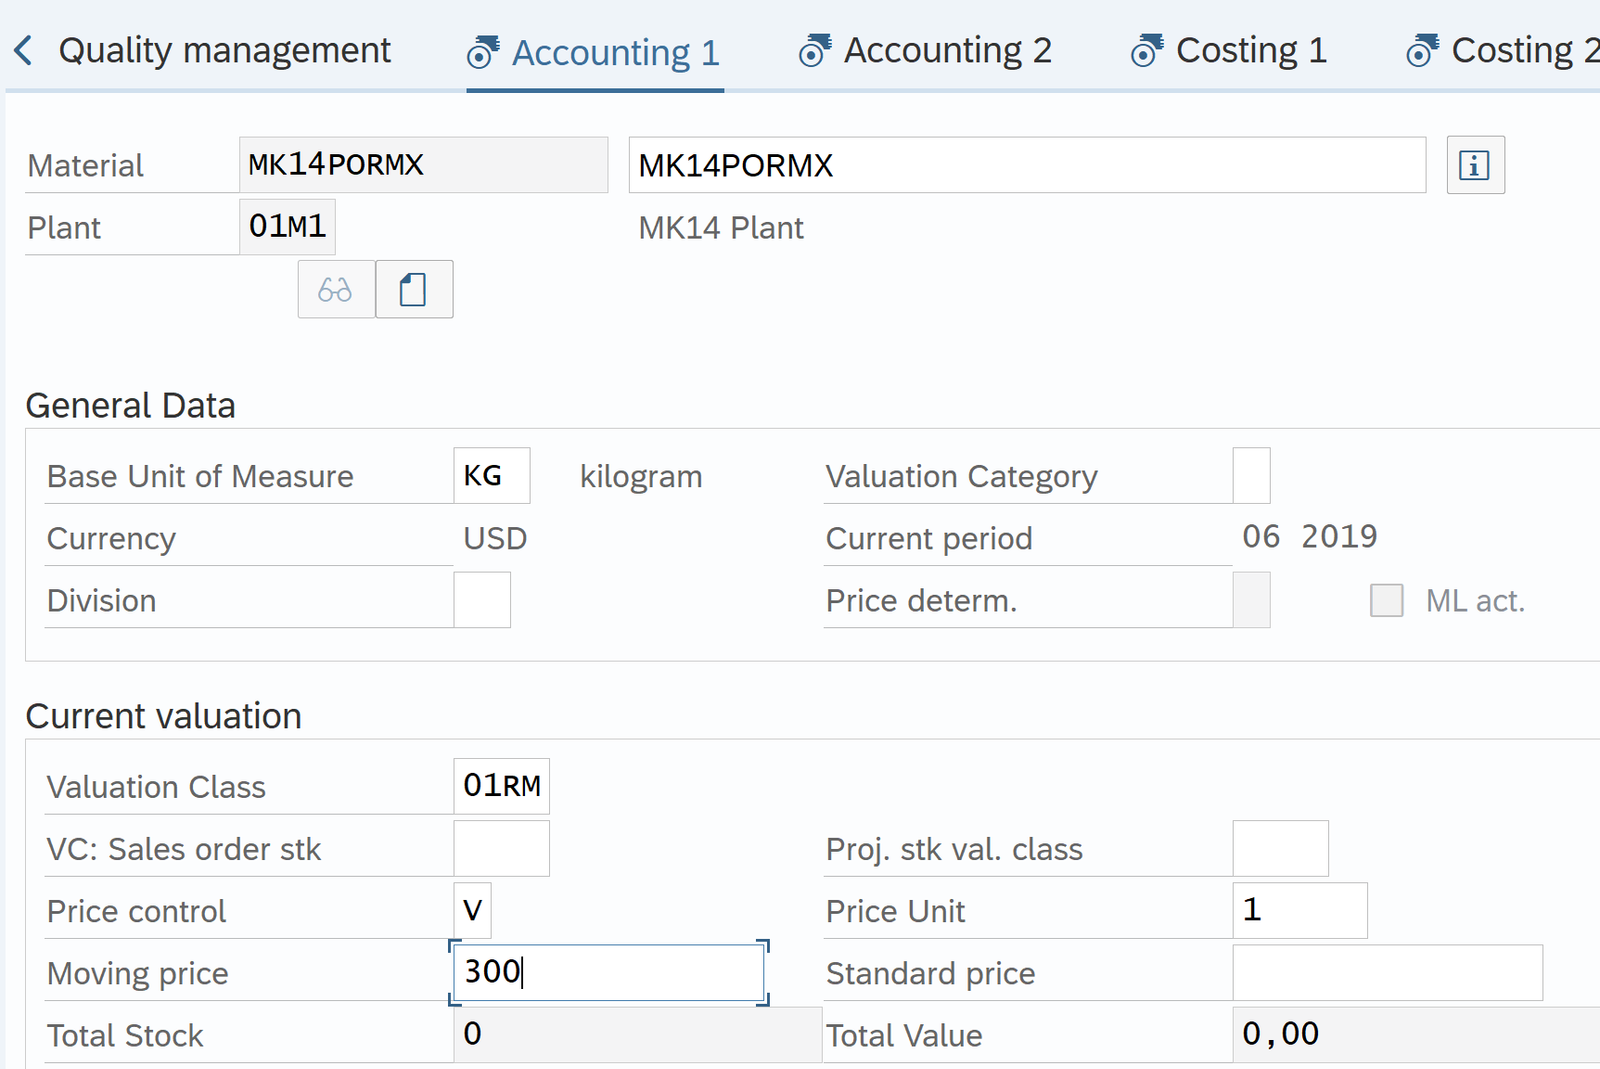
Accounting 1

  • Valuation Class: Determine GL account posted
  • Price Control
    • S: Standard cost. Used for FG
    • V: Moving average price. Used for Raw Material
  • Price Unit: Cost per Unit ( Units specified here)

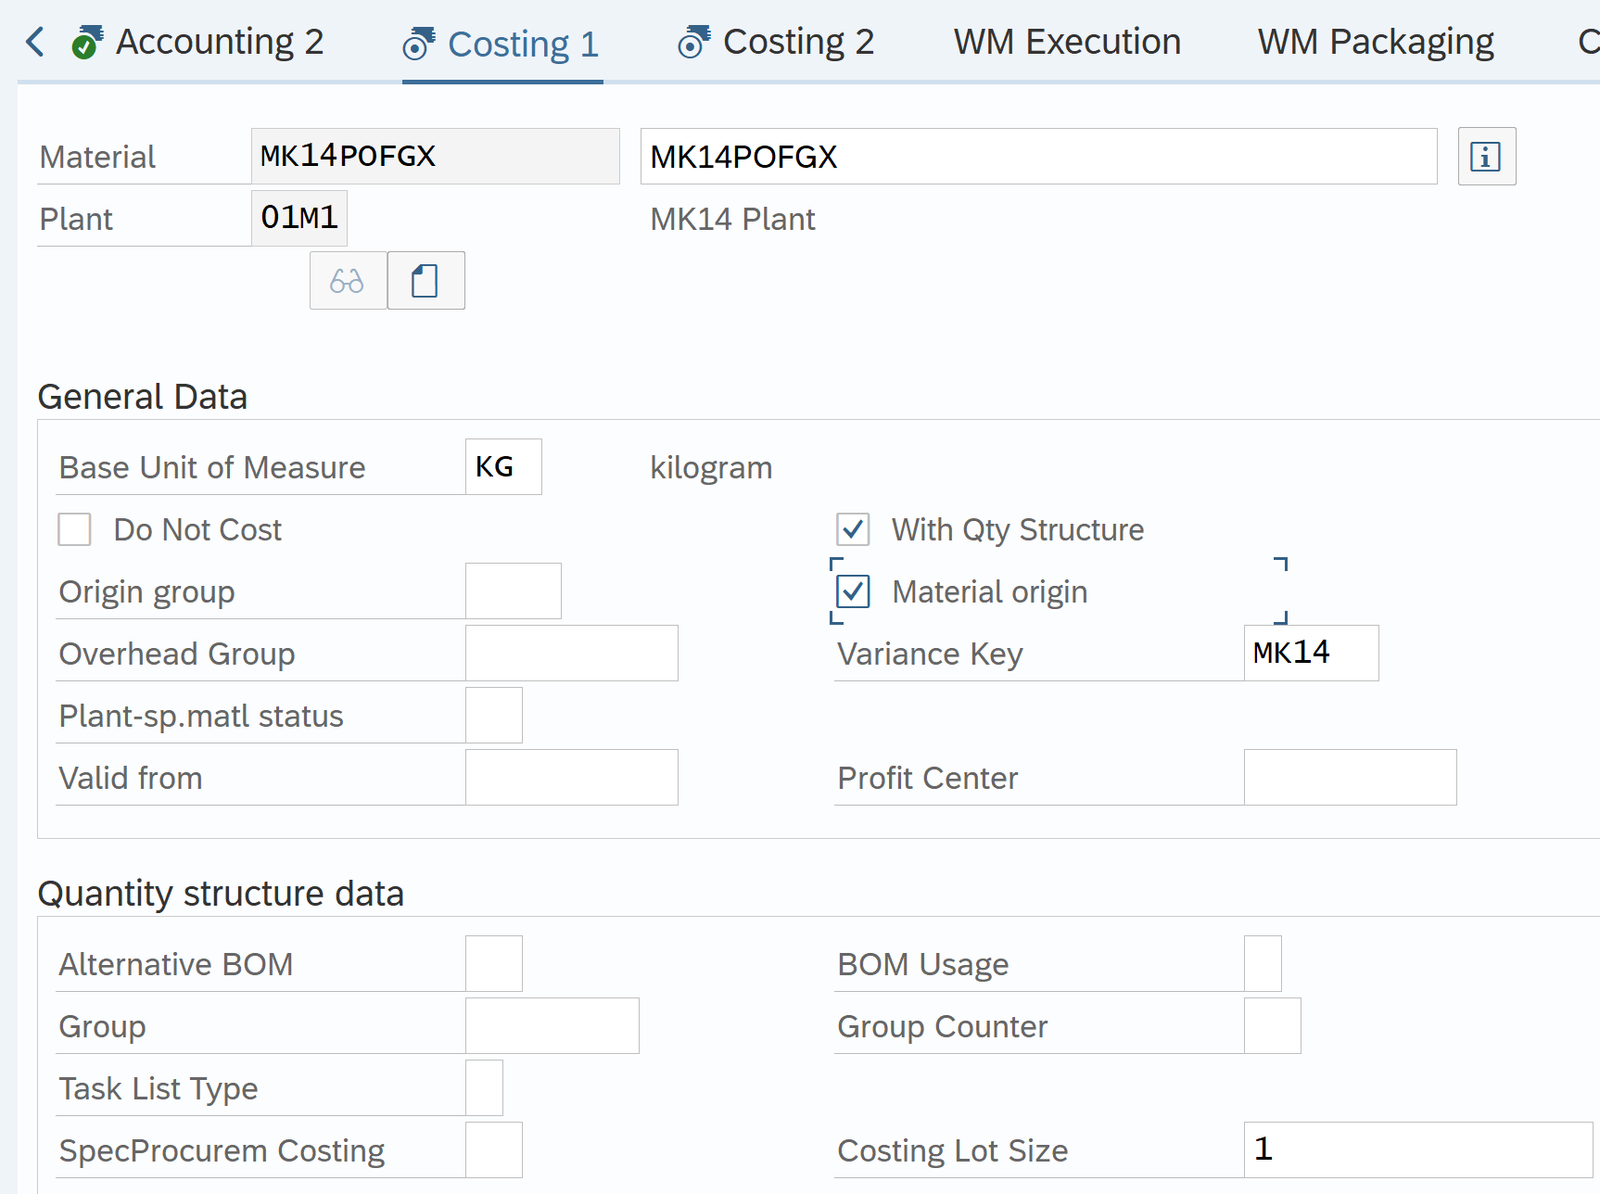
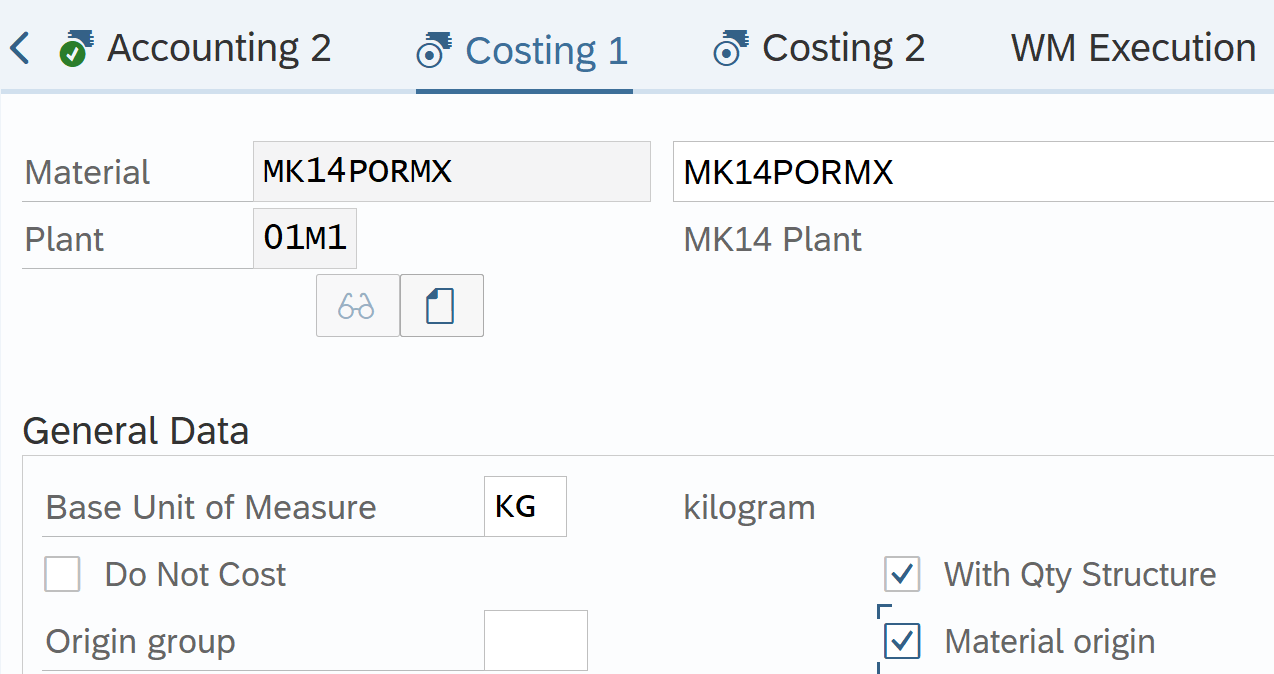
Costing 1

  • With Qty Structure: Selected for material costed with BOM + Routing
  • Material Origin: Select to display Material Number in controlling reports
  • Variance Key: Specify the one created earlier.
  • Costing Lot size

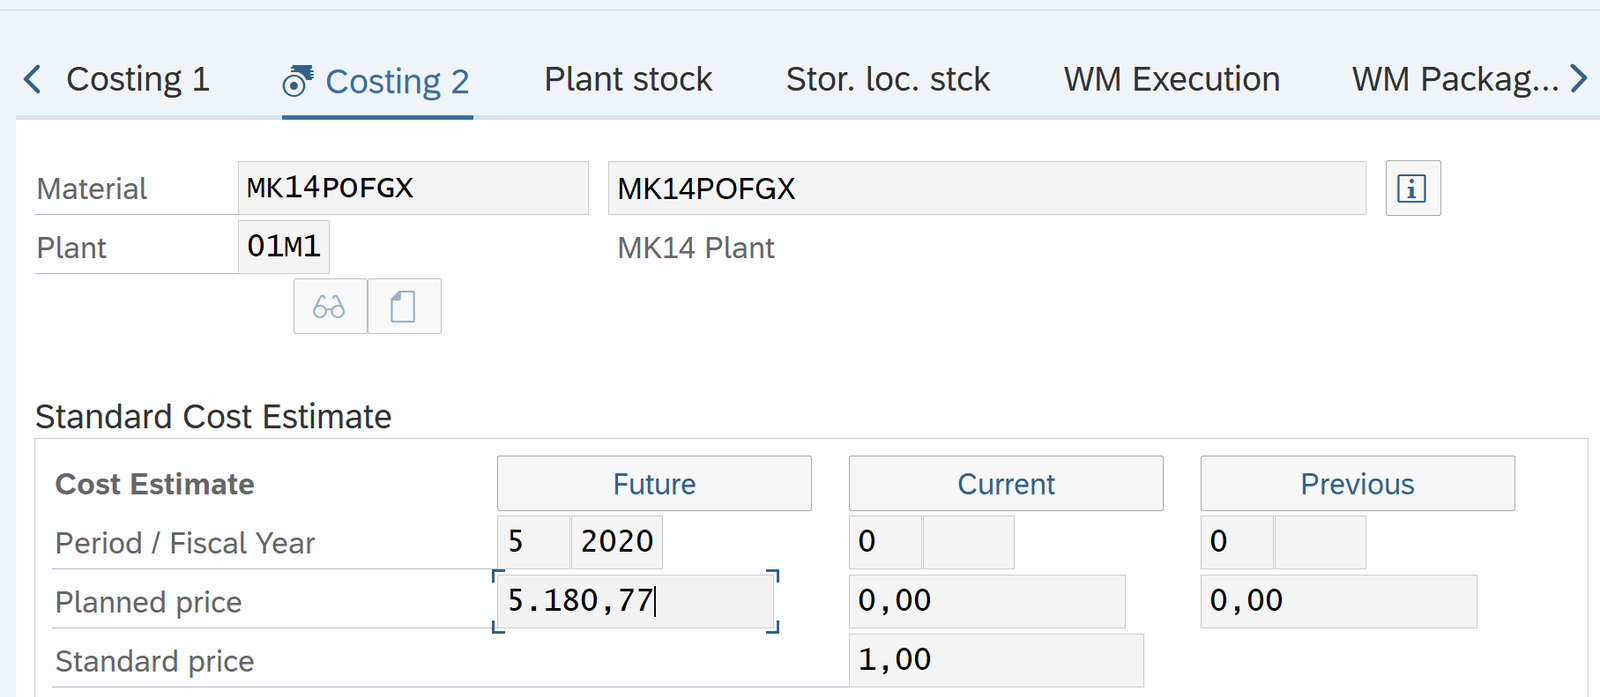
Costing 2

  • Future Price: Current market price
  • Current Price: Current Release Price


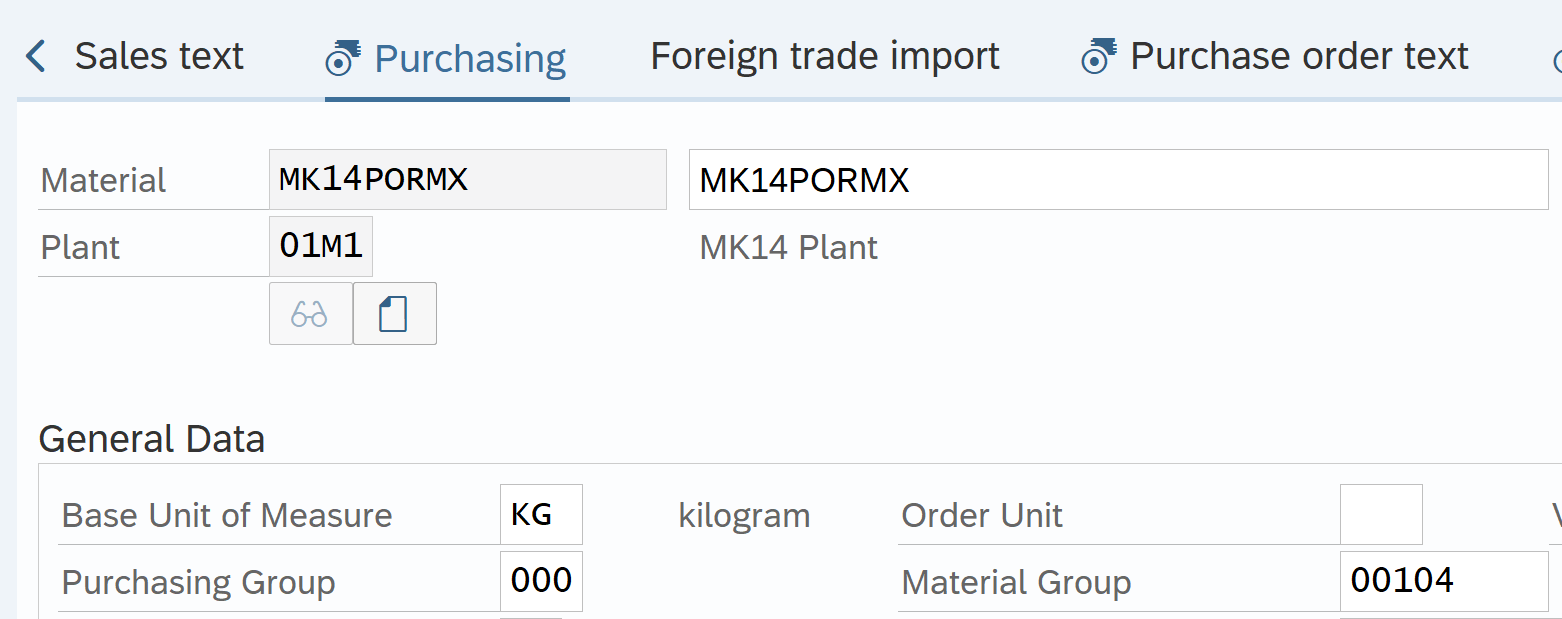
    1. Create Raw Material Master

Tcode: MM01

Material MK14PORMX created

Create MK14PORMY. Same as MK14PORMX

Material MK14PORMY created

Finished GoodsRaw material
MK14POFGXMK14PORMX
MK14PORMY

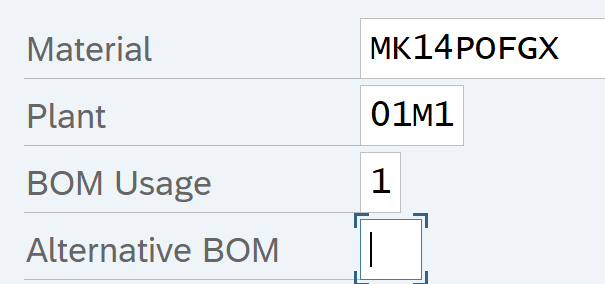
Create BOM

Tcode: CS01 / CS02 / CS03

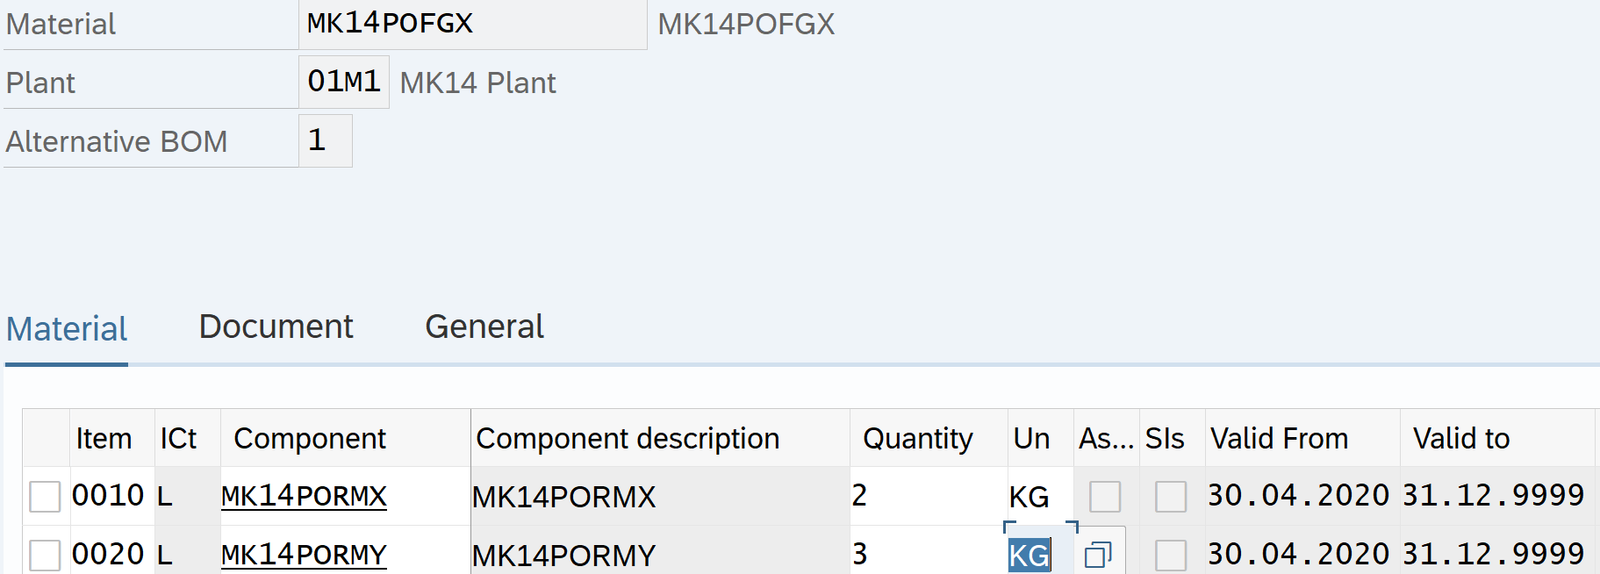
Create Finished Goods BOM (Bill of Material)

Above BOM => need 2 kg and 3 Kg of Raw material X and Y to manufacture 1 Kg of FG

Routing

RoutingSetup ActivityMachine ActivityLabor ActivityWork Center
Operation 10123WC 1
Operation 201 2WC 2

Routing is a list of Operations performed on Raw material to convert it into FG. These operations are performed at locations called work centers.

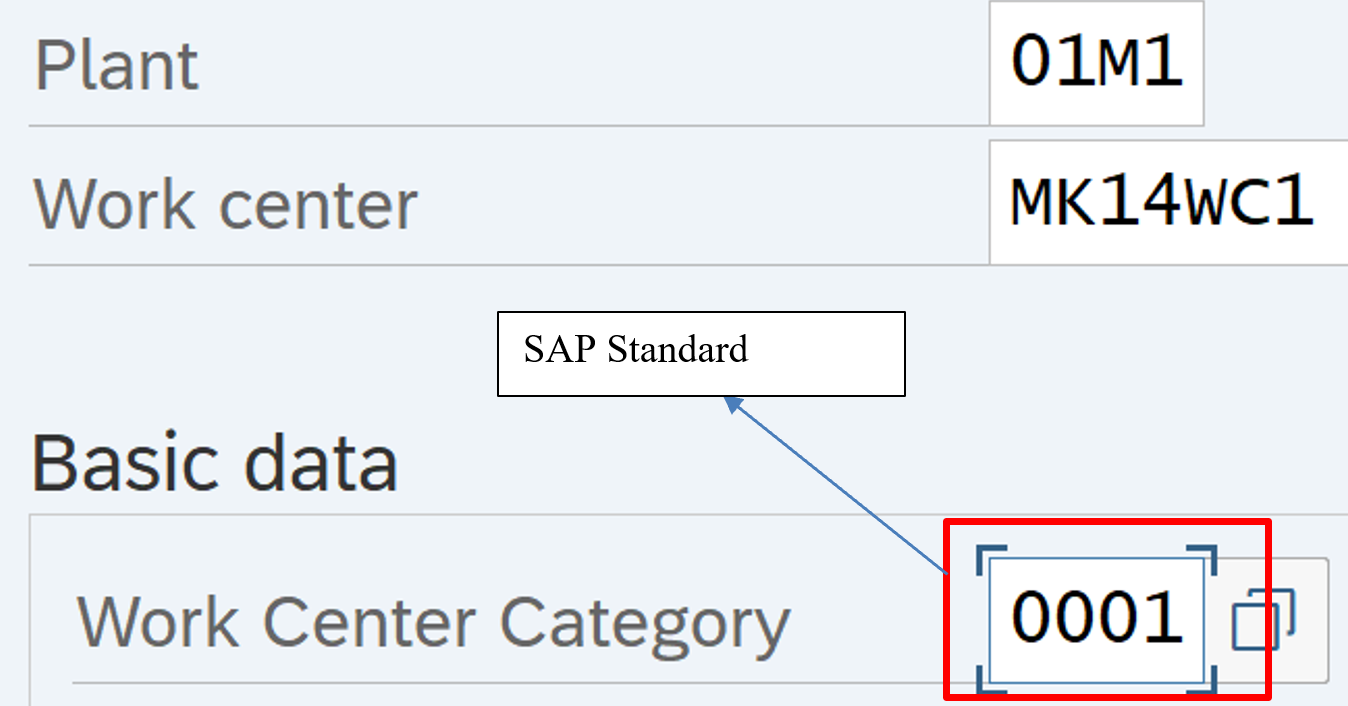
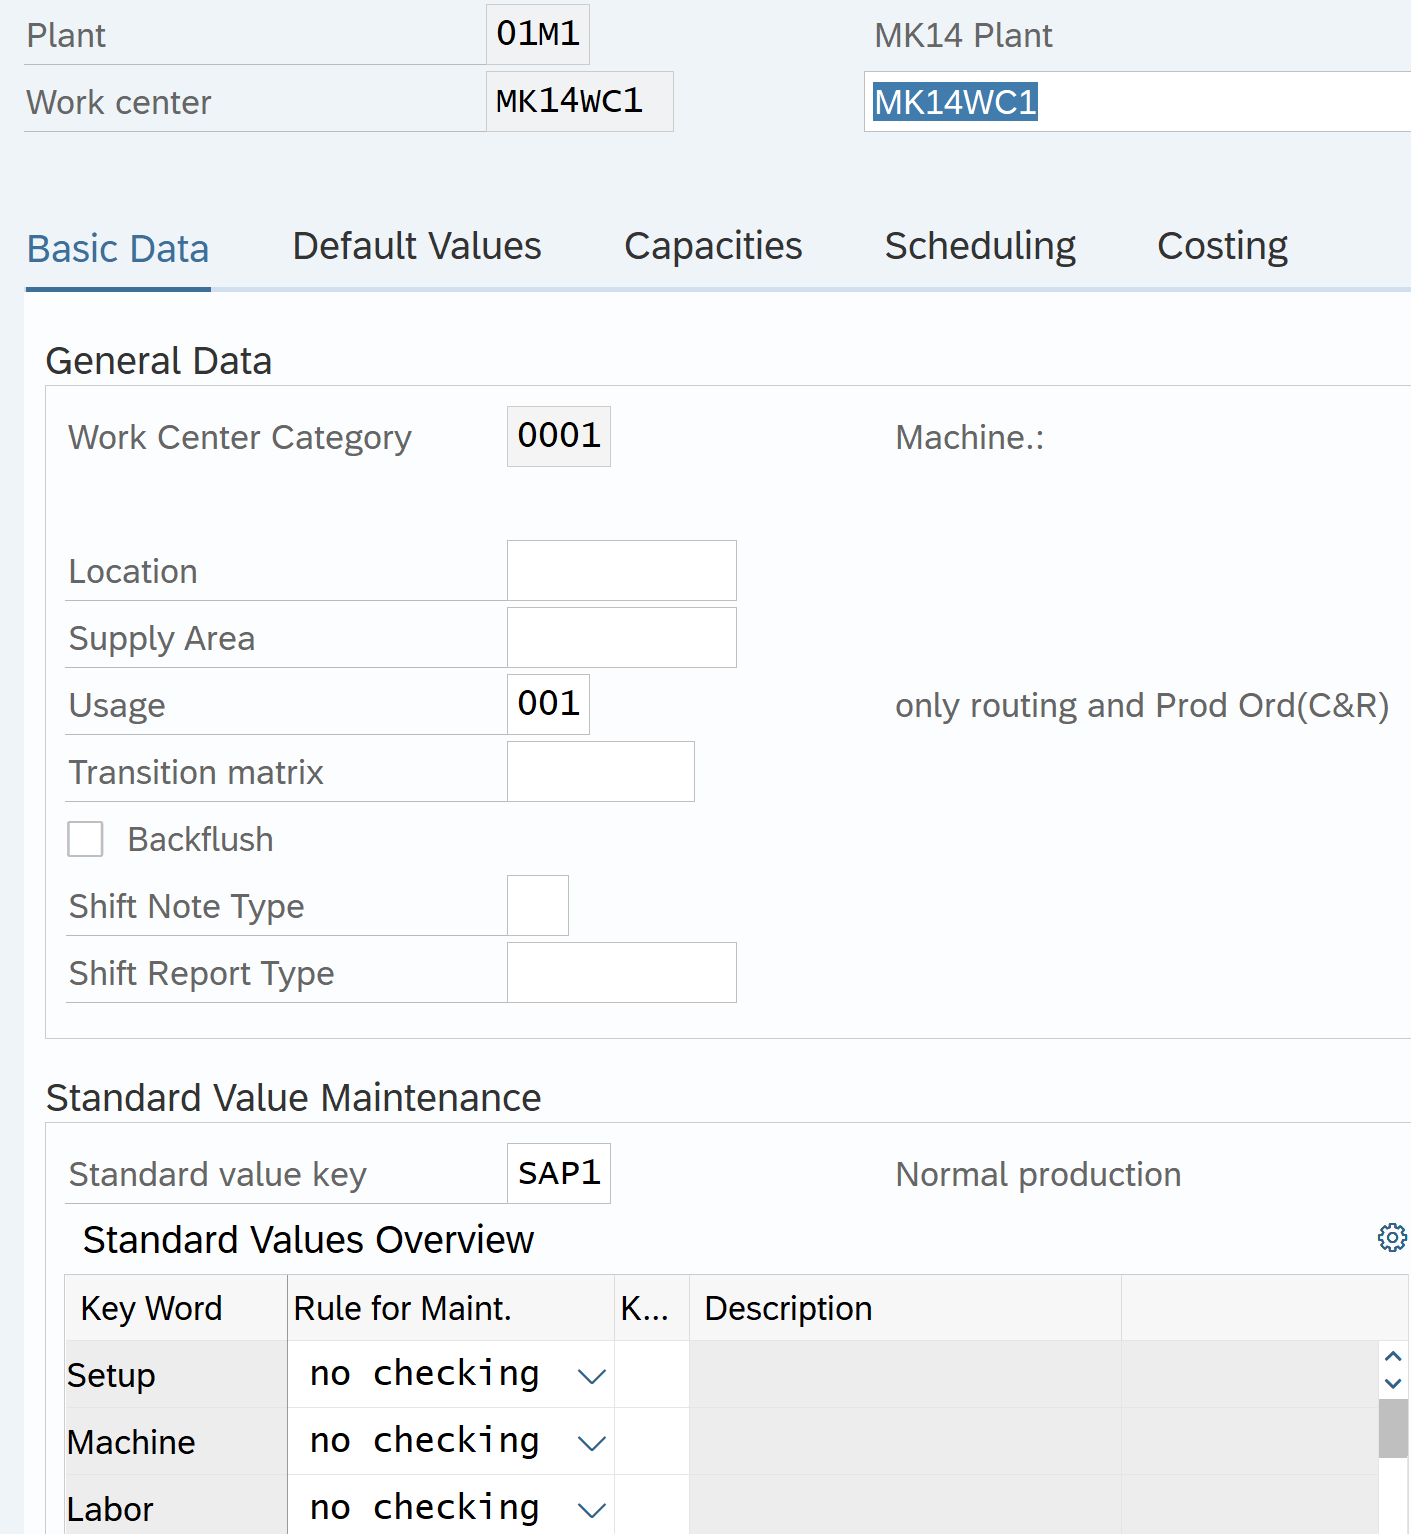
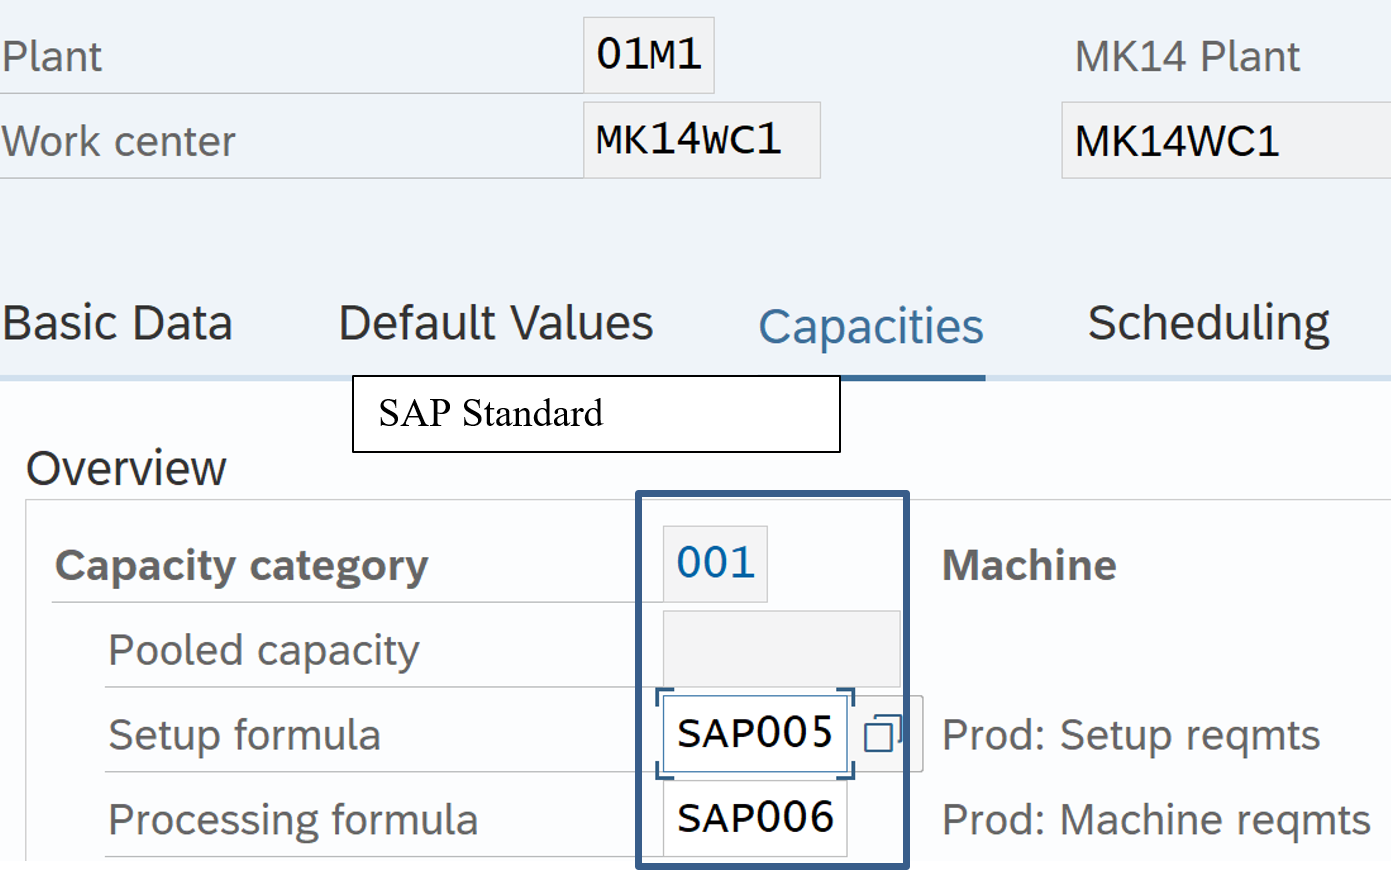
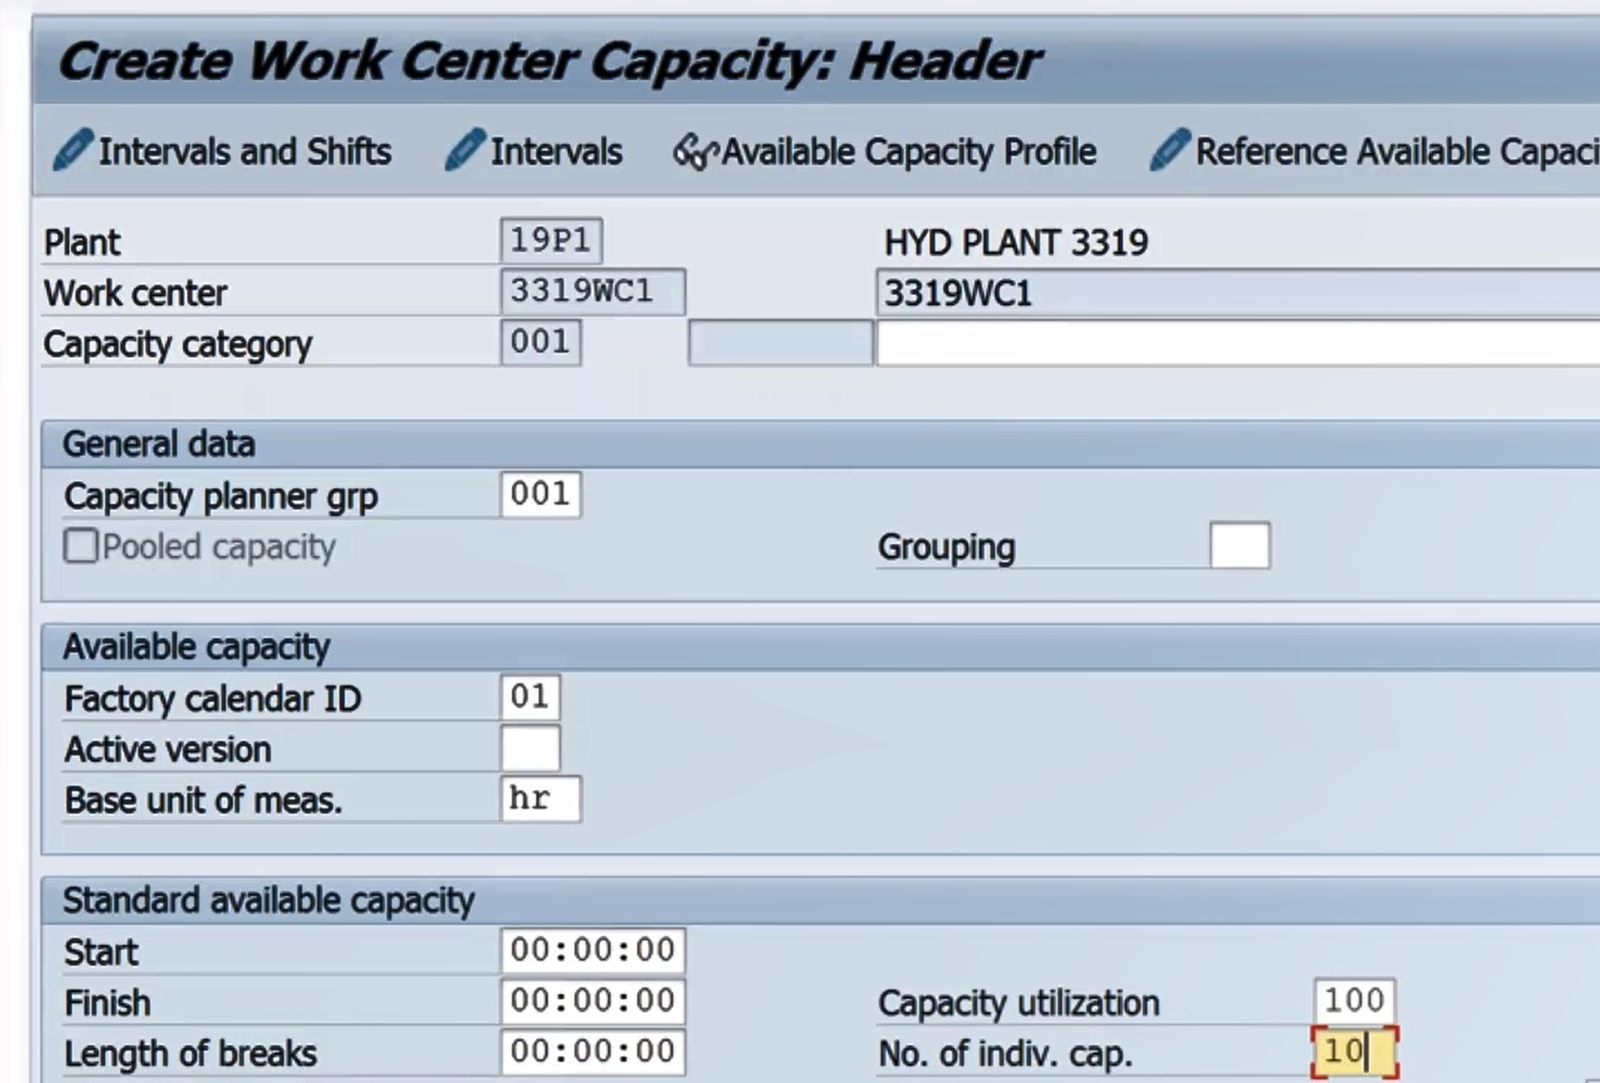
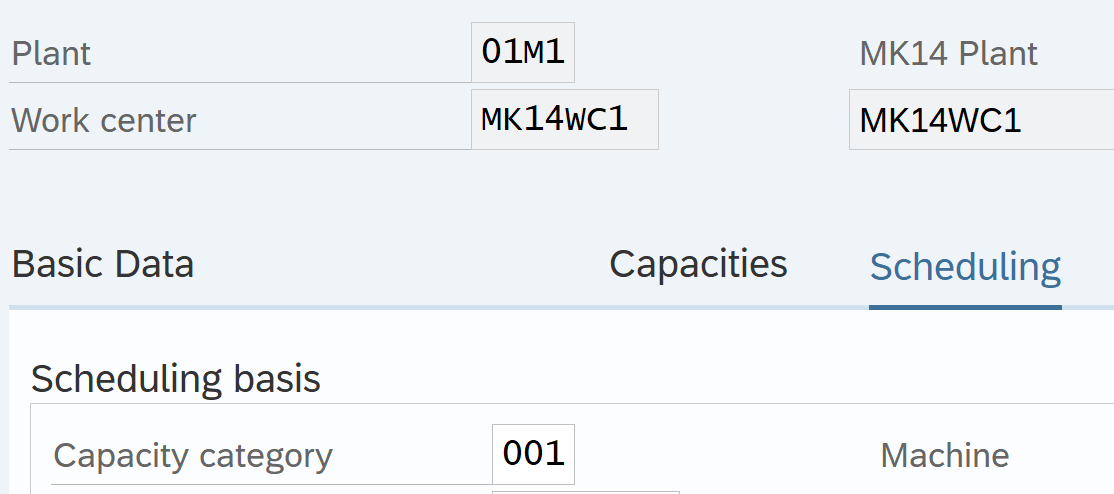
Create Work Center

Tcode: CR01

To hide Person responsible field, go to OPFA – Basic Data – P3000-VERAN – Hide

SAP Default

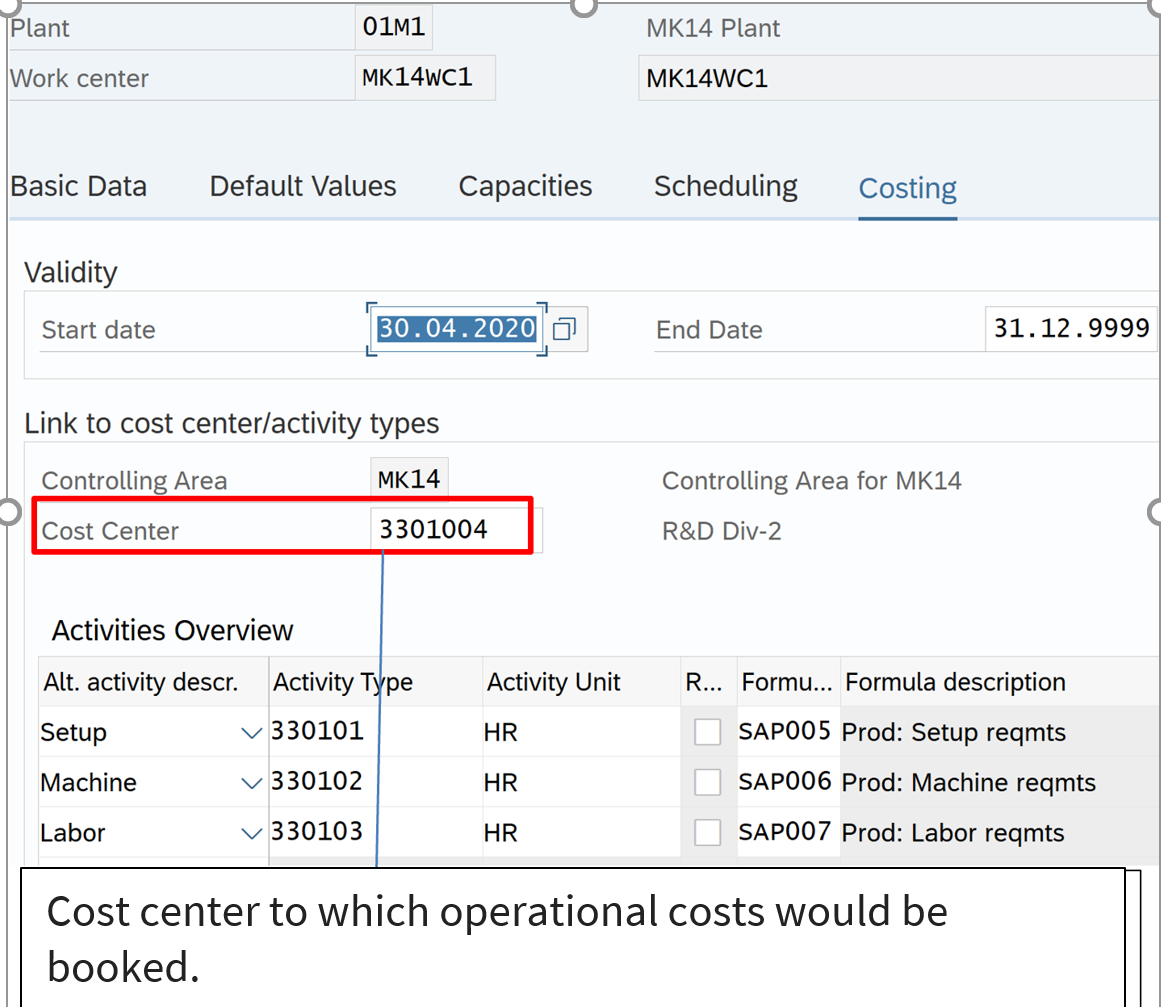
Below screen appears when press enter on earlier screen

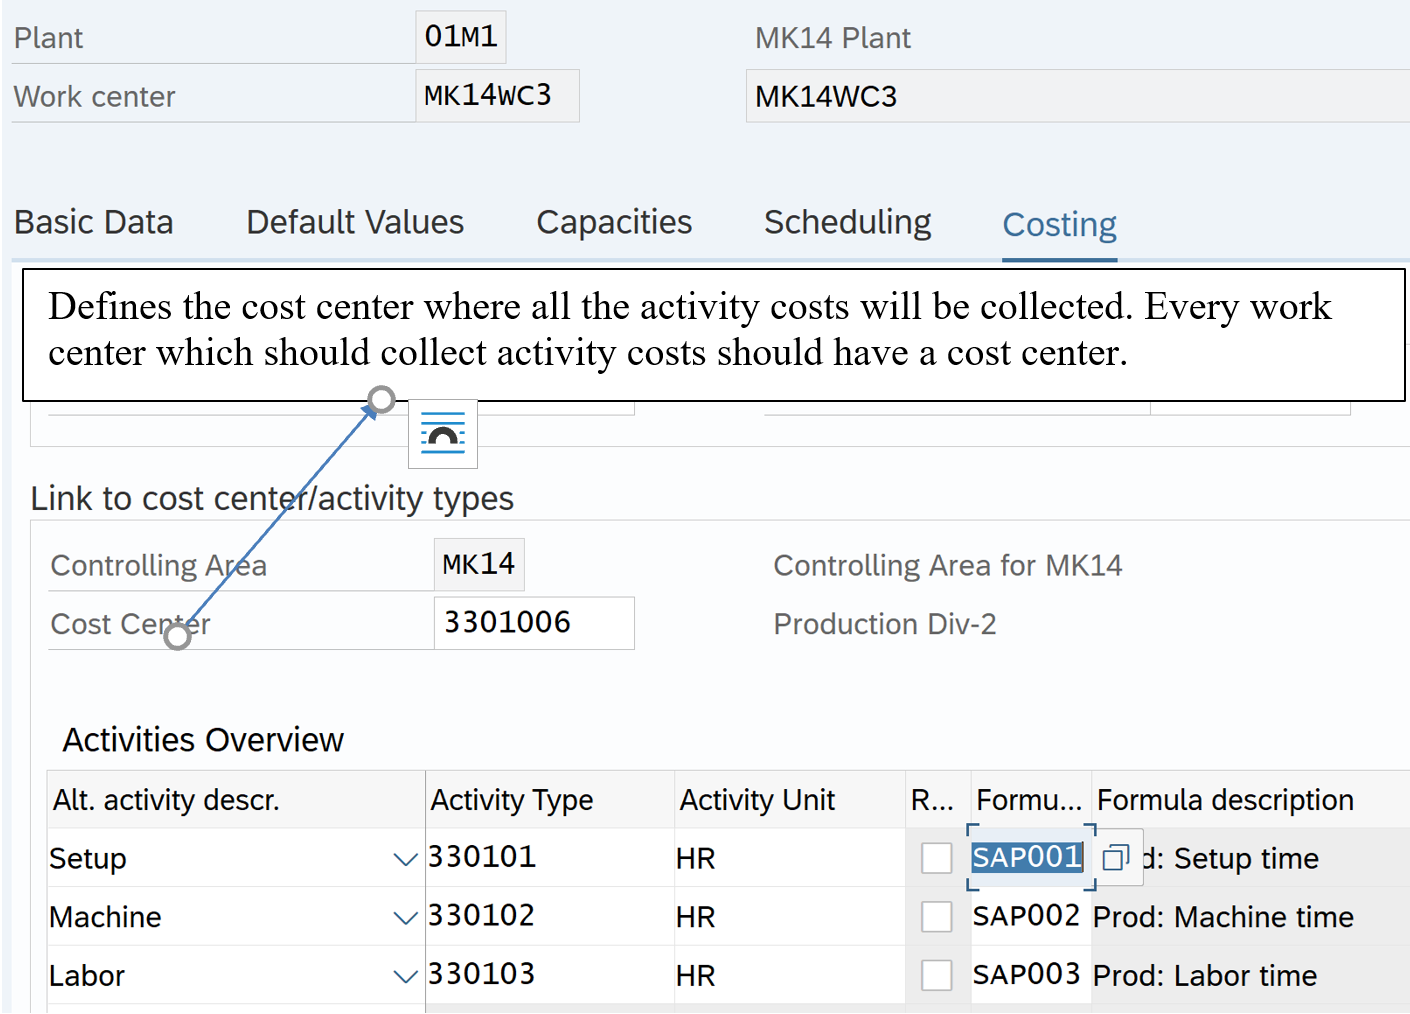
Cost center to which operational costs would be booked.

Similarly create work center 2 and WK Center 3: MK14WC2

Work center MK14WC2 in plant 01M1 was created

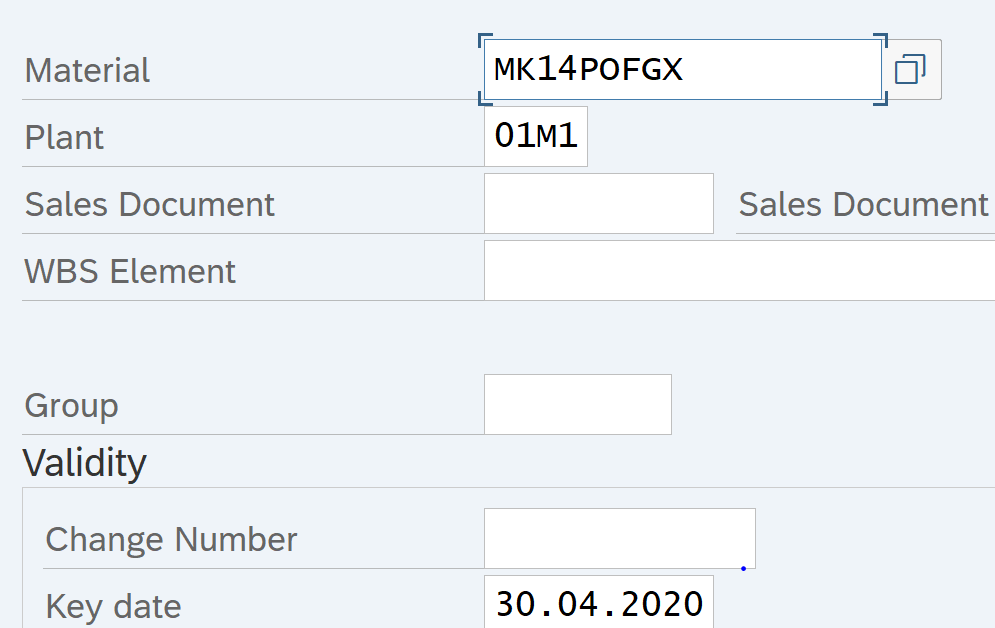
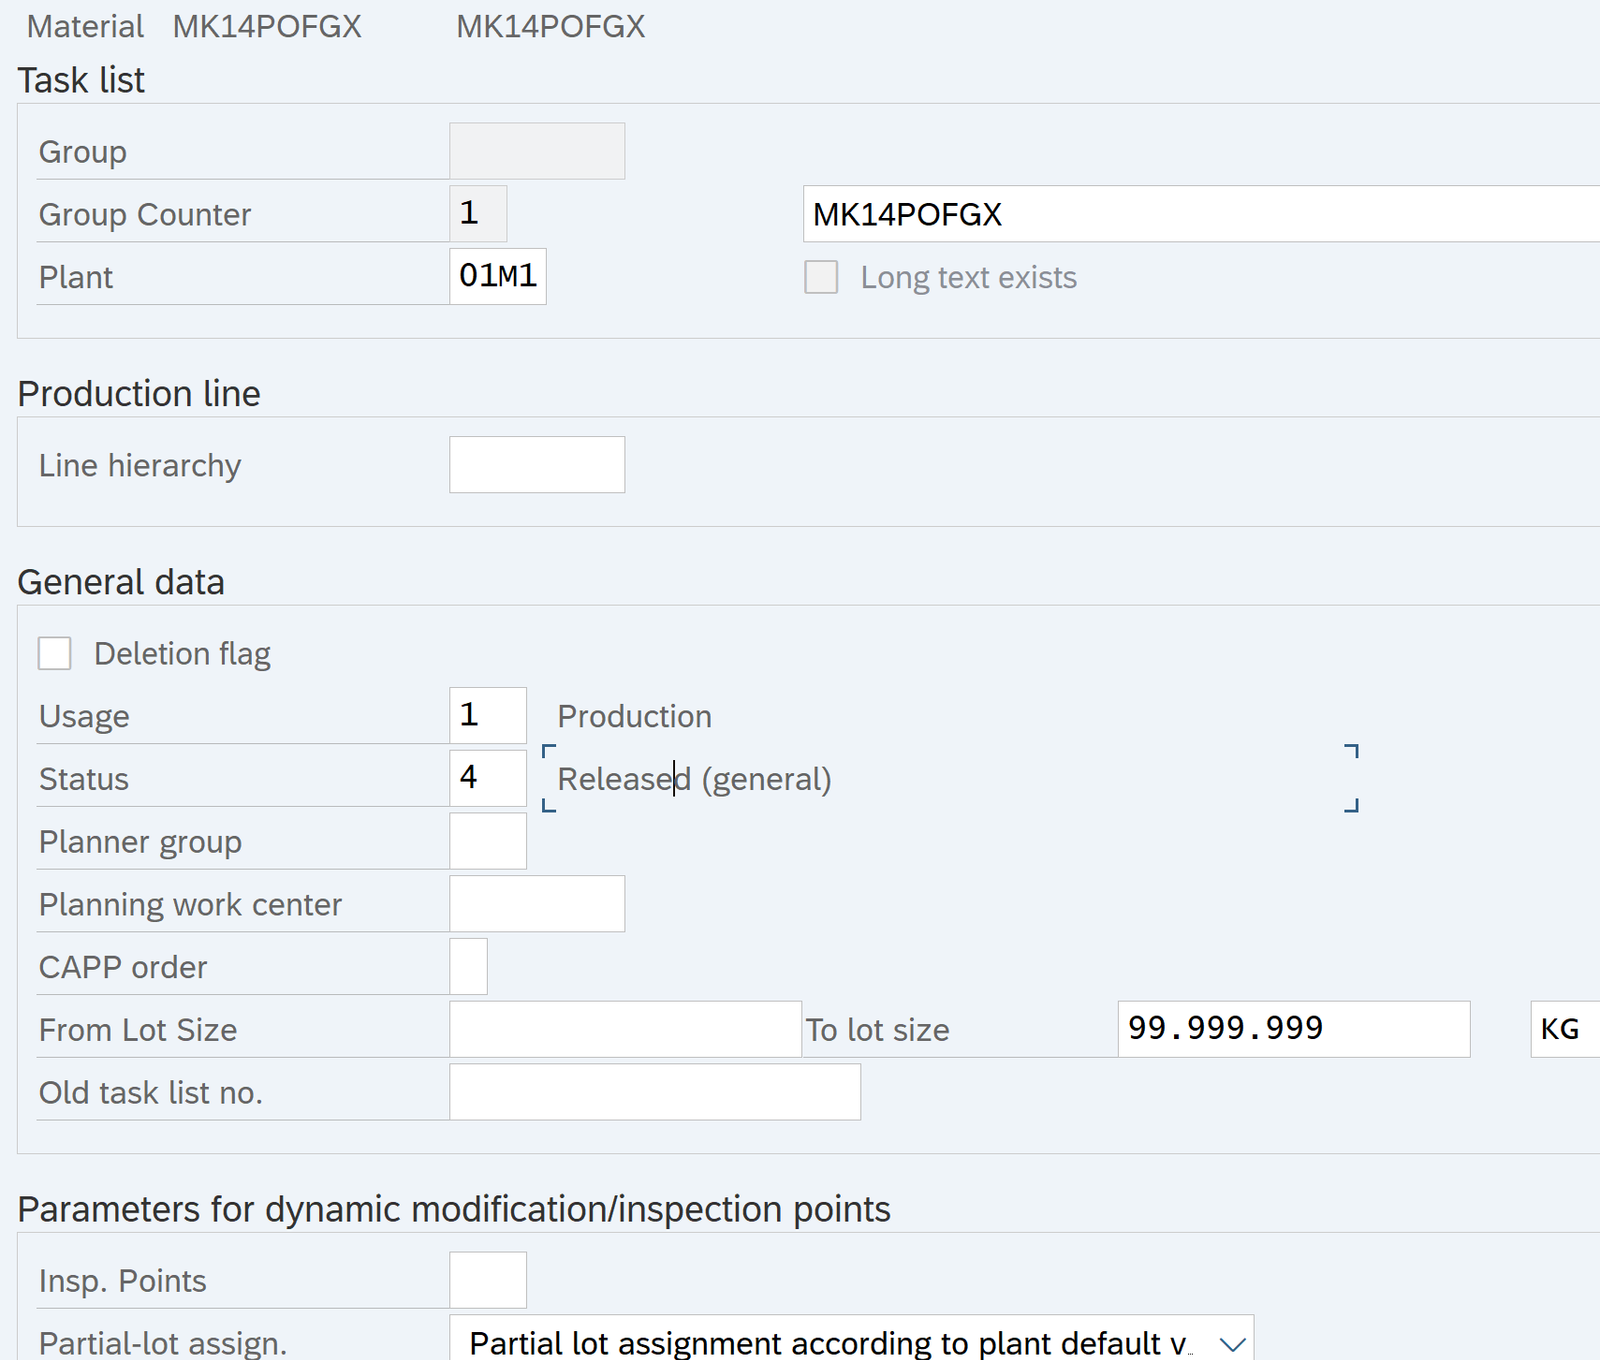
Create Routing

Tcode: CA01

Click Operations tab and enter below data

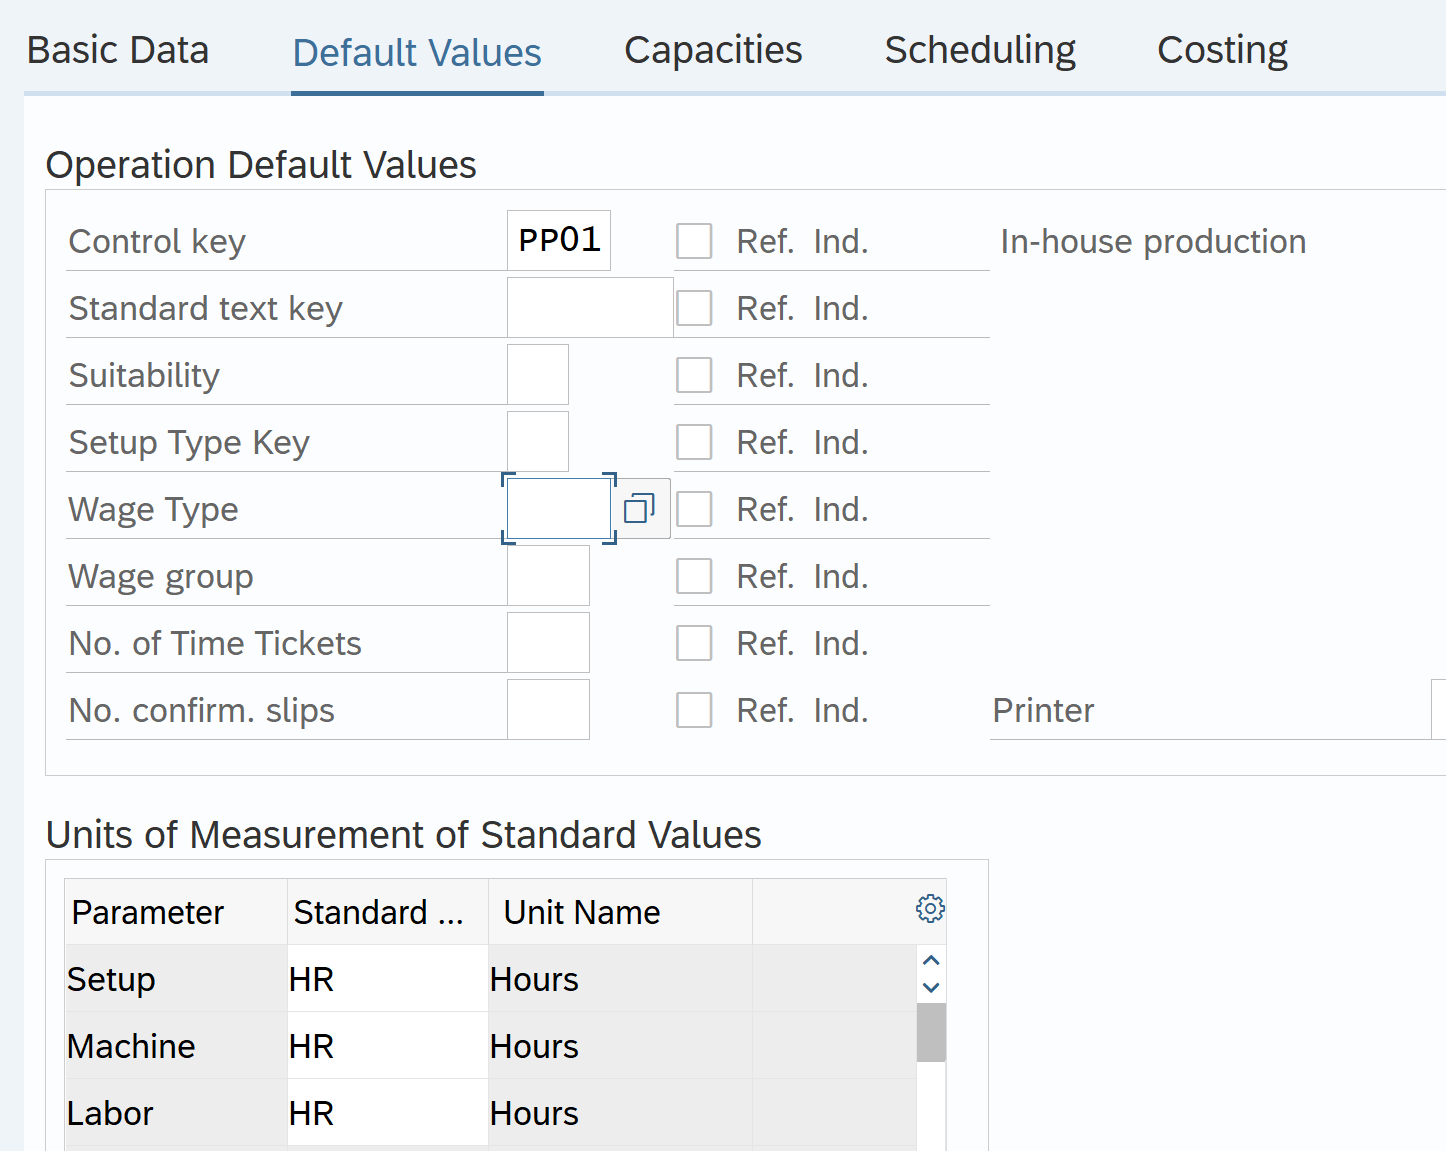
  • Control Key PP01: SAP standard for In House Production. Populated from work center
  • Base Unit 1: Quantity of finished goods (MK14POFGX) that will be produced by applying these operations in the work center
  • MK14WC1: Work Center 1. Will perform 1 hour of Setup activity, 2 hour of Machine activity and 3 hours of labor to produce one unit of FG
  • Similarly, for MK14WC2 and MK14WC3

Routing was saved with group 50001604 and material MK14POFGX.

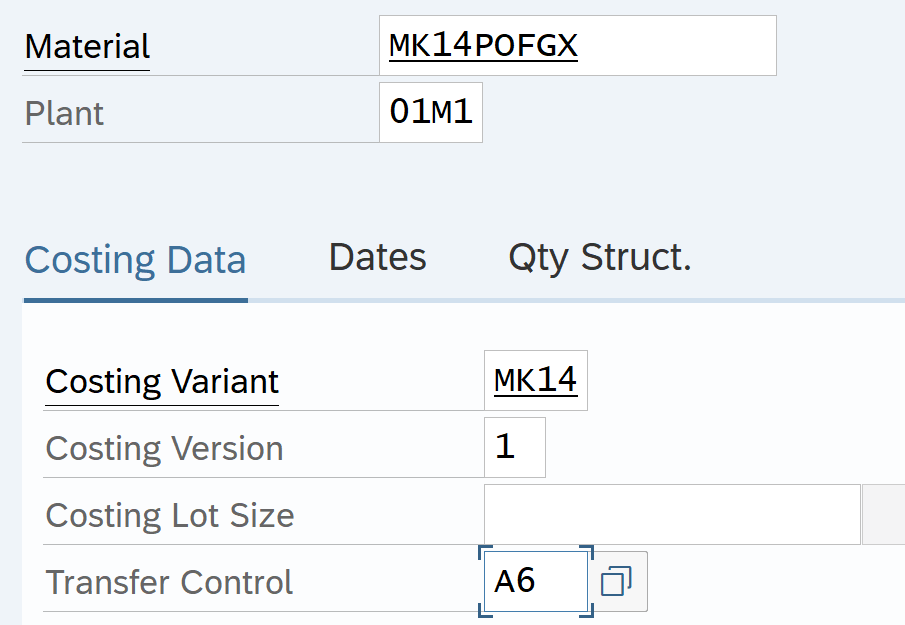
Create Standard Cost

Tcode: CK11N

BOM : CS01 
FGXKg
RMX2
RMY3
Routing: CA01Setup ActivityM/C ActivityLabor ActivityWork Center
Operation 10123WC 1
Operation 2012WC 2
 
Std Cost Estimation
Raw MaterialKgAvg PriceTotal
RMX2300600
RMY34001200
Total Price RMX +RMY1800
Operation 10 (Price from KSBT)HoursRate/Hr/EURTotal
Setup1470470
Machine2294588
Labor3285855
Total Price OP 101913
Operation 20
Setup
Machine1294294
Labor2285570
Total Price OP 20864
OH (Valuation variant : OKKN)
MOH10%1800180
AOH15%2777417
Total OH Price / Kg597
Standard Cost Estimation for 1 Kg5174

Create Standard Cost Estimate

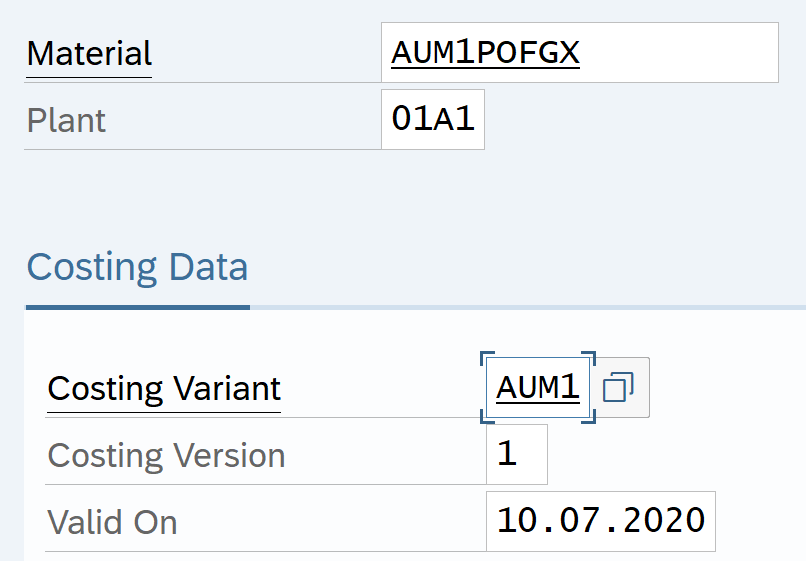
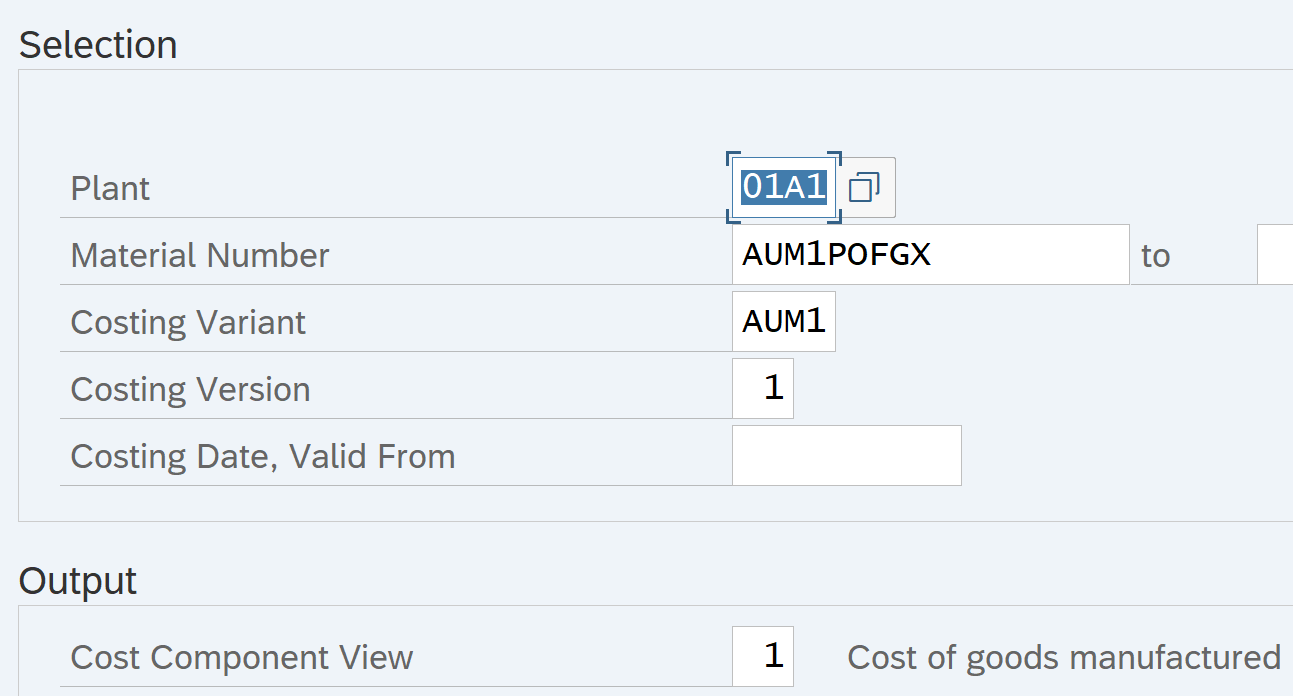
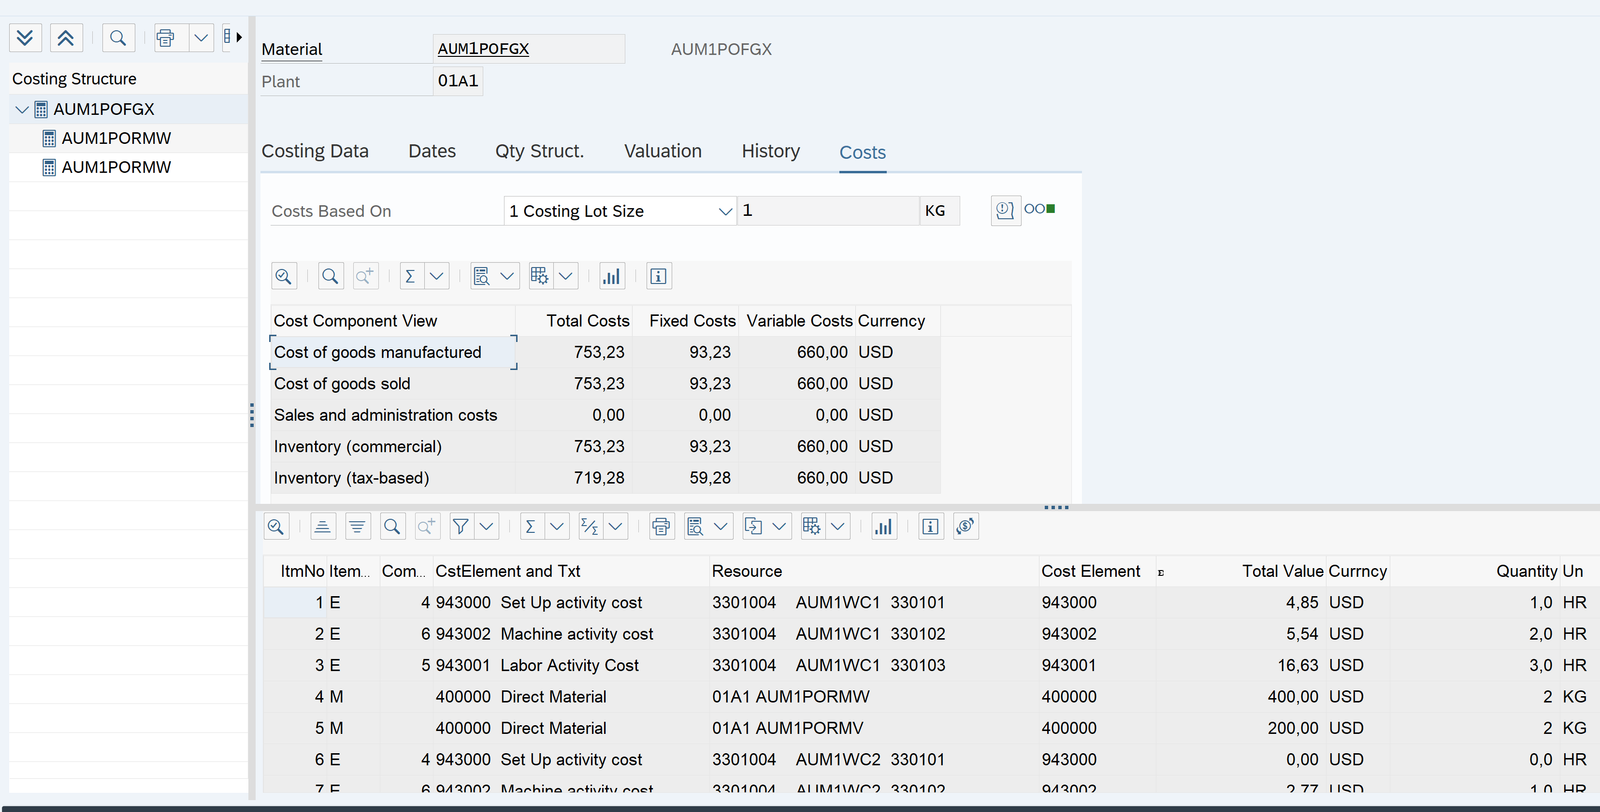
Tcode: CK11N

Select for detailed itemized view

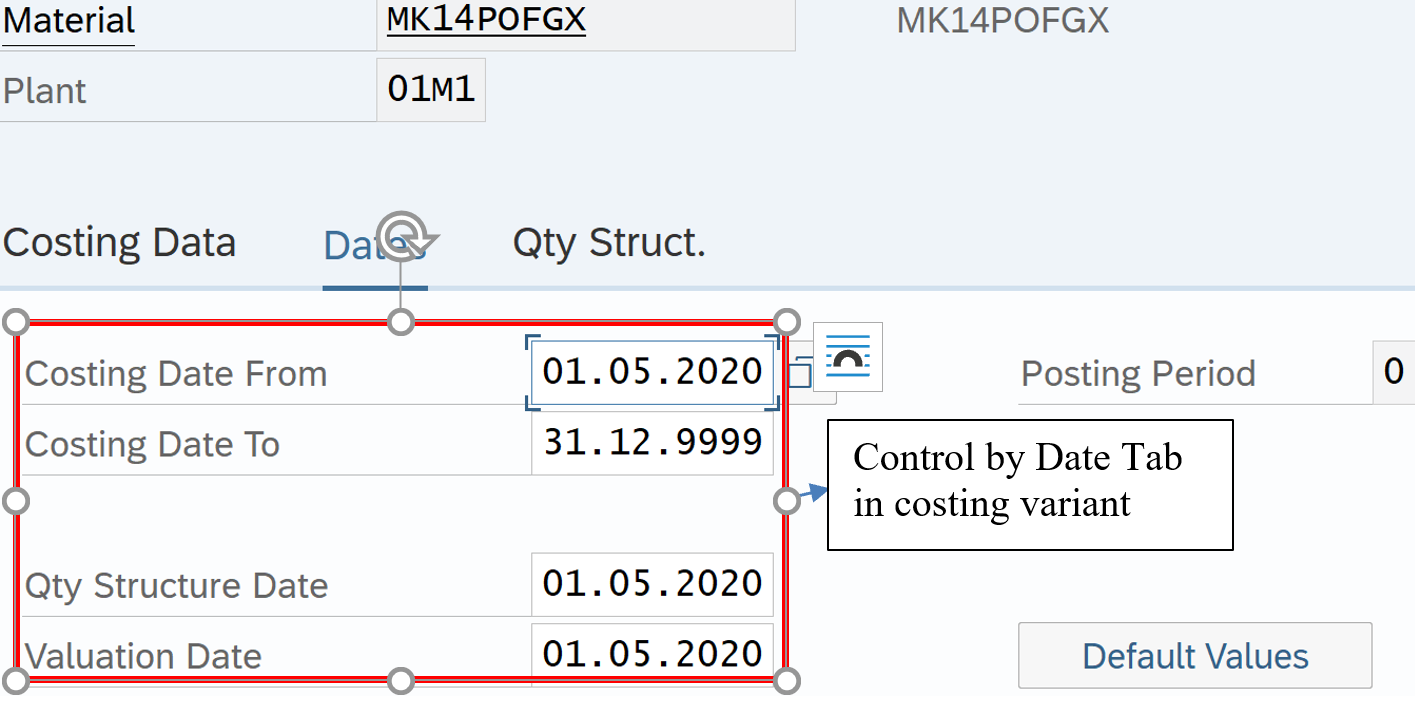
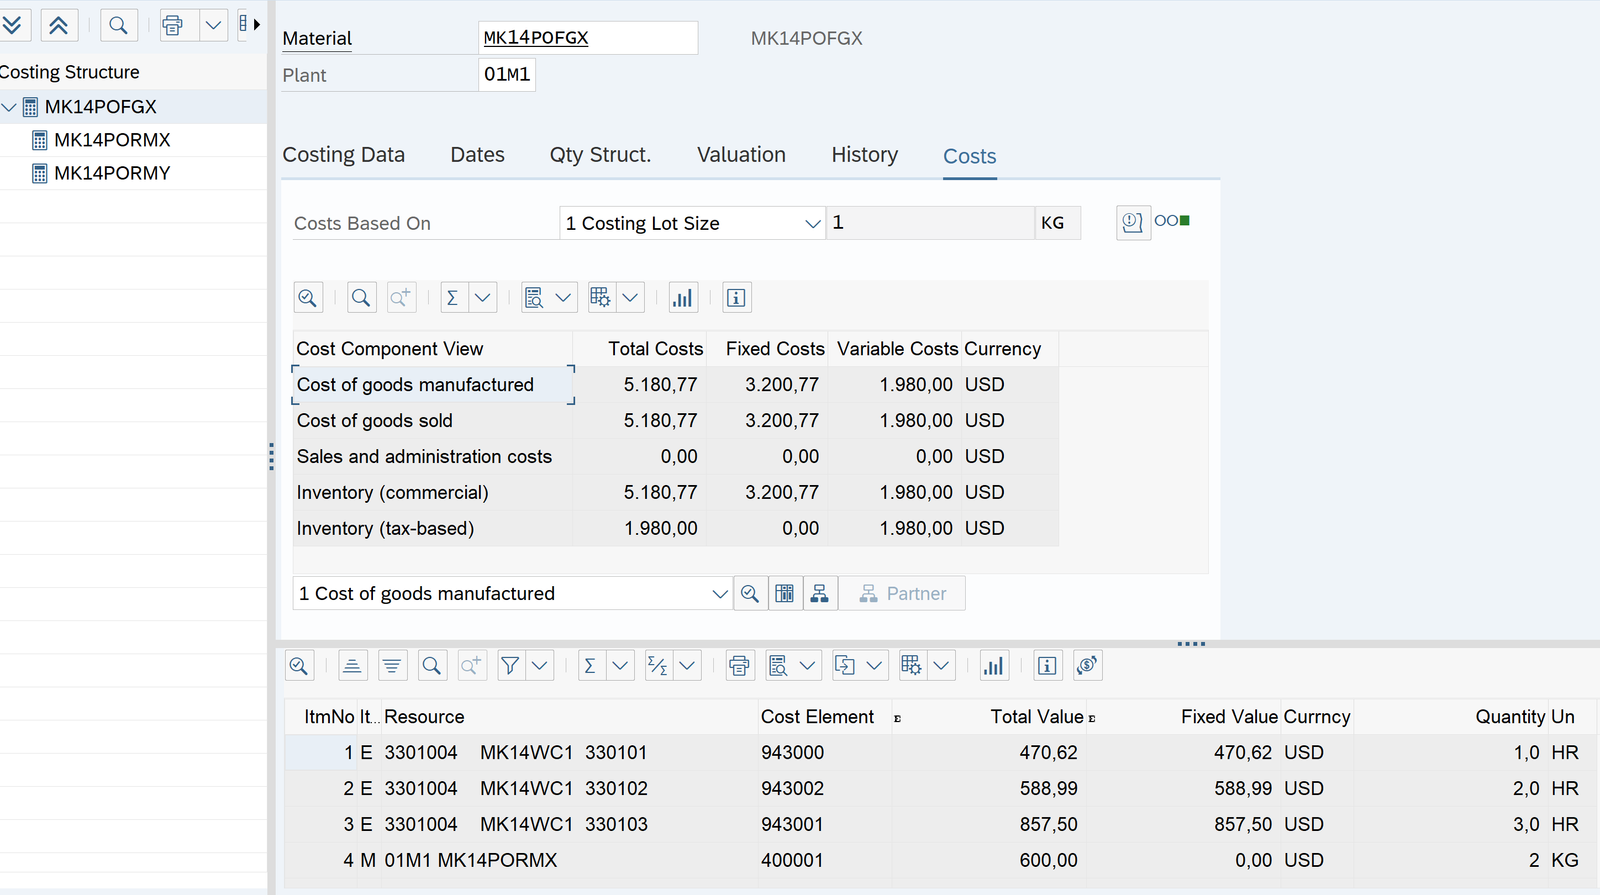
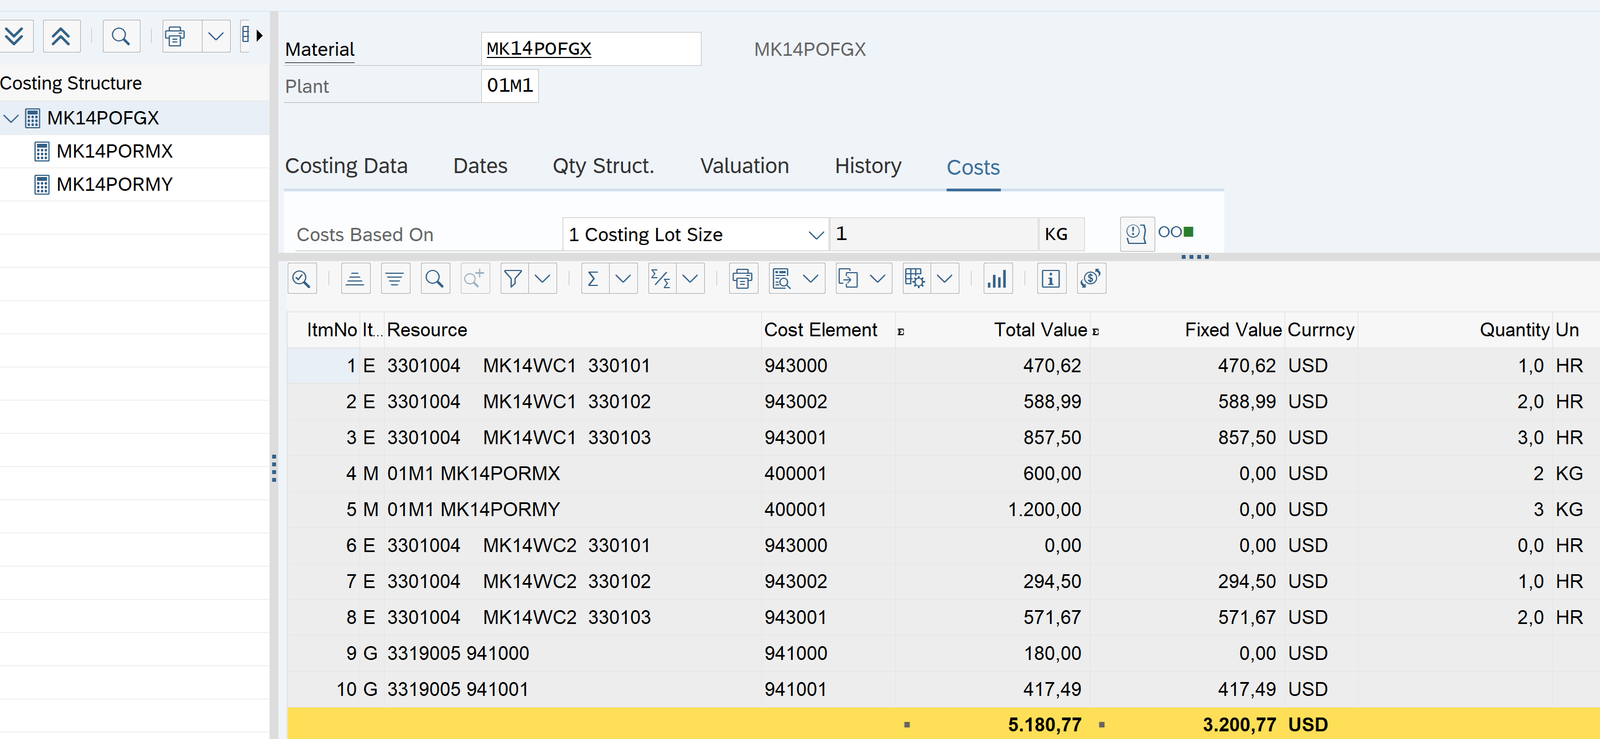
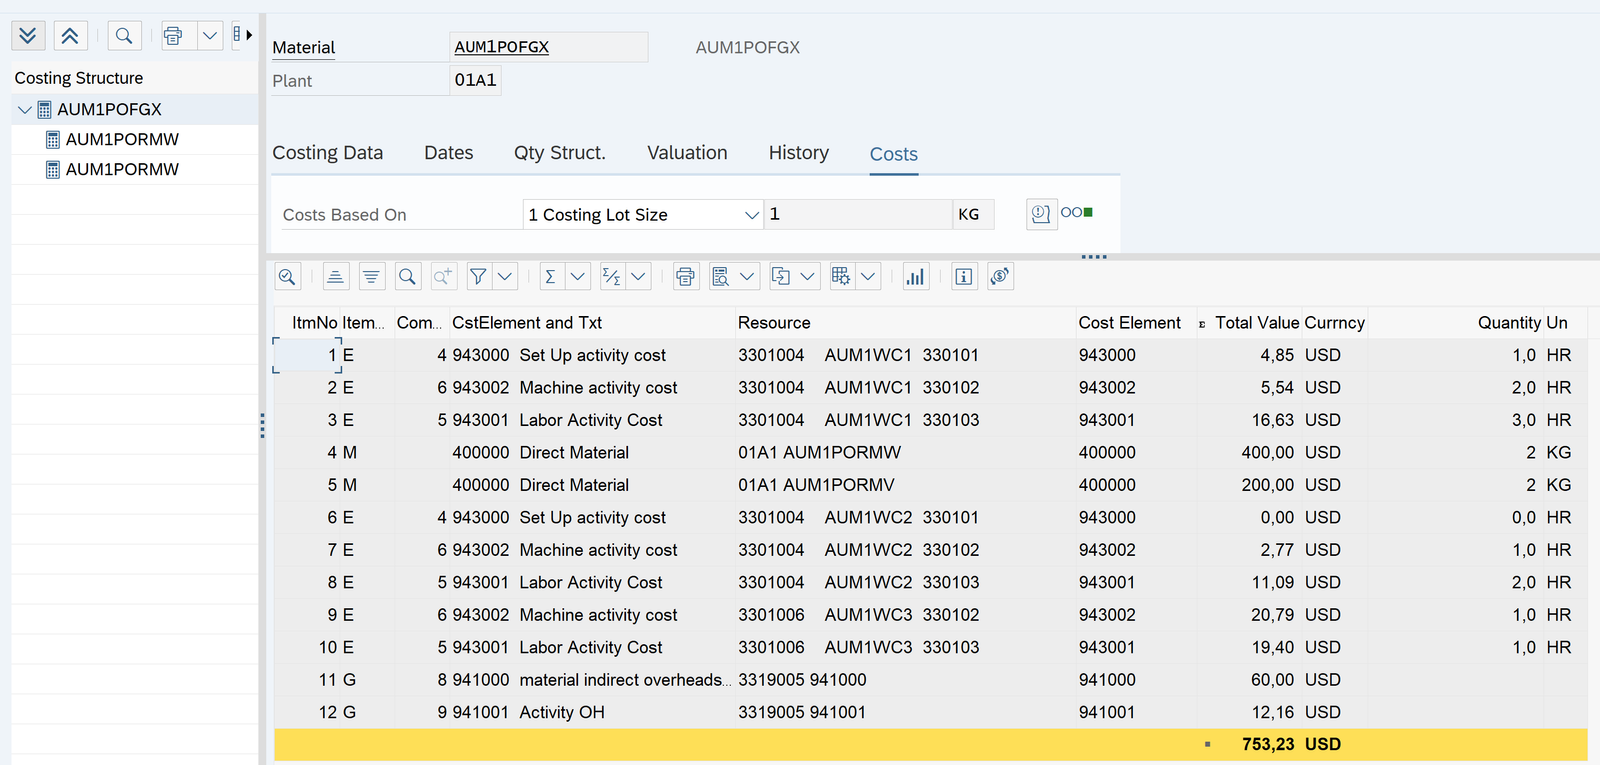
Itemized Product Cost

Calculated Value in the excel

BOM : CS01 
FGXKg
RMX2
RMY3
Routing: CA01Setup ActivityM/C ActivityLabor ActivityWork Center
Operation 10123WC 1
Operation 2012WC 2
 
Std Cost Estimation
Raw MaterialKgAvg PriceTotal
RMX2300600
RMY34001200
Total Price RMX +RMY1800
Operation 10 (Price from KSBT)HoursRate/Hr/EURTotal
Setup1470470
Machine2294588
Labor3285855
Total Price OP 101913
Operation 20
Setup
Machine1294294
Labor2285570
Total Price OP 20864
OH (Valuation variant : OKKN)
MOH10%1800180
AOH15%2777417
Total OH Price / Kg597
Standard Cost Estimation for 1 Kg5174

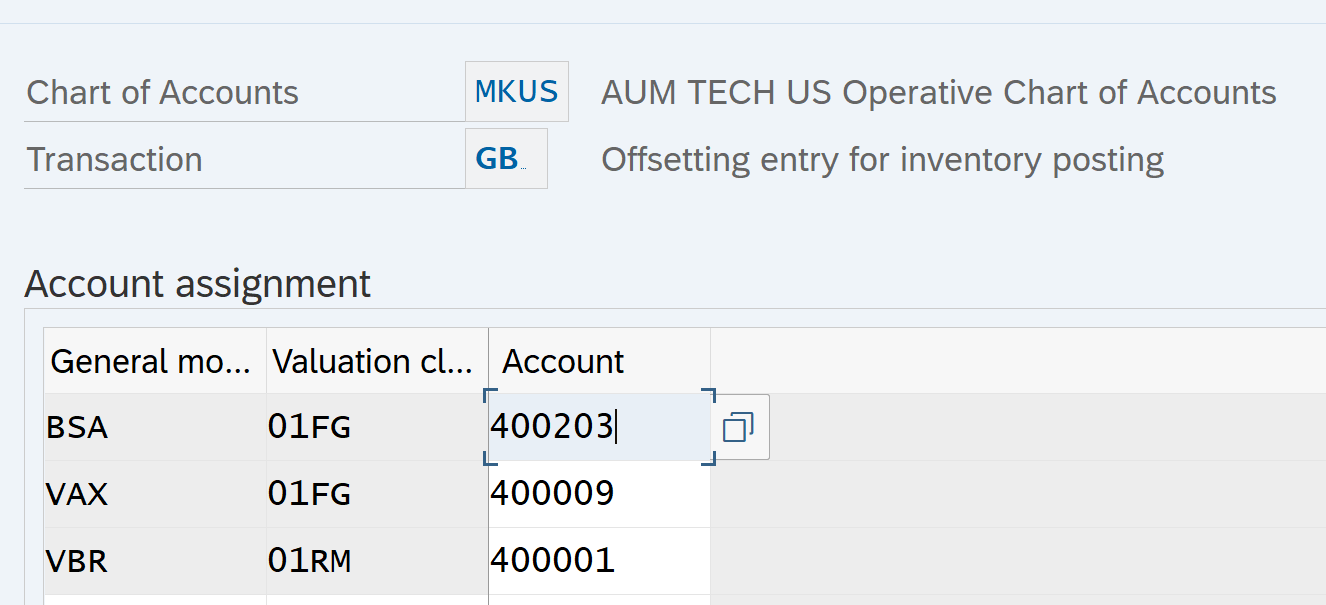
If error add below entries in OBYC – GBB

KSBT

Per Unit price match

330101Set Up activity cost470
330102Machine activity cost294
330103Labor activity cost285

Prl: 1 : Planned Price

Prl 5: Actual Price

OKTZ ( Cost Component Structure to check errors)

If error in log don’t save. Material can be re costed. It cannot be re costed after saving

Mark and Release Standard Cost Estimation

Transaction code: CK24

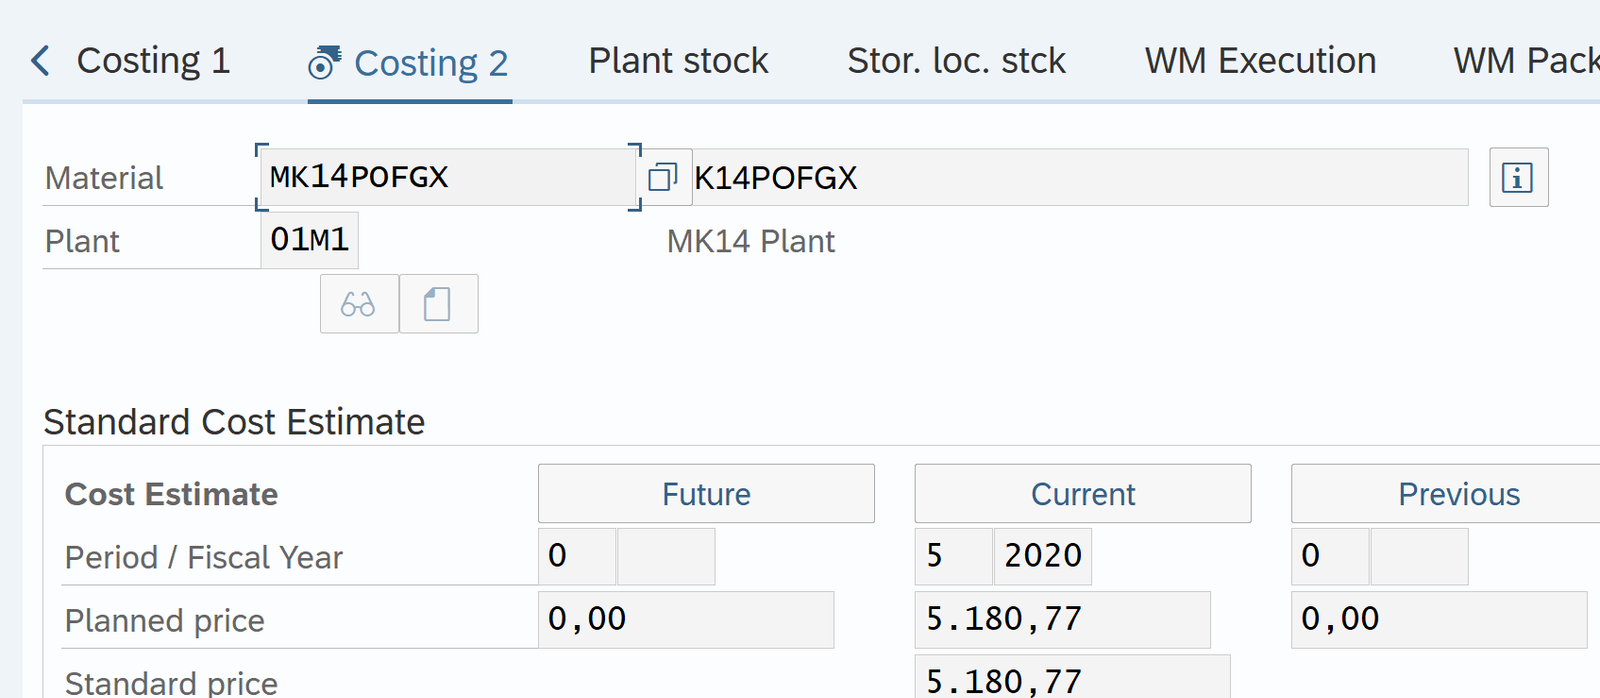
MarkStandard cost updated as future price in costing tab 2
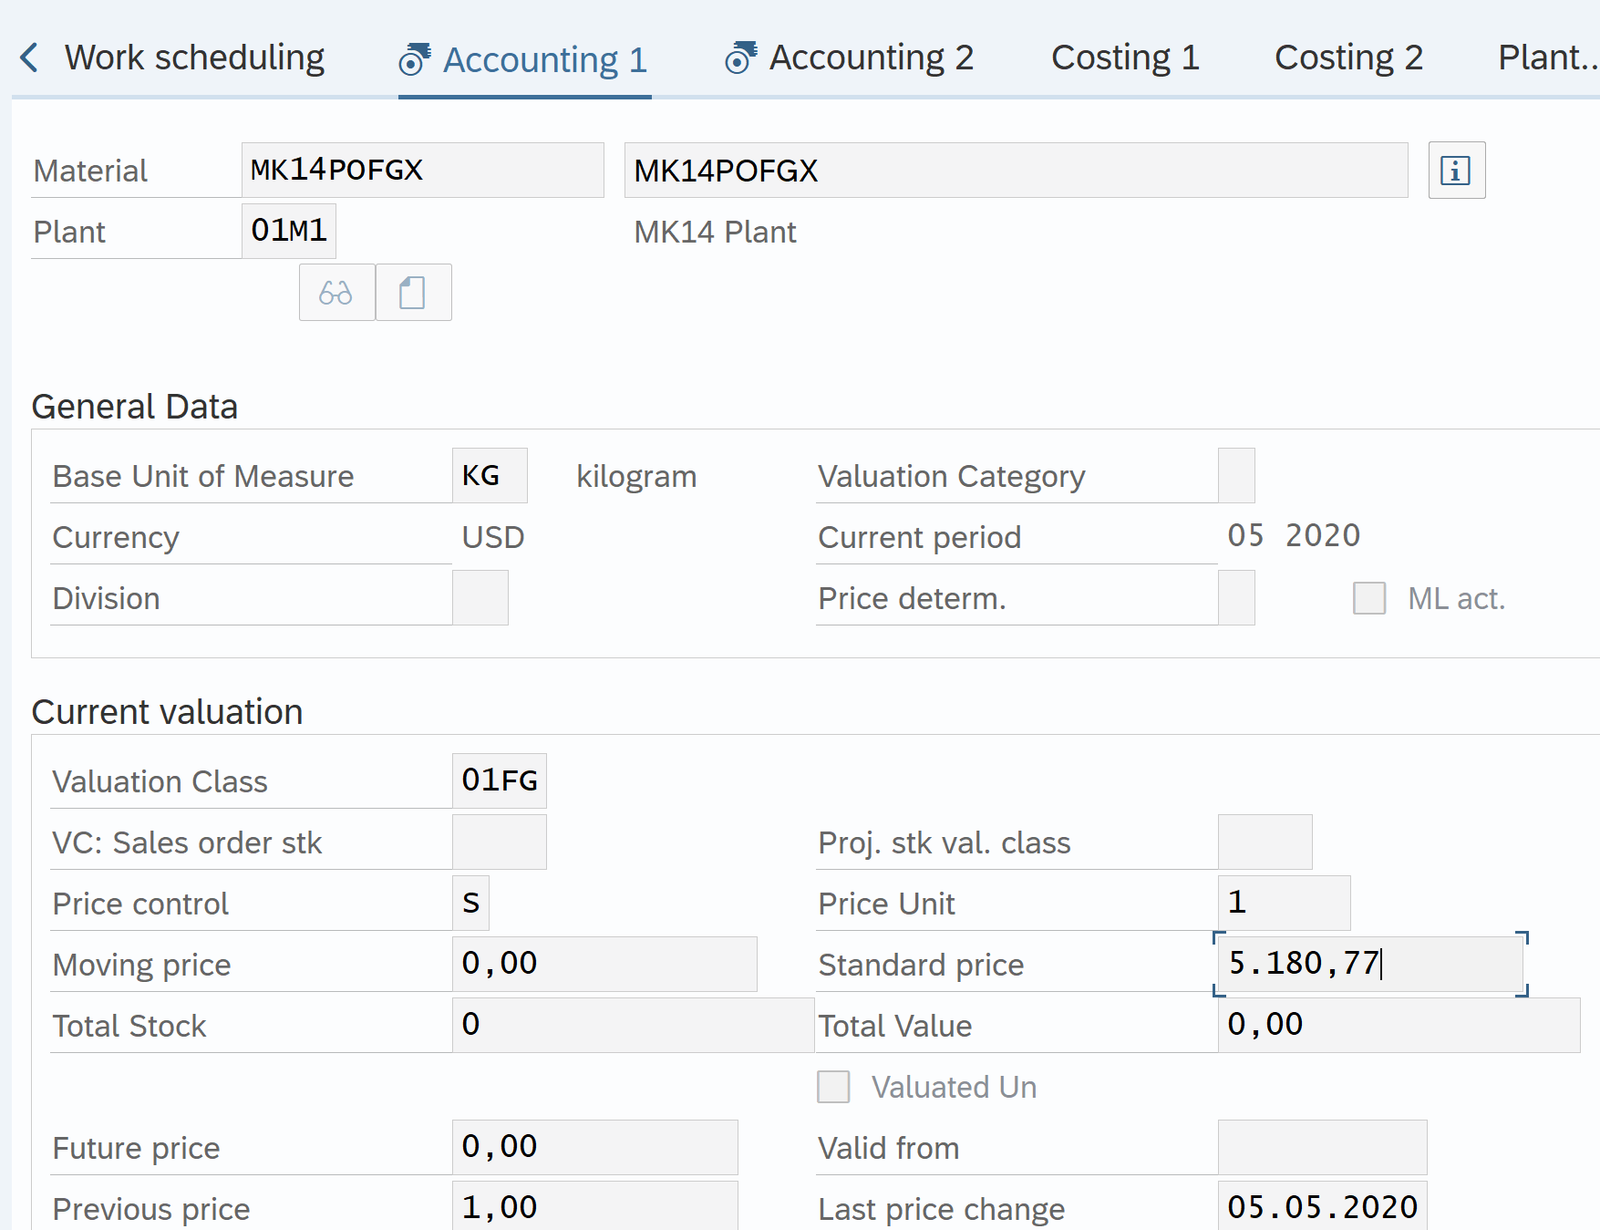
ReleaseFuture price now becomes current price in costing tab 2
Standard cost updated as standard cost in accounting tab 1 in MM02

May have to close MM period in MMPV

Display Standard cost with cost component structure

Transaction Code: CK13N

Standard Cost Report: S_P99_41000111

Standard Cost Report: S_P99_41000111

Product Costing Tables

s.no.TablesDescription
1KEKOProduct Costing – Header Data
2CKISItems Unit Costing/Itemization Product Costing

Product Costing – Actual Cost

We have calculated standard / estimated cost of FG. Now we will create a Production Order and calculate actual cost of FG. Difference between actual cost and Standard / estimated cost will be the variance

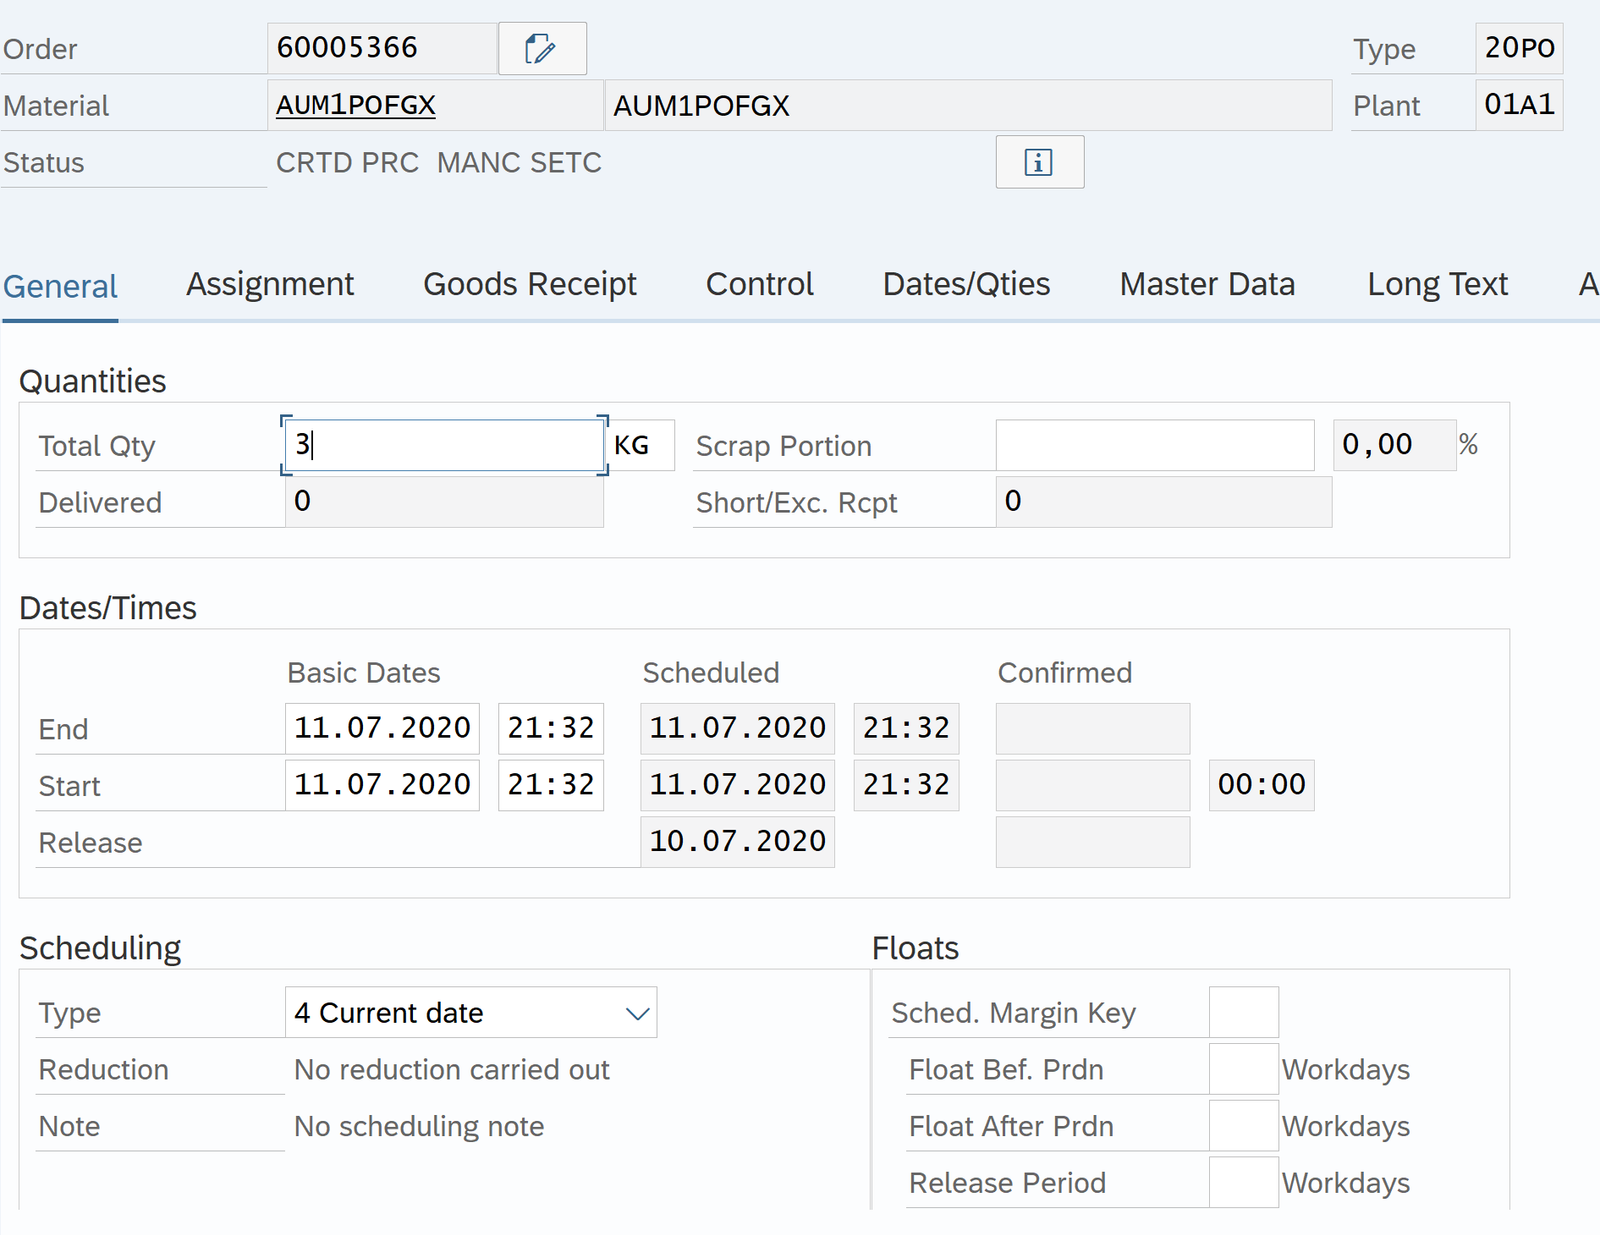
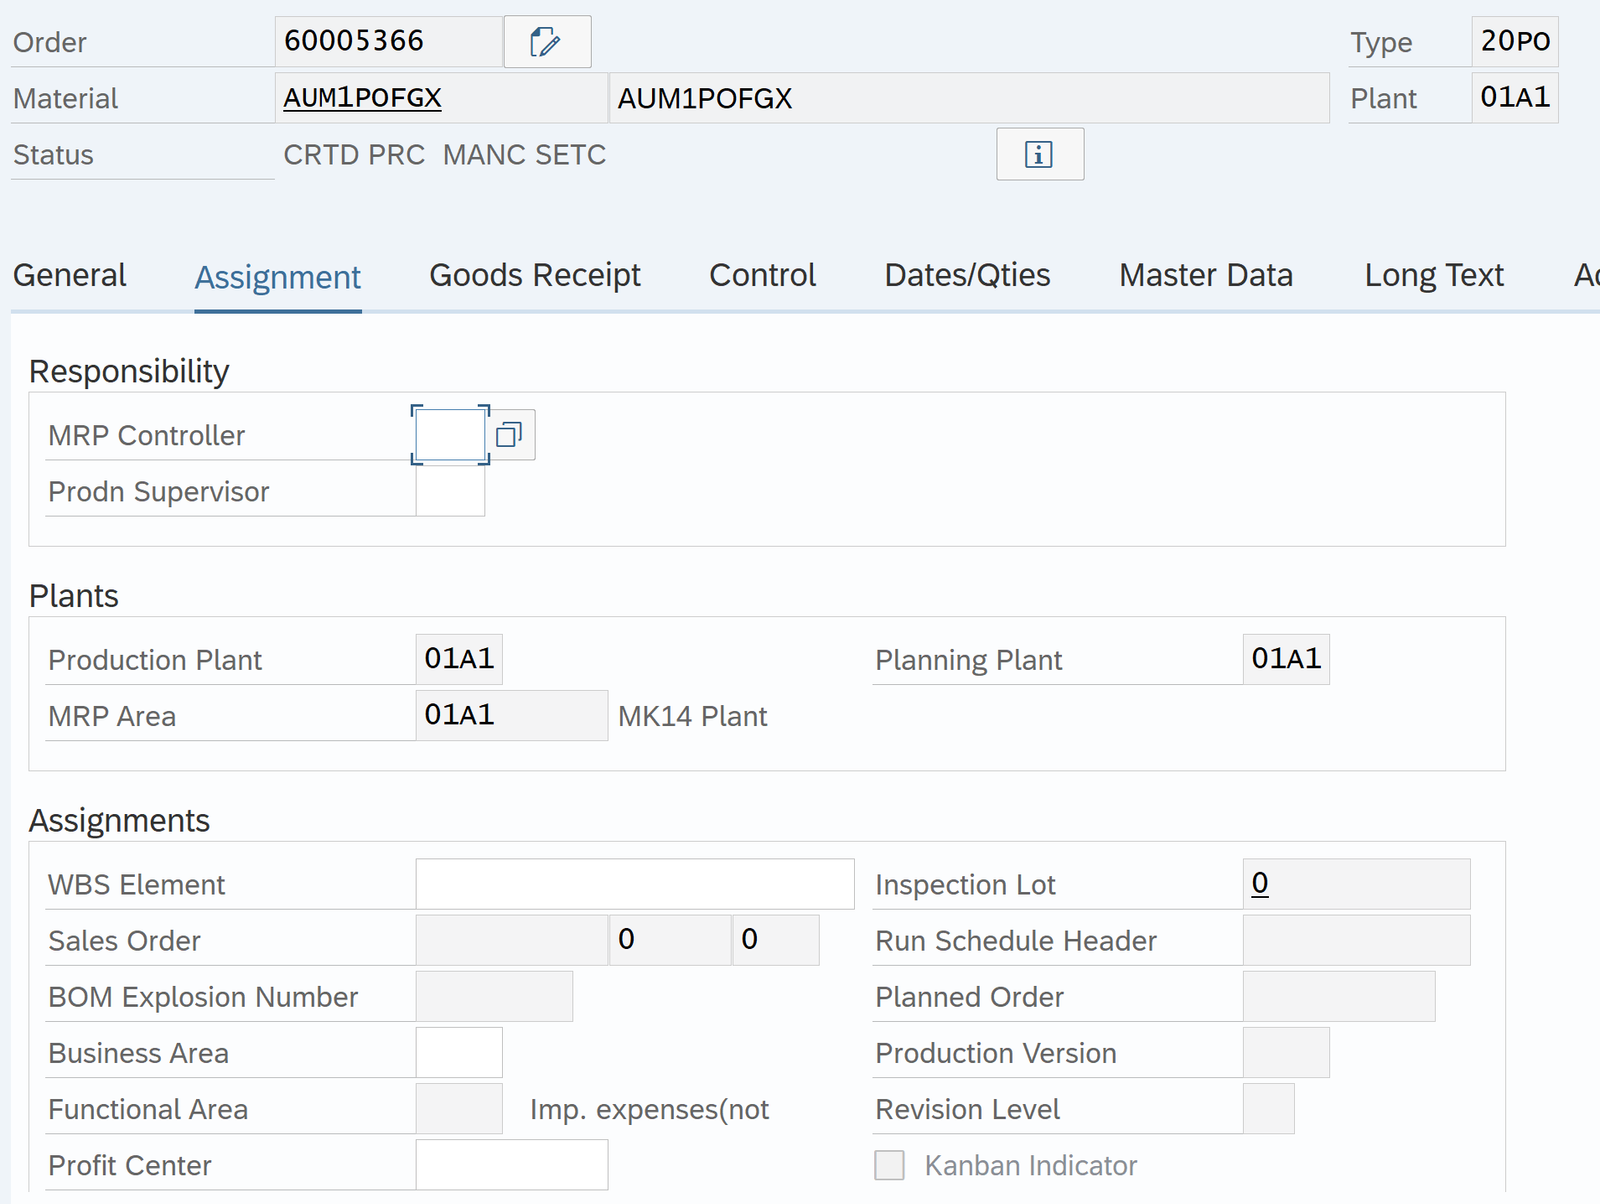
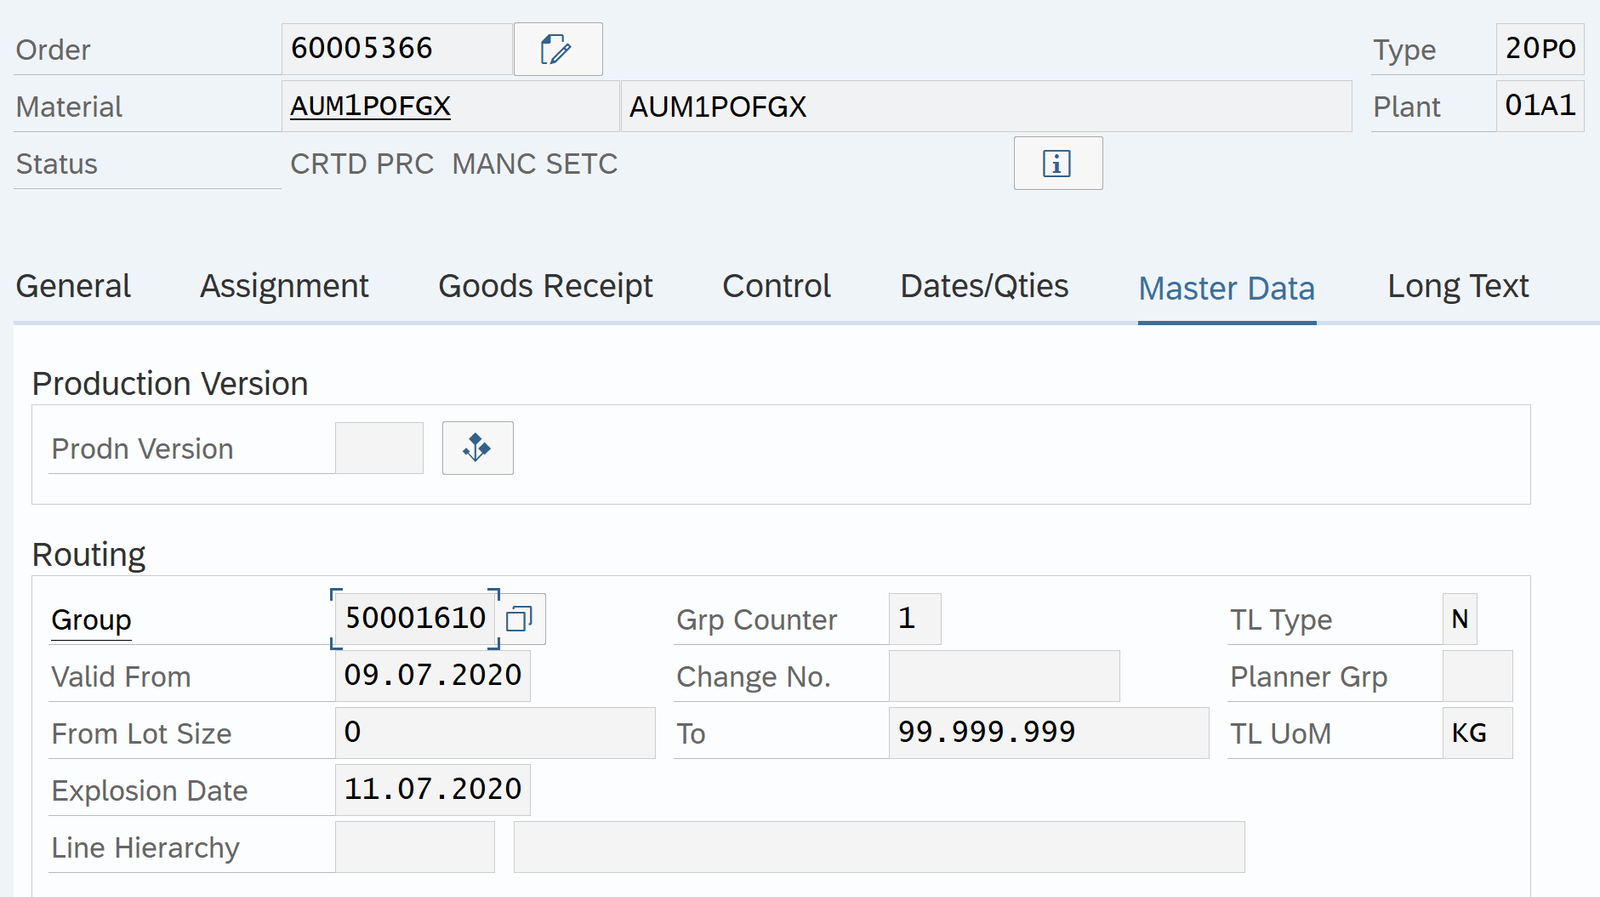
Create Production Order: CO01

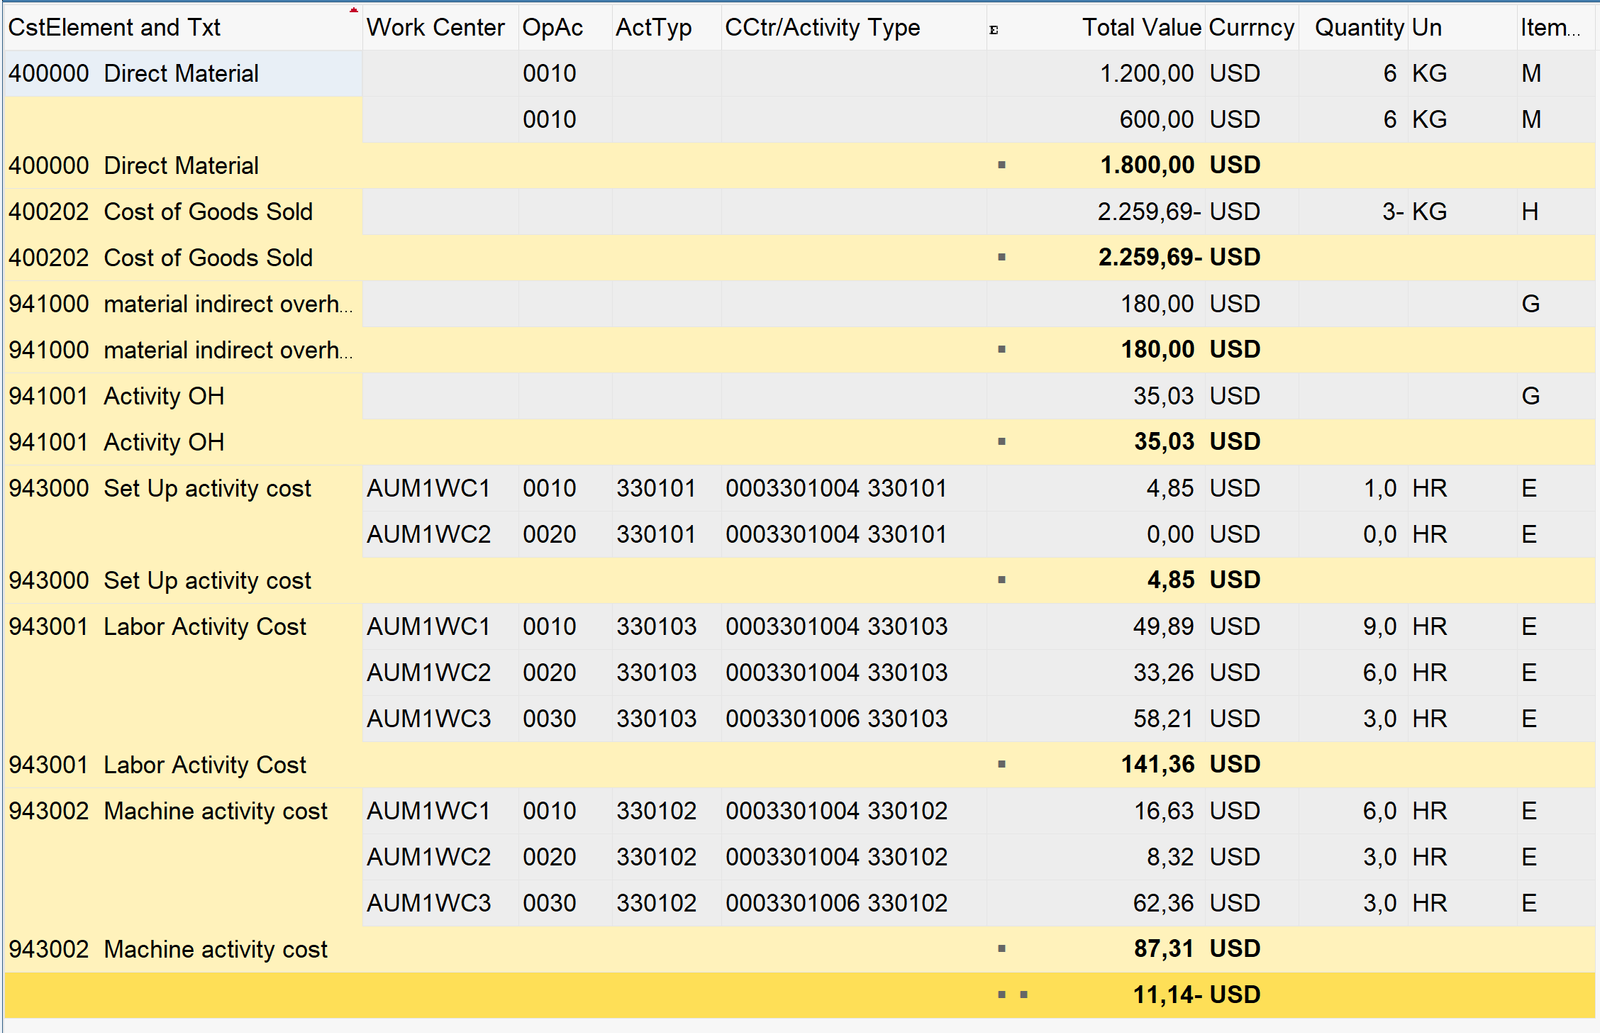
Now click Cost Order button. This will calculate the Planned cost of the Production Order. Standard cost is always for 1 unit. Planned cost is for the total production order unit (3 kg in this case). Thus, FC per unit differ between standard cost and planned cost

Click Goto – Cost – Itemization to view the planned cost

Planned cost Material = 2 Kg (BOM) * 3 Kg (Prod Order) = 1800

Planned cost Material OH = 10% OF 1800 (Costing Sheet) = 180

Planned cost activity OH = 15% of total activity cost (268) = 35

COGM / COGS = 3 (Prod Order Qty) * Standard Cost (753.23) = 2259

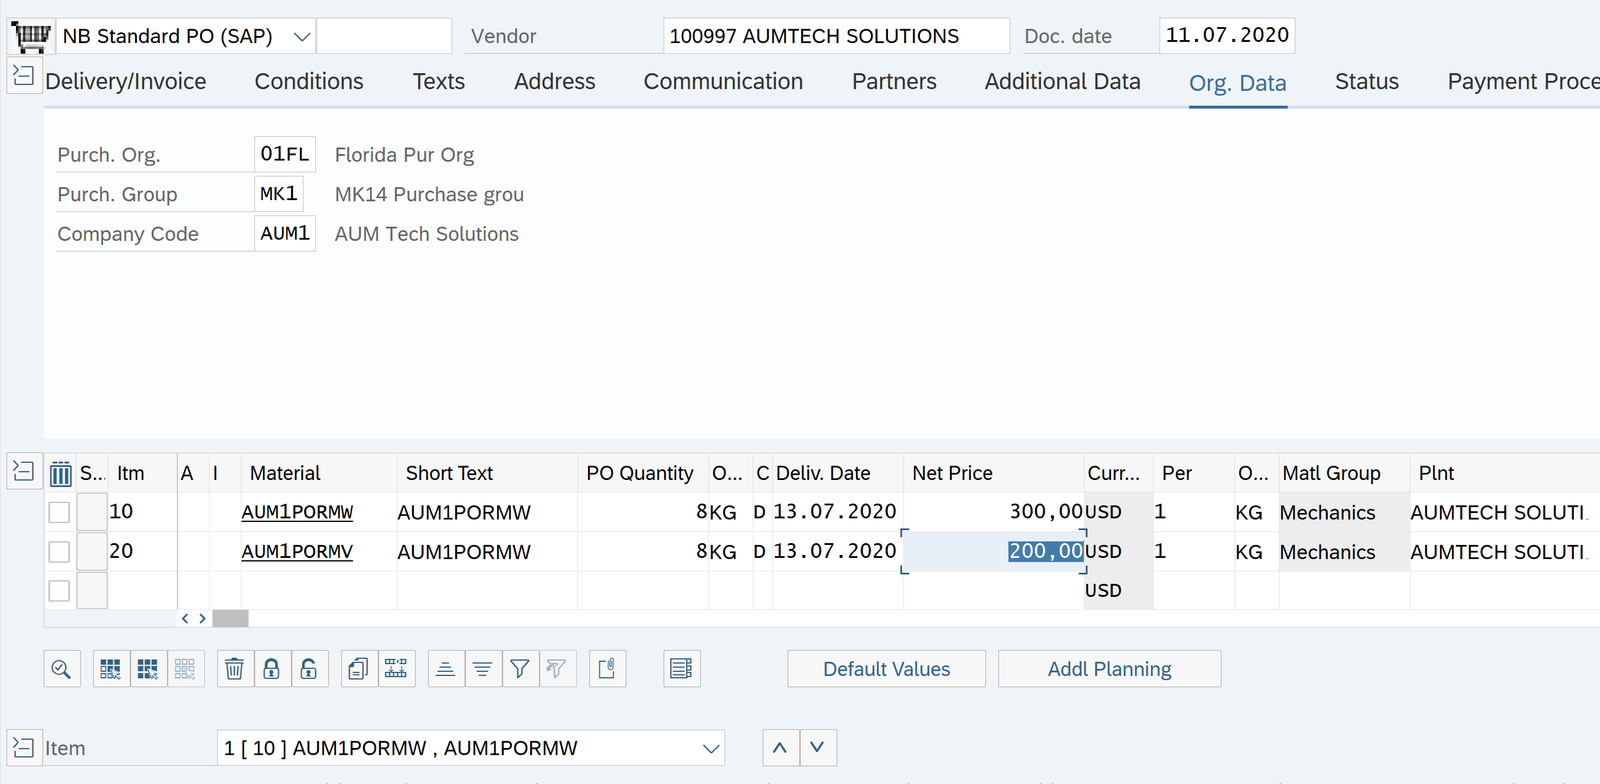
Create Purchase Order for Raw Material: ME21N

Standard PO (SAP) created under the number 4500043447

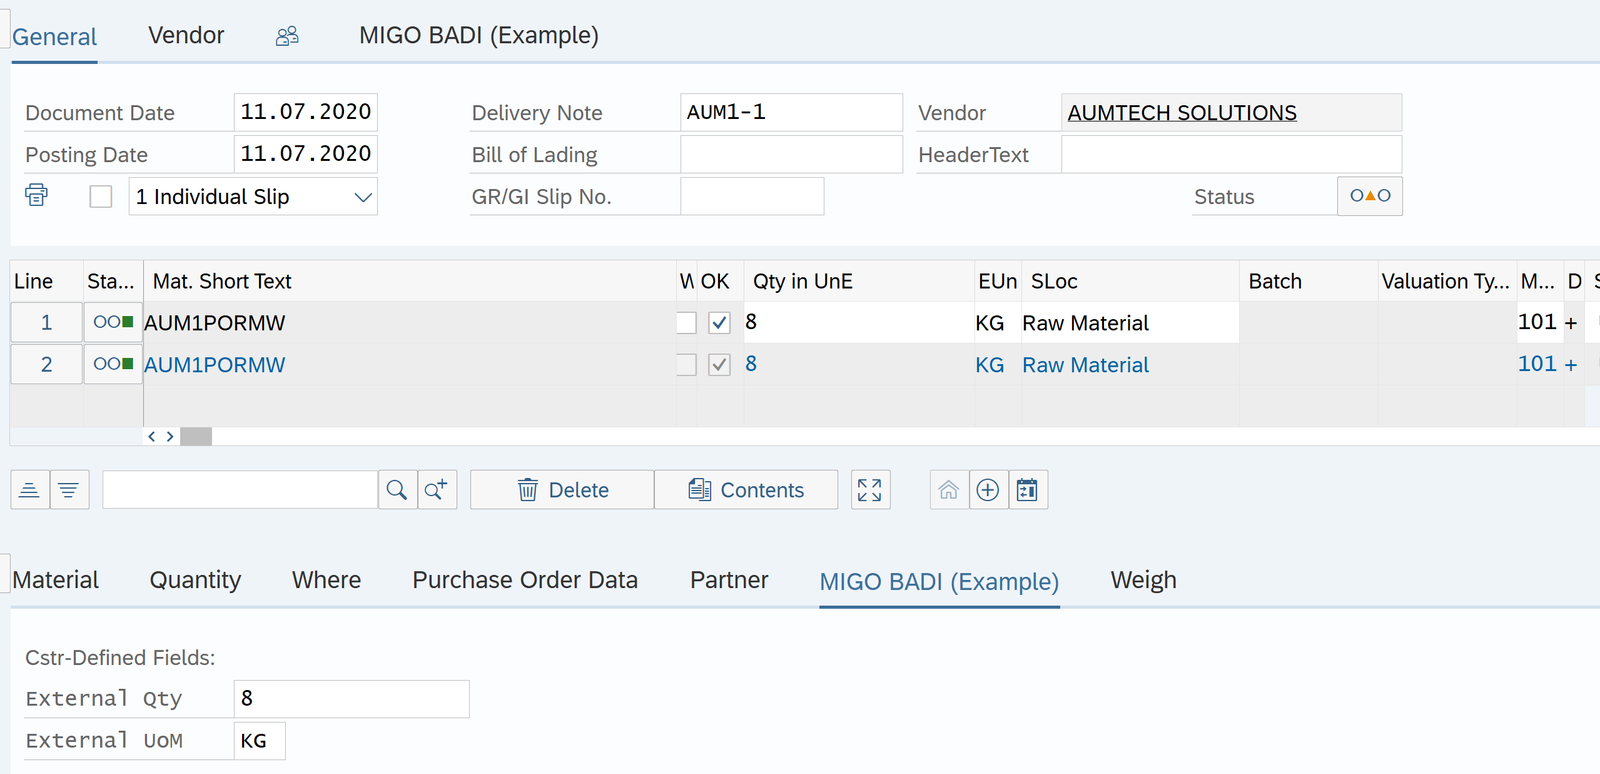
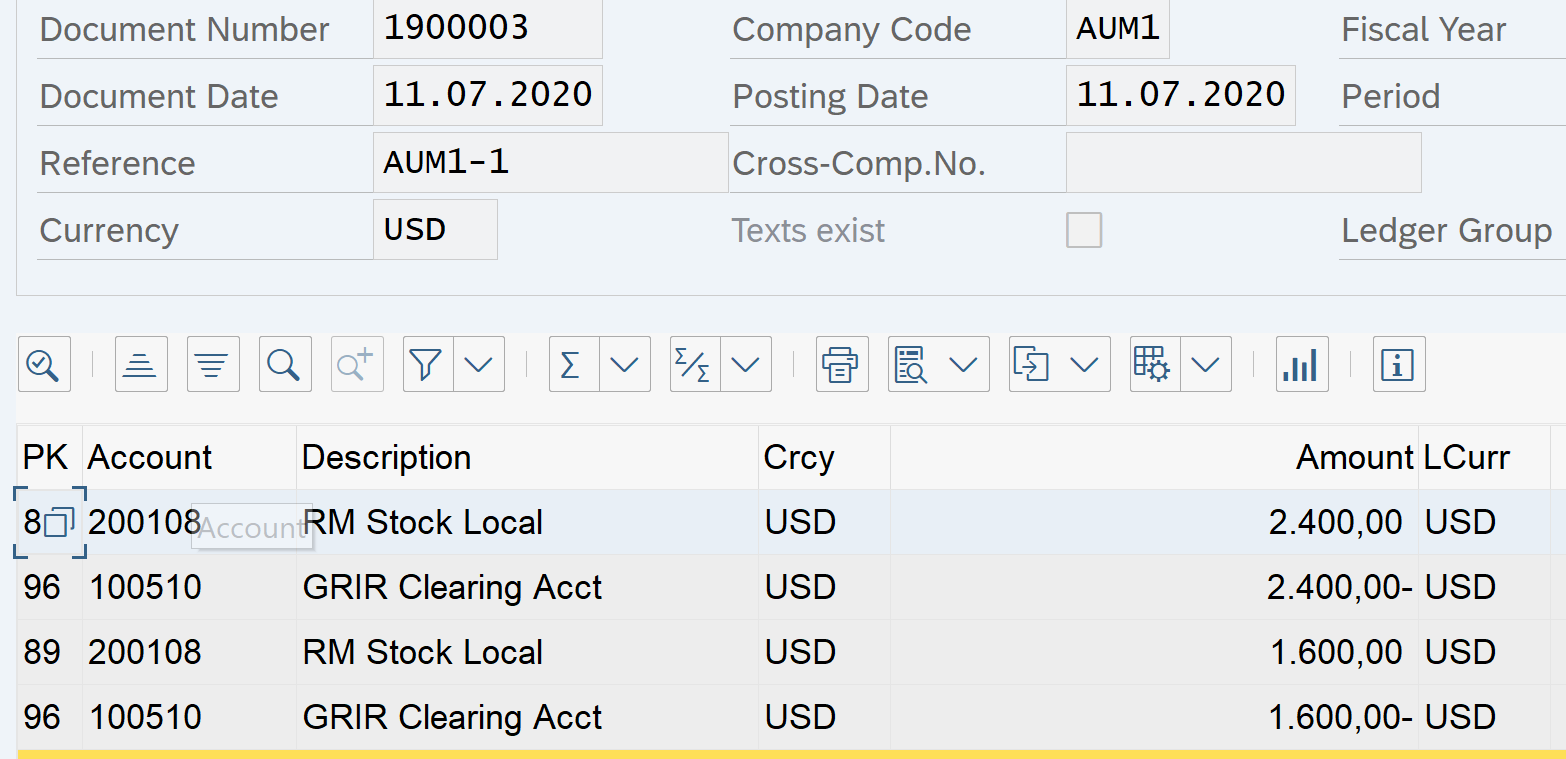
Raw Material Receipt from Vendor: MIGO

MIGO – Display

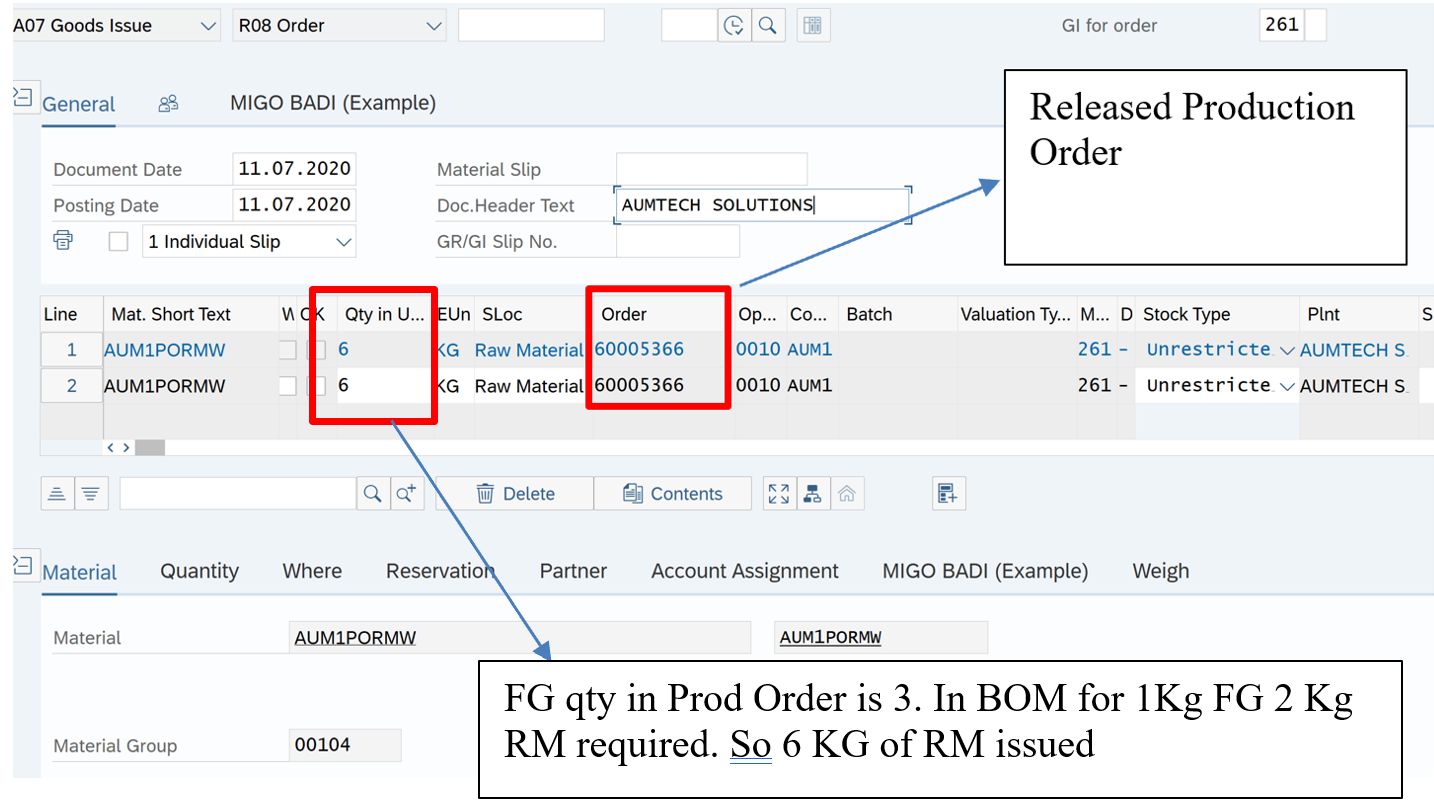
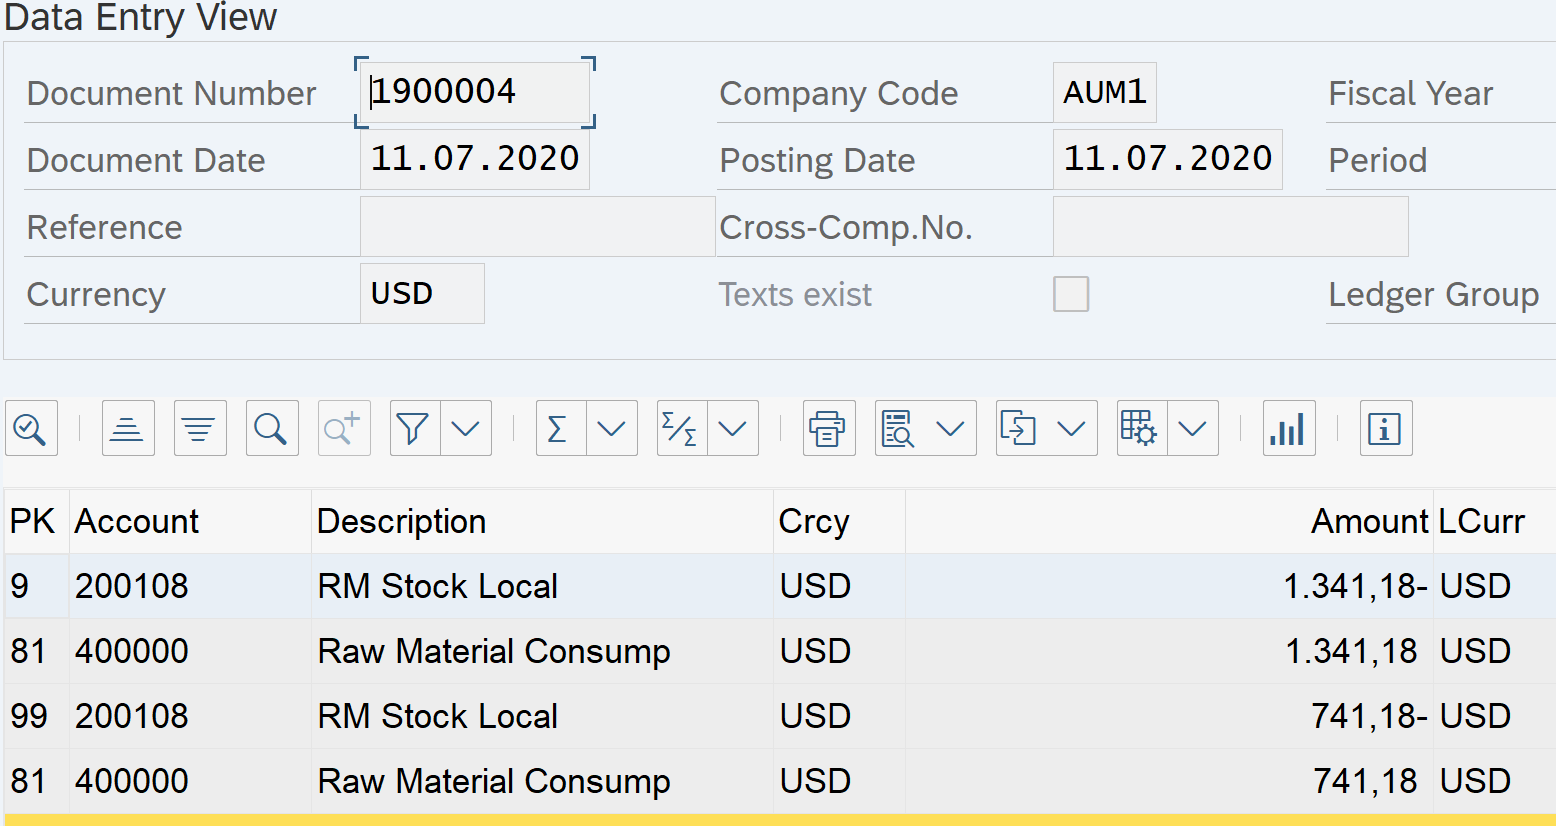
Issue Raw Material to Production Order: MIGO

Raw Material Issued to Production at Moving average price. Check in MM03

Moving average Price MM03

Go to Operations and confirm actual hours spent on converting Raw Material to FG: CO11N

  • Display Standard cost estimate: CK13N
  • We have calculated Standard cost / Estimated cost of the finished product. Now we will manufacture finished good and calculate its actual cost. Then find variances between standard cost and actual cost

Steps to manufacture finished goods, find actual cost and month end product costing activities

  1. Create Production Order to manufacture FG: CO01
  2. When Production is saved Planned cost of FG is calculated in the production order. Now standard cost is always for 1 kg of material. Planned cost is for the total Production order material which can be 2 kg or more. There is difference between Standard cost and Planned cost due to fixed cost being same in both

SAP Product Costing-2 Read More »

error: Content is protected !!